Discovering that a baby is unresponsive is one of the most frightening experiences any parent, caregiver, or childcare professional can face. Knowing how to perform infant CPR can mean the difference between life and death during the critical minutes before emergency medical services arrive.
Need hands-on training? CPR1 offers certified infant CPR classes nationwide. Call 855.888.2771 to enroll today.
Infant CPR differs significantly from adult CPR. Babies under 12 months old have smaller airways, more delicate bones, and different body proportions that require modified techniques. This guide walks you through each infant CPR step so you understand the correct hand placement, compression depth, rescue breath technique, and the ratio of compressions to breaths recommended by leading medical authorities.
Quick Summary: The infant CPR steps are: (1) check responsiveness by tapping the foot, (2) call 911 or perform 2 minutes of CPR first if alone, (3) position the baby on a firm surface, (4) open the airway with a slight head tilt, (5) check for breathing, (6) give 30 chest compressions with two fingers at 1.5 inches deep, (7) deliver 2 gentle rescue breaths covering the mouth and nose, and (8) repeat until help arrives. The compression rate is 100 to 120 per minute, and the single-rescuer ratio is 30:2.
- Infant CPR uses two fingers, not the heel of the hand
- Compress 1.5 inches deep at 100-120 compressions per minute
- Cover the baby’s mouth and nose together for rescue breaths
- If alone, give 2 minutes of CPR before calling 911
- Two-rescuer ratio changes to 15 compressions to 2 breaths
Important: This guide is an educational reference, not a substitute for hands-on CPR training. Reading about these infant CPR steps builds awareness, but practicing on a manikin with a certified instructor builds the muscle memory needed to act confidently in a real emergency. CPR1 offers pediatric CPR and first aid classes taught by certified instructors with real-world EMS and healthcare experience nationwide.
When Should You Perform Infant CPR?
Before starting chest compressions, you need to recognize the signs that an infant requires CPR. Perform infant CPR when a baby:
- Is unresponsive and does not react when you tap the bottom of their foot or call their name
- Is not breathing normally or is only gasping (occasional, irregular breaths that do not sustain life)
- Has no pulse or you cannot detect a pulse within 10 seconds
Common situations where infant CPR may be needed include:
- Choking that progresses to unresponsiveness
- Drowning or submersion incidents
- Suffocation from soft bedding, plastic, or positional asphyxia
- Sudden Infant Death Syndrome (SIDS) events
- Severe allergic reactions causing airway closure
- Trauma from falls or accidents
If the baby is crying, coughing forcefully, or moving, CPR is not needed. Focus on keeping the infant calm and calling 911 if you suspect a medical issue. For a deeper look at when CPR is and is not appropriate, read our guide on when to perform CPR.
Infant CPR vs. Adult CPR: Key Differences
Understanding how infant CPR differs from adult CPR is essential for performing the technique safely and effectively. Using adult-level force on a baby can cause injury, while using too little force will not circulate blood adequately.
| Factor | Infant (Under 12 Months) | Adult |
|---|---|---|
| Hand placement | Two fingers on the center of the chest, just below the nipple line | Heel of one hand over the other on the center of the chest |
| Compression depth | About 1.5 inches (approximately one-third the depth of the chest) | At least 2 inches |
| Compression rate | 100 to 120 compressions per minute | 100 to 120 compressions per minute |
| Compression-to-breath ratio (single rescuer) | 30 compressions to 2 breaths | 30 compressions to 2 breaths |
| Compression-to-breath ratio (two rescuers) | 15 compressions to 2 breaths | 30 compressions to 2 breaths |
| Rescue breaths | Cover mouth and nose with your mouth; gentle puffs | Pinch nose, seal mouth; standard breaths |
| Airway positioning | Neutral or slight sniffing position; do not over-extend the neck | Head-tilt, chin-lift with moderate extension |
The two-rescuer infant CPR ratio of 15:2 is a critical distinction. When a second trained rescuer is available, switching to 15 compressions and 2 breaths increases ventilation frequency, which is especially important for infants because respiratory failure is the most common cause of cardiac arrest in this age group.
For more on different levels of CPR training and which certification covers infant techniques, visit our training guide.
Step-by-Step Infant CPR Instructions
These are the infant CPR steps to follow if you find a baby who is unresponsive and not breathing normally. Stay calm, act quickly, and focus on high-quality compressions and gentle rescue breaths.
Step 1: Check for Responsiveness
Tap the bottom of the infant’s foot firmly and call their name or shout loudly. Never shake a baby to check responsiveness, as this can cause brain injury.
- If the infant responds (cries, moves, or opens their eyes), do not perform CPR. Call 911 if you suspect a medical emergency and monitor the baby closely.
- If the infant does not respond, immediately shout for help and move to Step 2.
Step 2: Call 911 and Get an AED
If someone else is nearby, direct them to call 911 and bring an AED (automated external defibrillator) while you begin CPR. Be specific: point at a person and say, “You, call 911 and get the AED.”
If you are alone with the infant:
- Perform 2 minutes of CPR first (about 5 cycles of 30 compressions and 2 breaths) before calling 911. Infants most often experience cardiac arrest due to breathing problems, so providing immediate CPR can be lifesaving.
- After 2 minutes, call 911 on speakerphone and continue CPR while waiting for help.
Step 3: Position the Infant
Place the infant face-up on a firm, flat surface such as a table, floor, or the ground. Remove any blankets or soft surfaces from underneath the baby.
- Support the infant’s head and neck as you position them.
- Remove or open any clothing covering the chest to allow proper hand placement.
Step 4: Open the Airway
Place one hand on the infant’s forehead and gently tilt the head back to a neutral or slight sniffing position. Use one or two fingers of your other hand to lift the chin.
Critical tip: Do not tilt the head back too far. Over-extending an infant’s neck can actually close the airway instead of opening it. The goal is a slight tilt, just enough to move the tongue away from the back of the throat.
Step 5: Check for Breathing
Look, listen, and feel for normal breathing for no more than 10 seconds:
- Look at the chest for rise and fall
- Listen for breath sounds near the mouth and nose
- Feel for air on your cheek
If the infant is not breathing or is only gasping, begin CPR immediately. Gasping is not effective breathing and should be treated the same as no breathing.
Step 6: Perform Chest Compressions
Place two fingers (index and middle finger) on the center of the infant’s chest, just below the nipple line on the breastbone (sternum).
- Press straight down about 1.5 inches (approximately one-third the depth of the chest)
- Allow the chest to fully recoil between each compression; do not lean on the chest
- Deliver compressions at a rate of 100 to 120 per minute
- Complete 30 compressions before giving rescue breaths
Rhythm tip: The beat of the song “Stayin’ Alive” by the Bee Gees matches the recommended compression rate of 100 to 120 beats per minute.
Two-rescuer technique: If a second trained rescuer is available, use the two-thumb encircling technique. Place both thumbs side by side on the lower half of the breastbone, with your fingers encircling the infant’s chest and supporting the back. This method generates better compression force and is preferred in a two-rescuer scenario, with a ratio of 15 compressions to 2 breaths.
Step 7: Give Rescue Breaths
After 30 compressions (or 15 if two rescuers), deliver 2 rescue breaths:
- Maintain the head-tilt, chin-lift to keep the airway open
- Cover the infant’s mouth and nose with your mouth, creating a complete seal
- Give a gentle puff of air, just enough to make the chest visibly rise
- Each breath should take about 1 second
- Watch for the chest to rise, then let it fall before giving the second breath
If the chest does not rise, reposition the head (re-tilt gently) and try again. If air still will not go in, suspect a foreign body airway obstruction and follow infant choking procedures.
For more background on rescue breathing technique and when mouth-to-mouth is indicated, see our detailed guide.
Step 8: Continue the Cycle
Repeat the cycle of compressions and breaths:
- Single rescuer: 30 compressions, then 2 breaths
- Two rescuers: 15 compressions, then 2 breaths
Continue CPR until:
- The infant shows signs of life (begins breathing, crying, or moving)
- Emergency medical services arrive and take over
- An AED becomes available and is ready to analyze
- You are physically unable to continue (if alone, this is when another bystander should take over)
Minimize interruptions. Pauses in chest compressions reduce blood flow to the brain and heart. Switch quickly between compressions and breaths, and if two rescuers are present, trade roles every 2 minutes to prevent fatigue.
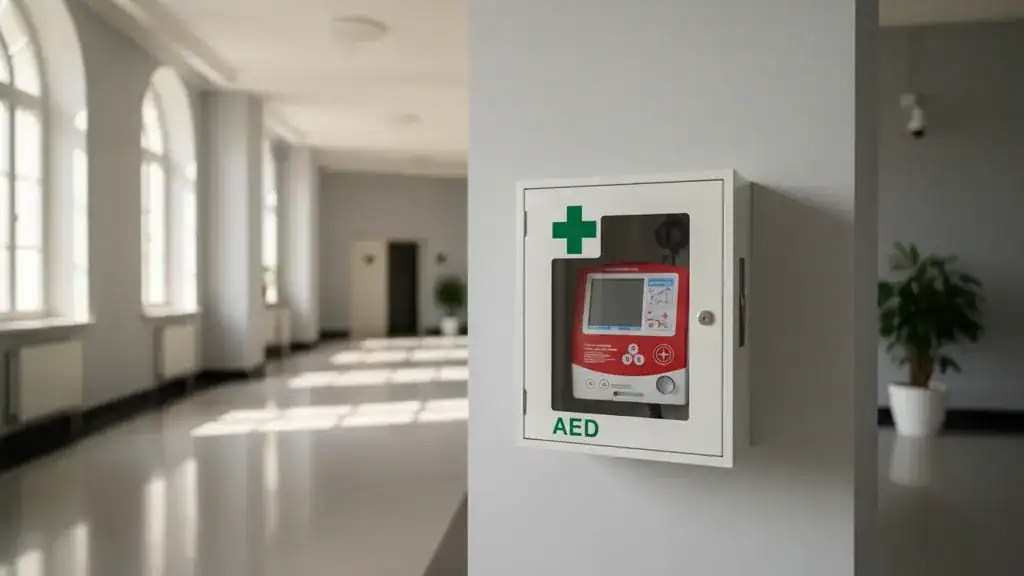
Using an AED on an Infant
If an AED is available, use it as soon as possible. AEDs are safe and effective for infants when used correctly.
- Turn on the AED and follow the voice prompts
- Use pediatric pads if available. Place one pad on the center of the chest and the other on the center of the back (front-to-back placement)
- If only adult pads are available, you can still use them. Ensure the pads do not touch or overlap. Front-to-back placement is usually necessary for infants because of their small chest size
- Do not touch the infant while the AED analyzes the heart rhythm
- If a shock is advised, ensure no one is touching the infant, then press the shock button
- Resume CPR immediately after the shock is delivered, starting with chest compressions
Most pediatric cardiac arrests in infants involve non-shockable rhythms, meaning the AED may advise “no shock.” Even when no shock is delivered, continue high-quality CPR. The compressions and breaths are what keep oxygenated blood flowing to the brain.
Common Infant CPR Mistakes to Avoid
Even well-intentioned rescuers can make errors that reduce the effectiveness of CPR. Be aware of these common mistakes:
- Compressing too deep or too shallow. Aim for about 1.5 inches. Too shallow does not circulate blood; too deep can injure the infant’s ribs or internal organs.
- Not allowing full chest recoil. Leaning on the chest between compressions prevents the heart from refilling with blood.
- Over-extending the neck. Tilting the head back too far kinks the airway in infants. Use a neutral to slight sniffing position only.
- Blowing too hard during rescue breaths. Infants need gentle puffs of air, not full breaths. Forcing too much air can cause stomach distension or lung injury.
- Interrupting compressions for too long. Keep pauses to fewer than 10 seconds. Each second without compressions reduces the chance of survival.
- Delaying CPR to call 911 first when alone. For infants, perform 2 minutes of CPR before calling because respiratory causes are most common.
- Forgetting the two-rescuer ratio change. With two rescuers, switch to 15:2 instead of 30:2 to optimize ventilation.
What to Do After Performing Infant CPR
Once emergency medical services arrive, provide them with as much information as possible:
- How long the infant was unresponsive before CPR began
- What you observed (choking, not breathing, found in crib, etc.)
- How many minutes of CPR you performed
- Whether the AED delivered any shocks
- Any known medical conditions or allergies
Even if the infant regains consciousness before EMS arrives, the baby still needs immediate medical evaluation. Cardiac arrest can cause complications that are not immediately visible, and the underlying cause must be identified and treated.
Why Hands-On Infant CPR Training Matters
Reading this guide gives you the knowledge to understand each of the infant CPR steps, but practicing on a training manikin with a certified instructor is what builds the confidence and muscle memory to act in a real emergency. Studies show that hands-on CPR training significantly improves bystander response rates and outcomes for cardiac arrest victims.
CPR1 offers infant and child CPR classes taught by certified instructors with backgrounds in fire, EMS, and healthcare. Our courses cover infant CPR, child CPR, adult CPR, AED use, and choking response in a single, comprehensive session.
Whether you are a parent, grandparent, babysitter, daycare provider, or school employee, getting certified gives you the skills to protect the children in your care. CPR1’s instructors are available nationwide, delivering onsite training at your workplace, school, or community center.
Ready to get certified? Call CPR1 at 855.888.2771 or visit cpr1.com to find an infant CPR class near you.
Frequently Asked Questions About Infant CPR
What is the correct compression-to-breath ratio for single-rescuer infant CPR?
For a single rescuer performing infant CPR, the correct ratio is 30 chest compressions followed by 2 rescue breaths. This cycle repeats continuously until help arrives or the infant shows signs of life. When two trained rescuers are present, the ratio changes to 15 compressions and 2 breaths.
How deep should chest compressions be for an infant?
Infant chest compressions should be approximately 1.5 inches deep, which is about one-third the depth of the infant’s chest. Use two fingers placed on the center of the chest, just below the nipple line. Allow the chest to fully recoil between each compression.
Can you use an AED on a baby?
Yes. AEDs are safe for use on infants. Use pediatric pads and place them front-to-back (one on the chest, one on the back). If pediatric pads are not available, adult pads can be used as long as they do not touch or overlap each other.
Why do you perform 2 minutes of CPR before calling 911 when alone with an infant?
Infant cardiac arrest is most commonly caused by respiratory failure rather than a heart rhythm problem. Providing 2 minutes of CPR (about 5 cycles) before calling 911 delivers critical oxygen to the brain and heart during the window when it matters most. If another person is present, they should call 911 immediately while you begin CPR.
What is the two-thumb encircling technique for infant CPR?
The two-thumb encircling technique is the preferred method when two rescuers are performing infant CPR. Both thumbs are placed side by side on the lower half of the breastbone, while the remaining fingers wrap around and support the infant’s back. This technique provides more consistent compression depth and force compared to the two-finger method.
At what age does a child transition from infant CPR to child CPR?
Infant CPR guidelines apply to babies from birth to 12 months of age. After 12 months, child CPR techniques are used, which involve using the heel of one hand for compressions instead of two fingers. The compression depth also increases to about 2 inches for children. For a complete overview, visit our BLS study guide.
tton
Most pediatric cardiac arrests in infants involve non-shockable rhythms, meaning the AED may advise “no shock.” Even when no shock is delivered, continue high-quality CPR. The compressions and breaths are what keep oxygenated blood flowing to the brain.
Common Infant CPR Mistakes to Avoid
Even well-intentioned rescuers can make errors that reduce the effectiveness of CPR. Be aware of these common mistakes:
- Compressing too deep or too shallow. Aim for about 1.5 inches. Too shallow does not circulate blood; too deep can injure the infant’s ribs or internal organs.
- Not allowing full chest recoil. Leaning on the chest between compressions prevents the heart from refilling with blood.
- Over-extending the neck. Tilting the head back too far kinks the airway in infants. Use a neutral to slight sniffing position only.
- Blowing too hard during rescue breaths. Infants need gentle puffs of air, not full breaths. Forcing too much air can cause stomach distension or lung injury.
- Interrupting compressions for too long. Keep pauses to fewer than 10 seconds. Each second without compressions reduces the chance of survival.
- Delaying CPR to call 911 first when alone. For infants, perform 2 minutes of CPR before calling because respiratory causes are most common.
- Forgetting the two-rescuer ratio change. With two rescuers, switch to 15:2 instead of 30:2 to optimize ventilation.
What to Do After Performing Infant CPR
Once emergency medical services arrive, provide them with as much information as possible:
- How long the infant was unresponsive before CPR began
- What you observed (choking, not breathing, found in crib, etc.)
- How many minutes of CPR you performed
- Whether the AED delivered any shocks
- Any known medical conditions or allergies
Even if the infant regains consciousness before EMS arrives, the baby still needs immediate medical evaluation. Cardiac arrest can cause complications that are not immediately visible, and the underlying cause must be identified and treated.
Why Hands-On Infant CPR Training Matters
Reading this guide gives you the knowledge to understand each of the infant CPR steps, but practicing on a training manikin with a certified instructor is what builds the confidence and muscle memory to act in a real emergency. Studies show that hands-on CPR training significantly improves bystander response rates and outcomes for cardiac arrest victims.
CPR1 offers infant and child CPR classes taught by certified instructors with backgrounds in fire, EMS, and healthcare. Our courses cover infant CPR, child CPR, adult CPR, AED use, and choking response in a single, comprehensive session.
Whether you are a parent, grandparent, babysitter, daycare provider, or school employee, getting certified gives you the skills to protect the children in your care. CPR1’s instructors are available nationwide, delivering onsite training at your workplace, school, or community center.
Ready to get certified? Call CPR1 at 855.888.2771 or visit cpr1.com to find an infant CPR class near you.
Frequently Asked Questions About Infant CPR
What is the correct compression-to-breath ratio for single-rescuer infant CPR?
For a single rescuer performing infant CPR, the correct ratio is 30 chest compressions followed by 2 rescue breaths. This cycle repeats continuously until help arrives or the infant shows signs of life. When two trained rescuers are present, the ratio changes to 15 compressions and 2 breaths.
How deep should chest compressions be for an infant?
Infant chest compressions should be approximately 1.5 inches deep, which is about one-third the depth of the infant’s chest. Use two fingers placed on the center of the chest, just below the nipple line. Allow the chest to fully recoil between each compression.
Can you use an AED on a baby?
Yes. AEDs are safe for use on infants. Use pediatric pads and place them front-to-back (one on the chest, one on the back). If pediatric pads are not available, adult pads can be used as long as they do not touch or overlap each other.
Why do you perform 2 minutes of CPR before calling 911 when alone with an infant?
Infant cardiac arrest is most commonly caused by respiratory failure rather than a heart rhythm problem. Providing 2 minutes of CPR (about 5 cycles) before calling 911 delivers critical oxygen to the brain and heart during the window when it matters most. If another person is present, they should call 911 immediately while you begin CPR.
What is the two-thumb encircling technique for infant CPR?
The two-thumb encircling technique is the preferred method when two rescuers are performing infant CPR. Both thumbs are placed side by side on the lower half of the breastbone, while the remaining fingers wrap around and support the infant’s back. This technique provides more consistent compression depth and force compared to the two-finger method.
At what age does a child transition from infant CPR to child CPR?
Infant CPR guidelines apply to babies from birth to 12 months of age. After 12 months, child CPR techniques are used, which involve using the heel of one hand for compressions instead of two fingers. The compression depth also increases to about 2 inches for children. For a complete overview, visit our BLS study guide.
Disclaimer for information purposes only:
The information provided on this website is intended for general educational and informational purposes only. It is not medical advice and should not be used as a substitute for professional diagnosis, treatment, or care. Always consult a qualified healthcare or medical professional regarding any health-related questions or concerns.
While we strive to ensure the information shared is accurate and up to date, no guarantees are made regarding completeness, accuracy, or applicability to any individual situation. Use of this content is at the reader’s sole discretion and risk.
This website is part of the Response Ready family of emergency preparedness and training resources, including CPR & first aid training and compliance services, AED sales and program support, AED program management software, and medical oversight solutions provided through our affiliated platforms:
• AEDLeader.com
• ResponseReady.com
• AEDTotalSolution.com
• MDSIMedical.com
By accessing or using this website, you agree to release, indemnify, and hold harmless the website owners, authors, contributors, and affiliated entities from any claims, losses, damages, or liabilities arising from the use or reliance on the information presented.

Anastasios Giannikas
Anastasios Giannikas
Save Lives with the Right AED Today
Buy Trusted AEDs from AED Leader Today!
Get Certified in CPR and Make a Difference!