
When someone is severely bleeding, you have about five minutes. That’s it. Five minutes until they can bleed to death—often before an ambulance can even arrive. That critical gap is where a life can be lost, but it doesn’t have to be. The solution isn’t a faster ambulance; it’s you. It’s empowering the people already there to act. This is why it’s so important to get bleeding control training. Learning the right bleeding control methods gives you the skills to control severe bleeding and turn a preventable tragedy into a story of survival.
Key Takeaways
- You Can Control Severe Bleeding: Learn the three essential steps to save a life: applying direct pressure, packing a deep wound, and properly using a commercial tourniquet on an arm or leg.
- Build a Kit with Proven Gear: Don’t rely on makeshift items in an emergency. A proper bleeding control kit should contain professional-grade tools like a windlass-style tourniquet and hemostatic dressings to be truly effective.
- Turn Your Team into a Response Unit: Create a culture of safety by integrating regular training into your workplace, placing kits in visible locations, and practicing skills to build the confidence needed for a coordinated emergency response.
What is Stop the Bleed Training?
In any emergency, the first person on the scene is rarely a paramedic—it’s a bystander. While many know CPR, a different but equally critical skill is needed for trauma: hemorrhage control. Uncontrolled bleeding is a leading cause of preventable death from injury, and a person can bleed out in minutes. That’s where Stop the Bleed training comes in. It’s a national initiative designed to teach anyone the simple, life-saving steps to control bleeding until professional help arrives, transforming you from a bystander into an immediate responder.
What Exactly is ‘Stop the Bleed’?
At its core, Stop the Bleed is a national campaign that empowers everyday people to act in a bleeding emergency. Launched by the White House and the American College of Surgeons, its goal is to give bystanders the tools and knowledge to stop life-threatening bleeding. In the critical minutes before professional help arrives, someone on the scene needs to be prepared. This training provides hands-on practice with proven techniques, giving you the confidence to intervene effectively when it matters most.
The Origins of the Stop the Bleed Initiative
The Stop the Bleed program wasn’t developed in a boardroom; it was forged from necessity on the battlefield. The initiative grew directly from critical life-saving lessons learned by the U.S. military during conflicts in Iraq and Afghanistan. Medical professionals and military leaders recognized that the techniques used to save soldiers from traumatic injuries could be just as effective in civilian emergencies. By translating these proven methods into a simple, teachable format, they created a program that empowers anyone to become an immediate responder. This powerful origin story is a testament to the program’s effectiveness and its single-minded focus on saving lives.
A Partnership Born from Experience
The program’s foundation is a direct result of a partnership with the U.S. Department of Defense. After analyzing battlefield data, military medical experts found that a significant number of combat deaths were preventable, with uncontrolled bleeding being the primary cause. The strategies they developed to counter this—like the effective use of tourniquets and wound packing—dramatically increased survival rates. The Hartford Consensus, a committee formed after the Sandy Hook Elementary tragedy, recommended that these military-proven techniques be taught to the public. This led to the official STOP THE BLEED® course, adapting battlefield medicine for Main Street.
Global Reach and Official Certification
What started as a national campaign has quickly become a global movement. Spearheaded by the American College of Surgeons (ACS), the Stop the Bleed program is now taught in over 160 countries, creating a worldwide network of trained and ready responders. This widespread adoption highlights the universal need for hemorrhage control skills. When you complete the training, you don’t just walk away with new knowledge; you earn an official U.S. Department of Defense STOP THE BLEED® Certificate. This certification is a recognized credential that validates your ability to act confidently and correctly in a bleeding emergency, making you a valuable asset in any community.
Why Controlling Bleeding is a Critical Skill
The reason hemorrhage control is so critical comes down to time. Severe bleeding is the leading cause of preventable death in trauma—deaths that could have been avoided with immediate care. When a major blood vessel is injured, a person can bleed to death in as little as five minutes, often before paramedics can arrive. A bystander who knows how to control bleeding can bridge that gap. Your actions in those first few moments can mean the difference between life and death for a family member, a coworker, or a stranger.
The Impact of Uncontrolled Bleeding by the Numbers
Let’s break down the numbers to see why this training is so essential. According to the American College of Surgeons, uncontrolled bleeding is the number one cause of preventable death after an injury. When a major blood vessel is damaged, a person can bleed to death in as little as five minutes—often faster than first responders can get there. The problem is so significant that even in a controlled environment like an operating room, 80% of deaths that occur within 24 hours of a serious injury are due to severe blood loss. These aren’t just abstract figures; they represent real situations where a trained bystander could have made all the difference. Knowing how to act in those first few minutes directly counters the most immediate threat to a person’s life.
Are You Believing These Bleeding Control Myths?
Many people hesitate to help because they’re afraid of making things worse. One of the biggest myths surrounds tourniquets—the fear that using one automatically leads to amputation. This is simply not true. Modern hemorrhage control training teaches that a commercially made tourniquet is a safe and effective tool for stopping life-threatening bleeding from a limb. When applied correctly, the risk is extremely low compared to the certainty of death from uncontrolled blood loss. Proper training dispels these fears and replaces them with the confidence to use life-saving tools correctly.
How to Control Severe Bleeding: The Core Methods
When someone is severely bleeding, every second counts. Knowing how to respond can be the difference between life and death. The good news is that the core techniques for controlling a hemorrhage are straightforward and can be learned by anyone. You don’t need to be a medical professional to make a huge impact. The key is understanding three critical skills: applying direct pressure, packing a wound, and using a tourniquet. Mastering these steps will give you the confidence to act decisively in an emergency. Let’s walk through exactly what to do.
Remembering the “4 D’s” of Bleeding Control
In the middle of an emergency, it’s easy to feel overwhelmed. The “4 D’s of bleeding control” is a straightforward mental checklist to guide your actions when every second is critical. Keeping these steps in mind helps you stay focused and take decisive action, turning a moment of panic into a life-saving response.
- Detect: First, find the source of the bleeding. Quickly identify the exact location of the wound so you know where to focus your efforts.
- Direct Pressure: Apply firm, consistent pressure directly on the wound using a clean cloth or bandage. This is the most important first step to slow or stop blood flow.
- Devices: If direct pressure isn’t enough, use specialized tools. This is where items from a proper bleeding control kit, like a tourniquet for a limb or hemostatic gauze for a deep wound, become essential.
- Don’t Dilute: Avoid doing anything that could interfere with the body’s natural clotting process. This means you shouldn’t try to clean a severe wound with water or other liquids.
Applying Direct Pressure: A Step-by-Step Guide
Applying direct pressure is your first line of defense and often the only step needed for less severe wounds. It’s a simple but powerful action that helps the body’s natural clotting process kick in. To do it right, grab a clean cloth, gauze, or even a piece of clothing and place it directly over the bleeding wound. Push down with firm, steady pressure using both hands if you can. Don’t be tempted to peek or lift the cloth to check on the bleeding. If blood soaks through the first layer, don’t remove it. Just add another cloth on top and keep applying pressure. While direct pressure is what emergency responders use first, it’s important to recognize when you need to move on to other methods for more serious injuries.
How to Correctly Pack a Deep Wound
For deep wounds or injuries in places where a tourniquet won’t work (like the groin, armpit, or neck), wound packing is the next critical skill. The goal is to apply pressure from the inside out. Start by taking a roll of gauze or a clean cloth and firmly pushing it directly into the wound. Continue feeding the material into the wound, packing it in tightly until you can’t fit any more. Once the wound is fully packed, apply firm, direct pressure on top with both hands. This technique is a core part of the official Stop the Bleed program because it’s one of the most effective ways to handle severe bleeding in junctional areas where limbs meet the torso.
Using a Tourniquet: When and How
When direct pressure isn’t enough to stop severe bleeding from an arm or leg, a tourniquet is your most important tool. It’s easy to worry that using one will cause permanent damage, but that’s a common misconception. When applied correctly and for a limited time, a tourniquet is a life-saving device that stops blood flow completely. Place the tourniquet high and tight on the limb, about two to three inches above the wound, and never on a joint. Tighten it until the bright red bleeding stops. It will be painful for the injured person, but it’s necessary. Once it’s on, don’t take it off—leave that to the professionals. Make a note of the time you applied it for the first responders.
How to Manage Multiple Injuries
Real-life emergencies are rarely simple, and you might be faced with a person who has more than one injury. In these chaotic moments, your job is to focus on the most immediate threat to life. You need to quickly identify the most severe bleed and address it first. Look for bleeding that is spurting, flowing continuously, or pooling on the ground. This is the injury that requires your immediate attention. Once you have that bleed under control with direct pressure, packing, or a tourniquet, you can move on to less severe injuries. Getting hands-on hemorrhage control training is the best way to prepare for these high-stress situations, so you can assess and act with confidence.
Building Your Bleeding Control Kit
Knowing how to control bleeding is critical, but having the right tools on hand can make all the difference. While a well-stocked first-aid kit is great for minor cuts and scrapes, a severe hemorrhage requires specialized equipment. Think of these items as the essential toolkit for responding to a life-threatening bleed. You don’t need a paramedic’s entire bag, but a few key supplies can dramatically improve someone’s chance of survival.
The goal is to have proven, reliable tools ready to go before you ever need them. In a high-stress situation, you don’t want to be fumbling with makeshift solutions that might fail or trying to remember a clever hack you saw online. That’s why professional responders and trained civilians rely on specific types of tourniquets, dressings, and bandages that have been tested in the real world. These items are designed to work quickly and effectively under pressure. As you build your own kit or stock your workplace cabinet, focus on quality over quantity. Investing in professional-grade equipment means you’re giving yourself—and the person you’re helping—the best possible chance to make it until professional help arrives. It’s about being prepared, not just hopeful.
How to Choose the Right Tourniquet
When you’re dealing with severe bleeding on a limb, a tourniquet is your most powerful tool. But not just any tourniquet will do. Forget what you’ve seen in movies—using a belt or a shoelace is often ineffective and can cause more tissue damage without actually stopping the bleed. You need a commercial, purpose-built tourniquet. Look for windlass-style models like the Combat Application Tourniquet (C-A-T) or the SOF-T Tourniquet. These are trusted by military and emergency services because they are designed to apply immense, evenly distributed pressure to stop arterial bleeding fast. Having one and knowing how to apply it in seconds is a true game-changer.
What Are Hemostatic Agents and Dressings?
What about bleeding from areas where you can’t place a tourniquet, like the neck, shoulder, or groin? That’s where hemostatic dressings come in. These are special gauzes or sponges infused with an agent that helps the blood clot much faster than it would on its own. When packed into a wound, these agents initiate a rapid clotting process right at the source of the bleeding. When shopping for supplies, look for trusted brands that are widely used in hospitals and military settings. Products from companies like QuikClot, Celox, or HemCon are excellent examples of effective hemostatic agents that are essential for controlling hemorrhage in those difficult-to-treat junctional areas.
When Should You Use a Compression Bandage?
A compression bandage, often called an emergency trauma dressing or “Israeli bandage,” is designed to apply constant, direct pressure to a wound. After you’ve packed a wound with gauze or a hemostatic dressing, a compression bandage is the next step. It secures the packing material and continues to apply the pressure needed to control the bleeding. This is incredibly useful because it frees up your hands to call 911, treat other injuries, or help move the person to safety. While direct pressure is the first and most important step, a compression bandage ensures that pressure stays strong and steady until help arrives.
Specialized Equipment: Chest Seals and Abdominal Bandages
While tourniquets and pressure dressings are your go-to tools for limb injuries, some wounds require more specialized gear. For an open chest wound, a chest seal is essential. This isn’t just a big bandage; it’s a life-saving device designed to treat a “sucking chest wound,” where air is pulled into the chest cavity with every breath, potentially collapsing a lung. A chest seal creates an airtight barrier, often with a one-way valve that lets trapped air out but keeps outside air from getting in. For large wounds on the abdomen, you’ll need a specialized abdominal bandage. These are designed to hold wound packing securely in place and apply broad, consistent pressure to control bleeding and protect internal organs. Having these tools in your bleeding control kit moves you beyond basic preparedness and equips you to handle more complex and dangerous injuries effectively.
A Checklist for Your DIY Bleeding Control Kit
You can buy a pre-assembled bleeding control kit or easily build your own. A good personal kit, often called an IFAK (Individual First Aid Kit), should be compact enough to keep in your car, backpack, or desk drawer. The essential items are non-negotiable: at least one commercial tourniquet, a hemostatic dressing, a compression bandage, a pair of trauma shears to cut away clothing, and nitrile gloves to keep you safe. You can find high-quality individual components and complete kits from trusted brands like North American Rescue, Rescue Essentials, and TacMed Solutions. Having one of these
How to Get Bleeding Control Training and Certification
Getting certified in hemorrhage control is a straightforward process that empowers you to act decisively in an emergency. The training is designed for everyone, regardless of their background, turning bystanders into immediate responders when every second counts. By completing a course, you gain not just a certificate, but the confidence and skills to save a life. The journey from learning to doing is shorter than you think, and it starts with understanding the simple requirements and choosing a training format that fits your life. Let’s walk through the steps to get you certified and ready to respond.
What Are the Training Requirements?
The first step is understanding what the training covers. The official ACS Stop the Bleed program was created with a clear mission: to teach everyday people how to stop severe bleeding. Its primary goal is to turn bystanders into lifesavers by equipping them with fundamental hemorrhage control skills. The core requirement for certification is completing a course that teaches you how to apply direct pressure, pack a wound, and use a tourniquet. There are no prerequisites, making this life-saving knowledge accessible to anyone who wants to be prepared to help in a crisis.
What to Expect from the Certification Process
The path to certification is simple. It starts with finding an approved course, which you can do through the official program website or a trusted provider like CPR1. Once you complete the training—which includes both a knowledge component and a hands-on skills session—you’ll receive a certificate of completion. For those who feel a passion for the material, the journey doesn’t have to end there. After taking the course, you may meet the requirements to become an instructor yourself, helping to spread these critical skills throughout your community and workplace.
Key Learning Objectives
The main goal of a Stop the Bleed course is to give you the confidence to act. You’ll move beyond theory and get hands-on practice with the three core techniques for hemorrhage control: applying firm, direct pressure; correctly packing a deep wound to apply pressure from the inside; and properly using a commercial tourniquet on a limb. A key part of the training is also dispelling common myths, like the fear that using a tourniquet automatically leads to amputation, which is simply not true. By the end of the course, you won’t just know *what* to do—you’ll have the practical skills and confidence to become an immediate responder, ready to intervene effectively in the critical minutes before professional help arrives.
Choose Your Training: Online vs. In-Person
Flexibility is key, which is why you can take the course in two ways: in person with an instructor or through a hybrid model that starts online. An in-person class offers the benefit of immediate, hands-on practice with direct feedback from a certified instructor. This is often the best way to build muscle memory and confidence. Alternatively, you can complete the knowledge portion with an online course from home. To earn your full certification, you’ll still need to attend a brief, in-person session to practice and demonstrate your skills. This blended approach is perfect for busy schedules.
Self-Paced Online Learning
For those with demanding schedules, the hybrid learning model offers the perfect blend of convenience and comprehensive training. You can complete the knowledge portion of the course through a self-paced online module, learning the core principles of hemorrhage control from your home or office. This digital component covers the theory behind why these techniques work and walks you through the steps for each skill. Once you’ve finished the online part, you’re ready for the final step. To earn your full certification, you’ll still need to attend a brief, in-person session to practice and demonstrate your skills with a licensed instructor.
Hands-On Skills Sessions
While online learning is great for theory, controlling a severe bleed is a physical skill that requires practice. An in-person class offers the benefit of immediate, hands-on practice with direct feedback from a certified instructor. This is the best way to build the muscle memory and confidence needed to act effectively under pressure. During these sessions, you’ll get to handle a real tourniquet, practice packing a wound on a training model, and ask questions in real-time. At CPR1, our instructors often come from Fire, EMS, and healthcare backgrounds, bringing invaluable real-world experience to your training and ensuring you leave feeling truly prepared.
Understanding Course Costs and Options
The cost of Stop the Bleed training can vary, but it’s designed to be widely accessible. Many community-led courses are offered for free or at a very low cost to encourage public participation. For businesses, schools, and other organizations seeking formal certification for compliance or professional development, structured courses from national providers are the ideal solution. The path to certification is simple and starts with finding an approved course. Whether you join a local class or arrange a private group session, you are making a small investment that provides an incredible return: the ability to save a life.
How to Find a Licensed Instructor Near You
Finding a certified course is easy. For individuals looking for a class in their community, the official Stop the Bleed course finder is an excellent resource that lists upcoming public sessions. For organizations, businesses, or groups that need to train multiple people, a national provider like CPR1.com is the most efficient option. We can bring our certified instructors and all the necessary training equipment directly to your location, anywhere in the country. This ensures your team receives consistent, high-quality training that fits your schedule and meets your organization’s safety goals.
How to Keep Your Certification Current
While most Stop the Bleed certificates don’t have a formal expiration date, bleeding control is a physical skill that fades without practice. We recommend taking a refresher course every two years, just as you would for CPR, to keep your skills sharp and stay current with any protocol updates. When you take the online portion of the training, here’s a pro tip: it’s best to complete the course in “incognito” or “private” mode on your web browser to avoid any technical glitches. Consistent practice ensures you’ll be ready and confident enough to act when it matters most.
Professional Bleeding Control Training with CPR1
Find the Right Course Format for You
We know that one size doesn’t fit all when it comes to life-saving training. That’s why we offer flexible formats for our Stop the Bleed courses. For those who thrive on hands-on learning, our in-person classes provide direct practice with our expert instructors. If your schedule is tight, our blended learning option combines self-paced online coursework with a brief, in-person skills session. This ensures everyone can gain essential hemorrhage control skills in a way that fits their life. You can explore our course formats to find the perfect fit for you or your team.
Comparing Our Program Options and Costs
We provide a full spectrum of Stop the Bleed solutions. Whether you’re an individual seeking certification or a manager outfitting an entire facility, we have a program for you. Our training delivers premier bleeding control instruction, and we can bundle it with the high-quality kits you need to be fully prepared. Because every organization has unique needs, we offer customized quotes for groups. This ensures you receive a clear, competitive price for the exact training and equipment required to build out your complete safety and response plan.
The Advantages of Training as a Team
Learning life-saving skills together builds a stronger, more capable team. Our group training sessions are designed to create a coordinated and confident response unit within your organization. When your staff or members train at the same time, they develop a shared language and learn to work together seamlessly in a crisis. This is perfect for fostering a true culture of safety in schools, businesses, and community groups. By scheduling an onsite course, you empower your entire team to act decisively and effectively when it matters most.
Equip Your Team with Corporate Training
A corporate Stop the Bleed program is a powerful investment in your most valuable asset: your people. Our training moves beyond compliance, empowering your employees to become immediate responders in a bleeding emergency. This enhances workplace safety and shows a genuine commitment to your team’s well-being. Our instructors can tailor the content to your industry’s specific risks, making the skills practical and relevant. Corporate safety training builds a resilient workforce that is prepared for the unexpected, protecting both your employees and your business.
How to Launch a Bleeding Control Program at Work
Taking the step from individual training to an organization-wide program is how you build a true culture of safety. A structured plan ensures that when an emergency happens, your team can respond as a coordinated unit, not just as a few skilled individuals. It’s about creating a system where everyone knows where to find life-saving equipment and feels confident using it. Whether you manage a busy office, a school campus, or a manufacturing facility, a formal hemorrhage control program provides a reliable safety net that protects your people and shows you’re prepared for the unexpected. This framework moves you beyond simple compliance and toward genuine readiness.
A Step-by-Step Guide to Develop Your Program
Building a successful program starts with a solid plan. First, assess your organization’s specific risks and needs. Where are injuries most likely to occur? Who is most vulnerable? Use this information to get support from leadership and secure a budget. Next, outline your goals for training and equipment. The national Stop the Bleed initiative calls for broad public access to bleeding control kits and training, which is a great model to follow. Finally, create a clear rollout schedule and communication plan so everyone understands the program’s importance and how they can participate. A well-defined emergency action plan is the foundation of a prepared workplace.
Where Should You Place Your Bleeding Control Kits?
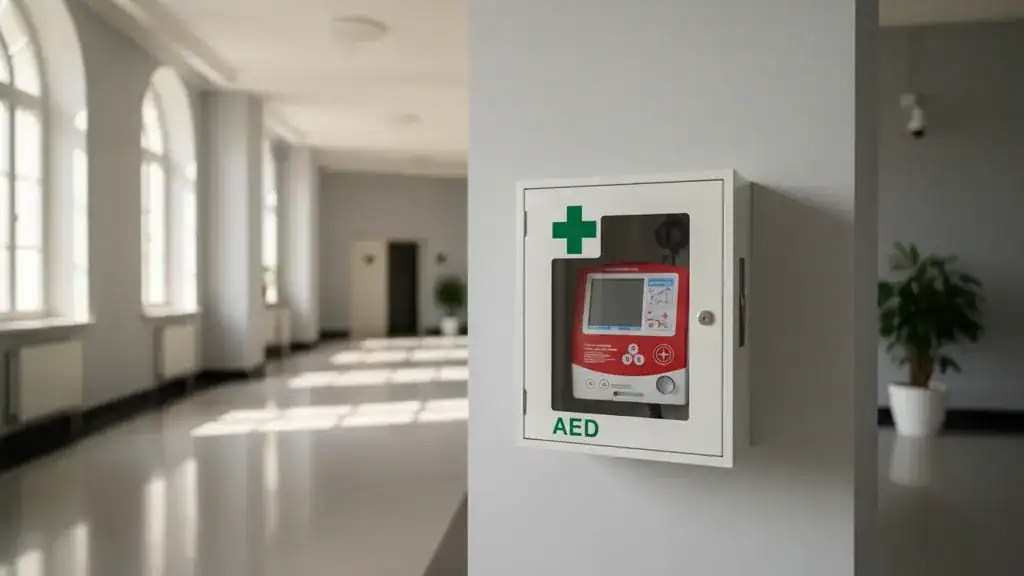
Life-saving equipment is useless if no one can find it in an emergency. Your placement strategy is just as critical as the training itself. Walk through your facility and identify high-traffic and high-risk areas. Think about lobbies, cafeterias, assembly lines, gymnasiums, and hallways far from the main office. Place your bleeding control kits in visible, accessible locations, ideally alongside existing safety equipment like AEDs and fire extinguishers. Use clear, standardized signage to mark each station. The goal is to make the kits easy to spot and grab within seconds, empowering anyone to become an immediate responder.
Who Needs Training? Setting Staff Requirements
Training is what transforms a box on the wall into a life-saving tool. Studies show that after training, participants report a massive increase in their confidence to respond to a medical emergency. Decide on a training strategy that fits your organization. You might choose to train all employees, create a dedicated volunteer emergency response team, or use a combination of both. Integrating Stop the Bleed certification into your onboarding process for new hires and as part of annual safety refreshers is an effective way to maintain readiness. Our corporate training programs are designed to make this process simple and effective for your entire team.
Keeping Your Program and Team Ready
Launching your program is the first step; maintaining it ensures it remains effective for years to come. Assign a program coordinator to be responsible for ongoing management. This person should conduct regular inventory checks on all bleeding control kits to restock used supplies and replace items nearing their expiration date. Schedule brief skill refresher sessions annually to keep knowledge fresh and confidence high. It’s also important to ensure your training methods are inclusive and can be understood by everyone on your staff. An effective program is a living one that adapts to your organization’s changing needs and is always ready to go.
Ready for More? Advanced Bleeding Control Skills
Once you’ve mastered the basics of applying pressure, packing a wound, and using a tourniquet, you can start building the skills to handle more challenging emergencies. Real-world situations are rarely as straightforward as classroom scenarios. Advanced training prepares you to think critically and act decisively when things get complicated. It’s about moving beyond the “how” and into the “what if”—what if the person is a child, what if there are multiple injuries, or what if the environment is chaotic? Developing these advanced skills gives you the confidence to be a true asset in an emergency, providing effective care until professional responders take over.
How to Adapt Your Skills in Any Environment
An emergency can happen anywhere—a factory floor, a crowded park, or the side of a highway. A key part of advanced training is learning to apply your skills in these unpredictable settings. The Stop the Bleed initiative emphasizes the need for bystanders to control bleeding in various environments, often with whatever materials are on hand. Your training will teach you to assess the scene for safety first, then use your surroundings to your advantage. You’ll learn to improvise when a standard kit isn’t available and stay focused amid distractions. This adaptability is what turns knowledge into a true life-saving capability, ensuring you can act effectively no matter where you are.
Adjusting Your Approach for Special Populations
Treating an injury on a small child or an elderly person requires a slightly different approach. Special populations have unique physical and emotional needs, and your response should reflect that. For instance, a standard tourniquet might be too large for a child’s limb, requiring you to adapt your technique for it to be effective. Learning the basics of pediatric first aid can make a huge difference. Similarly, an older adult may have fragile skin or underlying health conditions that you need to consider. Advanced courses help you understand these nuances, teaching you how to adjust your care to be both safe and effective. It’s about providing compassionate, competent aid that accounts for the individual you’re helping.
How to Handle Complex Bleeding Scenarios
What do you do when there’s more than one major wound, or when the injury is in a difficult location like the neck or torso? Complex scenarios require you to prioritize actions and think a few steps ahead. Advanced training helps you manage these high-stress situations, including dispelling common myths. For example, many people still worry that using a tourniquet leads to amputation, but modern medical understanding confirms that a properly applied tourniquet is a critical tool that can save both a life and a limb. Learning to handle these complex situations builds your confidence to manage chaos and make the right calls when every second is critical.
Keeping Up with the Latest Protocols
Emergency medical practices are constantly improving as we learn more about what works best. The techniques you learn today might be refined in the years to come. That’s why staying current with the latest protocols is so important for anyone with life-saving skills. Organizations like the American College of Surgeons continually update hemorrhage control guidelines based on new research and real-world data. Committing to regular refresher courses ensures your knowledge remains sharp and your skills align with the current standards of care. This ongoing education is a key part of being a prepared and reliable first responder.
Building a Culture of Preparedness in Your Workplace
Having a plan on paper is a great start, but a true culture of preparedness goes much deeper. It’s about creating an environment where every team member feels empowered and equipped to act decisively in an emergency. This isn’t just about meeting compliance standards; it’s about fostering a shared sense of responsibility for everyone’s safety. When people are confident in their skills and know exactly where to find the right tools, hesitation disappears and is replaced by helpful action.
Building this culture doesn’t happen overnight. It requires a commitment to integrating life-saving skills into your organization’s DNA. This means making training a regular and accessible part of your operations, ensuring life-saving equipment is always ready for use, and consistently reinforcing skills so they become second nature. By weaving these elements into your workplace, you transform your team from passive bystanders into a network of capable first responders. The goal is to make emergency readiness a natural part of your daily routine, just like any other critical business function.
How to Make Training a Part of Your Culture
The first step in building a prepared team is making training a standard, not an exception. Instead of treating it as a one-time event, weave hemorrhage control and CPR education into your onboarding process for new hires and your regular training schedule for existing staff. Make these life-saving skills accessible to everyone, from the front office to the warehouse floor, because an emergency can happen anywhere. By offering consistent group training, you ensure that a qualified responder is always nearby, ready to act with clarity and confidence when seconds count the most.
Your Checklist for Maintaining Equipment
The best training in the world is only effective if your team has the tools they need to put their skills into action. Strategically place bleeding control kits and AEDs in visible, accessible, and clearly marked locations throughout your facility. But placement is only half the battle. You also need a system for regularly checking your equipment. Assign a point person to inspect kits monthly, ensuring supplies are fully stocked, and nothing has expired. A well-maintained and easy-to-find bleeding control kit turns a prepared employee into a truly effective first responder.
Why Regular Skill Drills Are So Important
Emergency response skills are perishable. Without practice, even the most well-trained individuals can forget crucial steps under pressure. Keep your team’s abilities sharp by incorporating quick, hands-on skill refreshers into team meetings or safety briefings. These don’t have to be long sessions—even a five-minute drill on applying a tourniquet or packing a wound can make a huge difference. Regular practice builds muscle memory and reinforces knowledge, ensuring that when an actual emergency occurs, your team can perform the techniques correctly and automatically, without hesitation.
Build the Confidence to Respond
Ultimately, a culture of preparedness is built on confidence. When your team members feel sure of their ability to manage a bleeding emergency, they are far more likely to step up and take action. The combination of professional training, accessible equipment, and regular practice directly fosters this self-assurance. Studies show that people who complete Stop the Bleed training report a significant increase in their confidence to respond. By investing in this comprehensive approach, you empower your employees to shift from a mindset of uncertainty to one of proactive readiness.
Related Articles
- Stop The Bleed Training | CPR1 Emergency Response Courses
- First Aid for Bleeding: Emergency Treatment & Safety Guide — CPR1
- Get Bleeding Control Kit – Standard — CPR1
- Bleeding Control Kit – Standard Emergency Trauma Kit — CPR1
Frequently Asked Questions
Is Stop the Bleed training only for doctors and nurses? Not at all. This training was created specifically for people without any medical background. The entire goal is to empower everyday people—office workers, teachers, parents, and community members—to act confidently in an emergency. The techniques are straightforward and designed to be performed by anyone who finds themselves as the first person on the scene before professional help can arrive.
I’m worried about using a tourniquet. Isn’t it true they cause amputations? That’s a very common and understandable concern, but it’s based on outdated information. When a person is bleeding to death from a limb injury, a properly applied commercial tourniquet is a safe and life-saving tool. The risk of someone dying from uncontrolled blood loss is immediate and very real, while the risk of limb damage from a tourniquet is extremely low when it’s left to medical professionals to remove. The training gives you the confidence to use this tool correctly to save a life.
How is this different from a standard first-aid course? Think of it as a specialized skill. A general first-aid course gives you a broad overview of how to handle many common injuries, like burns, sprains, and minor cuts. Stop the Bleed has a laser focus on the single leading cause of preventable death after an injury: uncontrolled bleeding. It provides in-depth, hands-on practice for severe hemorrhage, which is a scenario that requires more specific skills than what is typically covered in a basic class.
Can’t I just use a belt as a tourniquet in an emergency? While it might seem like a good idea, improvised tourniquets like belts, scarves, or shoelaces are rarely effective. They are not designed to generate the specific, immense pressure needed to stop arterial bleeding and can often cause more tissue damage without actually stopping the blood flow. A commercial tourniquet is an engineered medical device designed to work quickly and correctly under pressure, which is why having one in your kit is so important.
How long does the certification take to complete, and do I need to renew it? The course is designed to be efficient and impactful, typically taking just a couple of hours to complete. While most Stop the Bleed certificates don’t have a hard expiration date, the skills are physical and can fade over time. To ensure you stay confident and ready to act, we recommend taking a short refresher course every two years, much like you would for CPR.
Disclaimer for information purposes only:
The information provided on this website is intended for general educational and informational purposes only. It is not medical advice and should not be used as a substitute for professional diagnosis, treatment, or care. Always consult a qualified healthcare or medical professional regarding any health-related questions or concerns.
While we strive to ensure the information shared is accurate and up to date, no guarantees are made regarding completeness, accuracy, or applicability to any individual situation. Use of this content is at the reader’s sole discretion and risk.
This website is part of the Response Ready family of emergency preparedness and training resources, including CPR & first aid training and compliance services, AED sales and program support, AED program management software, and medical oversight solutions provided through our affiliated platforms:
• AEDLeader.com
• ResponseReady.com
• AEDTotalSolution.com
• MDSIMedical.com
By accessing or using this website, you agree to release, indemnify, and hold harmless the website owners, authors, contributors, and affiliated entities from any claims, losses, damages, or liabilities arising from the use or reliance on the information presented.

Anastasios Giannikas
Anastasios Giannikas
Save Lives with the Right AED Today
Buy Trusted AEDs from AED Leader Today!
Get Certified in CPR and Make a Difference!