- Published
The Essential Guide to Workplace Bleeding Control Training

A standard first aid kit is great for minor cuts, but it’s simply not equipped for a true emergency. When a serious injury occurs, a person can bleed to death in as little as five minutes—often before professional help can arrive. This is where a bleeding control kit becomes the most important tool in your facility. But the gear is only half the battle. Without effective workplace bleeding control training, even the best equipment can be intimidating in a crisis. This guide will walk you through everything you need to know to build a program that gives your team the skills and confidence to save a life.
Key Takeaways
- Recognize the Kit’s Critical Role: A bleeding control kit is not an all-purpose first aid kit; it’s a specialized tool with items like tourniquets and trauma dressings designed exclusively to stop severe, life-threatening hemorrhage.
- Assess Your Environment to Plan Placement: The right number and location of kits depend on a practical risk assessment of your facility’s size, layout, and specific hazards, ensuring a kit is always visible and quickly accessible.
- Prioritize Hands-On Training for Real Readiness: The equipment is only effective when your team is confident using it, making professional, hands-on training the essential step that prepares them to act decisively in a real emergency.
What is a Workplace Bleeding Control Kit?
Let’s start with the basics. A bleeding control kit is a specialized first aid kit designed for one critical purpose: to stop severe, life-threatening bleeding. Think of it as the emergency-room-level tool in your workplace safety arsenal, distinct from the standard office first aid box. While a regular kit is perfect for handling minor cuts, scrapes, and burns, a
Having these kits accessible empowers any trained person on your team to act decisively and effectively in the critical minutes before professional help arrives. It’s a fundamental part of a comprehensive workplace safety program and a clear signal to your employees that their well-being is a top priority. These kits aren’t just a box of supplies; they are a lifeline. They provide the essential equipment needed to control a hemorrhage, bridge the gap until EMS is on the scene, and ultimately, save a life. Understanding their function is the first step toward building a truly response-ready environment.
Why Every Workplace Needs One
The reality is that severe bleeding is a leading cause of preventable death after an injury. A person can bleed to death in as little as five minutes—often faster than paramedics can arrive. That gap in time is where a bleeding control kit becomes absolutely essential. Workplace accidents can happen without warning, from incidents in manufacturing facilities to unexpected events in an office setting. Being prepared isn’t just about compliance; it’s about giving your team the ability to save a coworker’s life. Equipping your workplace with these kits and providing the right emergency response training turns bystanders into immediate responders, dramatically improving the outcome of a serious injury.
The Stark Reality: Bleeding by the Numbers
Let’s break down the numbers, because they really put the need for preparedness into perspective. According to the American College of Surgeons, uncontrolled bleeding is the leading cause of preventable death after an injury. The clock is ticking from the moment an accident happens; a person can bleed to death in as little as five minutes. That’s often not enough time for paramedics to get to the scene. This isn’t just a statistic for battlefields or major disasters—it applies to any severe injury that could happen in a factory, on a construction site, or even in an office. The good news is that immediate responders can make all the difference. That’s why national initiatives and courses like Stop the Bleed training have equipped millions of people with the skills to control bleeding and save lives.
Bleeding Control Kit vs. First-Aid Kit: What’s the Difference?
It’s important to understand that a bleeding control kit and a standard first aid kit are not interchangeable. Your typical first aid kit is stocked with items for minor injuries: adhesive bandages, antiseptic wipes, gauze pads, and pain relievers. It’s designed for everyday mishaps. A bleeding control kit, however, is built for trauma. It contains specialized tools like a commercial-grade tourniquet, hemostatic gauze that helps blood clot, pressure bandages, and chest seals for puncture wounds. These items are specifically designed to stop massive hemorrhaging quickly and effectively. While you need both types of kits in your workplace, knowing the difference ensures you have the right tool for the right emergency.
Are Bleeding Control Kits Legally Required?
This is one of the most common questions we get, and the short answer is: it depends. There isn’t a single federal law that mandates bleeding control kits for every business in the country. Instead, the requirements are a patchwork of federal recommendations, specific state and local laws, and industry-specific safety standards.
While you might not find a universal mandate, the trend is moving decisively toward greater preparedness. Many states are passing laws requiring these kits in public spaces, and OSHA expects employers to protect their teams from all recognized workplace hazards—and severe bleeding is certainly one of them.
Think of it less as a question of “Do I absolutely have to?” and more as “Should I?” In any emergency, having the right tools on hand can make all the difference. The following sections will help you understand the specific rules and recommendations that apply to your workplace, so you can make an informed decision that keeps your people safe.
What Does OSHA Recommend?
The Occupational Safety and Health Administration (OSHA) doesn’t have a specific standard that explicitly names bleeding control kits. However, that doesn’t mean you’re off the hook. OSHA’s regulations for first aid are rooted in its General Duty Clause, which requires employers to provide a workplace “free from recognized hazards that are causing or are likely to cause death or serious physical harm.”
Severe bleeding from a workplace accident or a violent incident is a recognized hazard. Because of this, OSHA expects employers to assess their specific risks and provide adequate first aid supplies. While a basic first aid kit is a start, it often isn’t equipped to handle a life-threatening bleed. Providing a bleeding control kit is seen as a reasonable and necessary step to prepare for worst-case scenarios and fulfill your duty to protect your employees.
Checking Your State and Local Requirements
This is where requirements get much more specific. A growing number of states and cities are passing “Stop the Bleed” legislation that mandates trauma kits in certain public buildings. For example, laws in states like California and Texas now require bleeding control kits in places like schools, airports, stadiums, and large government buildings.
These laws are becoming more common every year. Because the rules can vary significantly from one place to the next, it’s crucial to check your state and local municipal codes. Your local fire marshal or public health department is often a great resource for understanding what’s required in your area. Staying on top of these regulations ensures you remain compliant and, more importantly, prepared.
Industry-Specific Rules You Need to Know
Not all workplaces are created equal when it comes to risk. An office environment has a very different hazard profile than a construction site or a manufacturing plant. Industries like construction, forestry, warehousing, and transportation carry a much higher risk of injuries that can cause severe bleeding.
OSHA requires every employer to perform a workplace hazard assessment to determine what first aid supplies and training are necessary. If your assessment reveals a risk of serious cuts, amputations, or other traumatic injuries, then a standard first aid kit simply won’t be enough. In these high-risk environments, providing bleeding control kits isn’t just a best practice—it’s a fundamental part of your safety plan.
What’s Inside a Workplace Bleeding Control Kit?
When you open a bleeding control kit, you’ll notice it looks very different from a standard office first aid kit. You won’t find adhesive bandages or antiseptic wipes. Instead, you’ll find a set of specialized tools designed for one purpose: to stop life-threatening bleeding fast. These kits are built to empower anyone, even without a medical background, to take immediate action and bridge the critical gap between the time an injury occurs and when professional help arrives.
The contents are based on lessons learned from military medicine and are promoted by national campaigns like Stop the Bleed. Each item has a specific role in controlling severe hemorrhage from traumatic injuries. While the tools might seem intense, they are surprisingly straightforward to use with proper training. Understanding what’s inside and how each component works is the first step toward building the confidence to act decisively in an emergency. Think of it as a compact, life-saving toolkit that turns a bystander into an immediate responder.
The Essential Supplies for Stopping Blood Loss
A workplace bleeding control kit is essentially a specialized first aid kit focused entirely on managing severe external bleeding. Every item inside is chosen for its effectiveness in a high-stakes emergency. Unlike a general first aid kit that handles minor cuts and scrapes, these kits contain professional-grade medical devices that can mean the difference between life and death. The goal is to provide everything a first responder needs to control a catastrophic bleed.
The core components typically include a tourniquet for limb injuries, hemostatic gauze for wounds in areas like the neck or groin, pressure dressings to maintain control, a chest seal for penetrating torso trauma, and essential support tools like trauma shears and protective gloves. Our workplace bleeding control kits are stocked with these critical supplies, ensuring you have what you need when every second counts.
The Big Three: Tourniquets, Gauze, and Pressure Bandages
The three primary tools for stopping blood loss are tourniquets, hemostatic gauze, and pressure bandages. A commercial-grade tourniquet is the most effective tool for stopping arterial bleeding in an arm or leg. It’s applied above the wound and tightened to cut off blood flow completely. Next is hemostatic gauze, which is a special dressing infused with an agent that helps blood clot. This is crucial for packing deep wounds or injuries in places where a tourniquet won’t work, like the shoulder or hip.
Finally, a pressure bandage, also known as an emergency trauma dressing, is used to apply firm, direct pressure to a wound after it has been packed with gauze. It has a built-in pressure bar that helps maintain control over the bleeding, securing the packing and freeing up the rescuer’s hands. Learning how to use these tools correctly is a key part of any Stop the Bleed certification course.
Understanding ANSI-Compliant Tourniquets
When you’re choosing a tourniquet, not just any device will do. The American National Standards Institute, or ANSI, sets specific guidelines to make sure these tools are both safe and effective in an emergency. According to the ANSI Z308.1-2021 standard, a compliant tourniquet must be at least 1.5 inches wide. This isn’t an arbitrary number; that width is critical for applying pressure evenly across a limb, which effectively stops blood flow without causing unnecessary damage to the underlying tissue. The standard also requires that the tourniquet can be used on limbs ranging from 7 to 33 inches around, ensuring it’s versatile enough for most adults.
Beyond the physical specifications, ANSI also emphasizes that a tourniquet should be simple enough for a layperson to use correctly under extreme stress. After all, the person applying it might be a coworker with basic training, not a paramedic. This focus on accessibility is why the updated standards now recommend including a tourniquet in all Class B first aid kits—those intended for higher-risk workplaces like construction sites or manufacturing plants. Ensuring your kits contain an ANSI-compliant tourniquet is a key step in meeting modern safety best practices and truly preparing your team for a worst-case scenario.
Beyond the Basics: Chest Seals, Shears, and Protective Gear
Beyond the primary bleeding control tools, a well-stocked kit includes several other critical items. A chest seal is used to treat a sucking chest wound—a puncture to the torso that can cause a lung to collapse. This special dressing sticks to the skin and creates a one-way valve, letting air escape from the chest cavity without letting any back in. Trauma shears are powerful scissors designed to cut through thick materials like denim, leather, and seatbelts, allowing you to quickly expose an injury without moving the victim unnecessarily.
Finally, every kit must include personal protective equipment (PPE). At a minimum, this means high-quality nitrile gloves. Protecting yourself from bloodborne pathogens is non-negotiable when providing aid. According to OSHA guidelines, employers must ensure their teams are protected from exposure during a medical emergency.
Why Clear Instructions Are a Lifesaver
In a true emergency, stress and adrenaline can make it hard to think clearly. That’s why every bleeding control kit should include simple, easy-to-follow instructions. These are often illustrated, step-by-step guides that walk you through the “ABCs of Bleeding Control”: Alert (call 911), Bleeding (find the source), and Compress (apply pressure). The instructions provide a quick reference to help you apply a tourniquet, pack a wound, or apply a pressure dressing correctly.
While these instructions are an invaluable aid, they are not a replacement for hands-on training. The muscle memory and confidence you gain from practicing these skills in a controlled environment are what truly prepare you to act effectively under pressure. Think of the instructions as your backup, but make emergency preparedness training your primary strategy for readiness.
How Many Bleeding Control Kits Does Your Workplace Need?
Deciding on the right number of bleeding control kits isn’t about meeting a bare minimum; it’s about creating a safety net that truly covers your people and your space. There isn’t a one-size-fits-all answer, but there is a straightforward way to figure out what your facility needs. The goal is to ensure that no matter where an emergency happens, a kit is just moments away. To get to your number, you’ll need to look at your team size, the physical layout of your workplace, and the specific risks your employees face every day. Think of it as creating a map of safety, with kits placed at strategic points to stop a life-threatening bleed as quickly as possible.
How to Calculate Your Employee-to-Kit Ratio
A good starting point for any workplace is to have at least one bleeding control kit for every 10 employees. This ratio provides a solid baseline, but you should think of it as the floor, not the ceiling. For larger facilities or in the event of a major incident involving multiple people, you’ll want more kits than you think you need. Having an excess of supplies is never a problem in an emergency. The key is to ensure that enough kits are available to handle a worst-case scenario, allowing multiple people to provide aid at once without having to search for or wait on limited resources. This proactive approach is a fundamental part of a strong workplace safety program.
Factor in Your Workspace Layout and Risks
Your building’s layout and daily operations play a huge role in determining kit quantity and placement. A comprehensive workplace hazard assessment is the best way to identify your specific needs. Consider the unique risks of your environment—a construction site with heavy machinery has different needs than a multi-floor office building. Think about the physical distance between different work areas. If it takes more than a minute or two to get from one end of your facility to another, you need kits staged in multiple locations. You should also factor in things like shift schedules and how far you are from professional emergency services. The more spread out your team is and the higher the risk, the more kits you’ll need.
Where Should You Store Your Bleeding Control Kits?
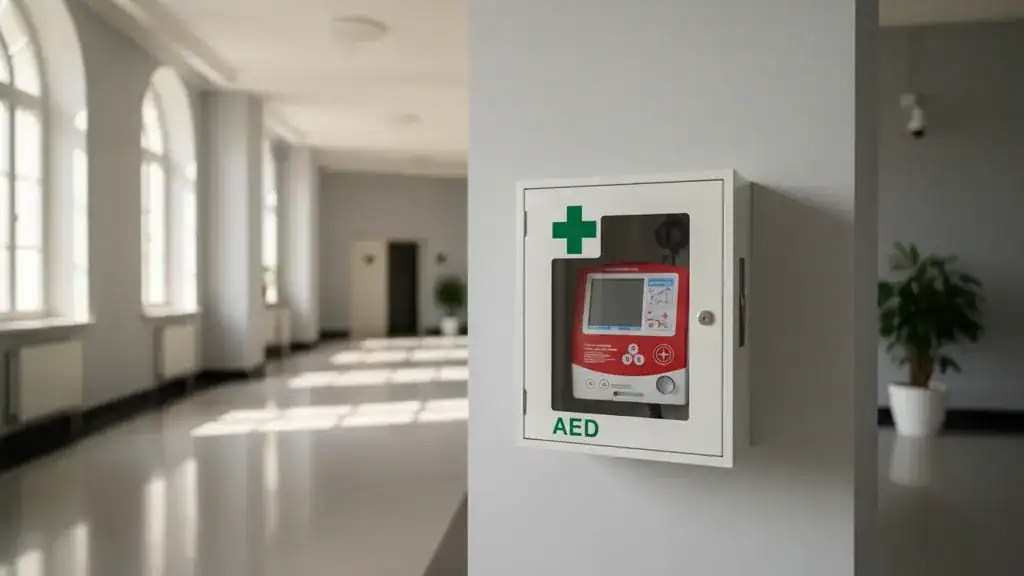
Where you put your kits is just as important as how many you have. A kit that’s locked in an office or hidden in a supply closet isn’t helpful in an emergency. Bleeding control kits should be mounted on walls in visible, accessible, and unlocked locations. Place them in high-traffic areas like hallways, break rooms, and near main entrances. For maximum effectiveness, position them right alongside your other emergency equipment, such as AEDs and standard first aid kits. Using clear, bold signage helps everyone know exactly where to find these life-saving tools when seconds count. Making your AED devices and bleeding control kits part of a single, easy-to-find emergency station is a smart and effective strategy.
Preparing for Large-Scale Emergencies
While we often plan for single-person accidents, it’s critical to also prepare for large-scale emergencies. In these situations, having an adequate supply of bleeding control kits is not just a compliance issue—it’s a moral responsibility to protect your team and anyone else on your property. Being prepared means having the tools on hand to save a life before professional help can arrive. This is why many organizations choose to go beyond the minimum recommendations, especially schools, large venues, and corporate campuses. Equipping your team with the right tools and the right training, like a Stop the Bleed course, empowers them to act confidently and effectively when it matters most, turning bystanders into immediate responders.
How to Implement Workplace Bleeding Control Training
Having bleeding control kits on-site is a critical first step, but the equipment is only as effective as the people who use it. In a real emergency, there’s no time to read a manual. Panic and adrenaline can make even simple instructions feel overwhelming. That’s why training isn’t just a good idea—it’s the essential link that turns a box on the wall into a life-saving tool. When your team is trained, they move from being bystanders to becoming immediate responders, capable of taking decisive action in the critical minutes before professional help arrives.
A well-trained team is a confident team. They’ll know exactly where the kits are, what’s inside them, and how to apply each component correctly under pressure. This preparation not only improves the outcome for an injured person but also creates a stronger, more resilient safety culture throughout your entire organization. By investing in workplace safety training, you empower every employee with the skills to protect themselves and their colleagues, turning a potential crisis into a controlled response. It’s about building a team that is truly ready for anything.
Why “Stop the Bleed” Certification Matters
While the instructions inside a kit are helpful, they can’t replace formal training. The best way to prepare your team is through a certification course like Stop the Bleed. This nationally recognized program was designed specifically to teach bystanders the basic techniques of bleeding control. During the course, instructors guide participants through the essential skills: how to identify life-threatening bleeding, apply direct pressure, pack a wound, and correctly use a tourniquet. Earning a certification gives your team members a verified skill set and the confidence that comes with knowing they’re following proven, life-saving protocols.
The Origins of the “Stop the Bleed” Program
The “Stop the Bleed” program wasn’t created in a vacuum; it was a direct answer to a critical need. Developed by the American College of Surgeons (ACS), the initiative was launched in 2015 to address the growing number of preventable deaths from severe bleeding. Drawing on hard-won lessons from military medicine, where controlling hemorrhage on the battlefield is a top priority, the program’s founders recognized that civilians needed the same power to act. The core idea is simple but profound: empower bystanders to become immediate responders. The program emphasizes that the person next to a bleeding victim is in the best position to save their life by taking immediate action to control the bleeding before professional help can arrive.
A Global Movement for Public Safety
Since its launch, Stop the Bleed has grown from a national initiative into a global movement. The program has successfully trained over 5 million people worldwide, equipping ordinary citizens with the skills and confidence to act in a crisis. Its practical, life-saving approach has earned international recognition, leading governments and organizations across the globe to adopt it as a vital component of public safety. This widespread adoption reinforces a critical message: anyone can learn to save a life. The movement’s success is built on empowering people from all walks of life—from teachers and office workers to community leaders—to become the help until help arrives, creating a stronger, more resilient chain of survival everywhere.
Why Hands-On Practice is Non-Negotiable
You can’t learn to stop a severe bleed just by watching a video or reading a pamphlet. The only way to build real competence is through hands-on practice. In a training session, your team members will physically apply tourniquets to mannequins (and sometimes each other), pack simulated wounds, and handle pressure dressings. This muscle memory is what takes over during a high-stress event. Because bystanders are always the first to arrive at an emergency, this practical experience is what enables them to act quickly and correctly without hesitation. It’s the difference between knowing what to do and knowing how to do it.
What to Expect in a Training Course
A good bleeding control course is anything but a stuffy classroom lecture. It’s an active, hands-on session where you’ll build real-world skills and the confidence to use them. During a Stop the Bleed certification course, our experienced instructors, many with backgrounds as first responders, create a supportive environment for learning. After a quick review of the core principles, you’ll spend most of your time practicing. You’ll work directly with training tourniquets, learn to pack simulated wounds, and apply pressure dressings. This practical approach is what builds muscle memory, so you can act effectively under pressure. You’ll leave not just with a certificate, but with the genuine readiness to be an immediate responder in an emergency.
Don’t Forget Refresher Training
Life-saving skills can fade over time if they aren’t used. A one-and-done training session isn’t enough to ensure long-term readiness. To keep your team’s abilities sharp, it’s important to schedule regular refresher training, ideally on an annual basis. These sessions don’t have to be long; even a quick drill or skills review can make a huge impact. You can time these refreshers with your monthly kit inspections. When you check your supplies for expiration dates, take a few minutes to have team members practice applying a tourniquet. This consistent reinforcement keeps life-saving techniques top of mind.
How to Launch Your Staff Training Program
Implementing a training program is straightforward. Start by making bleeding control training a standard part of your new employee onboarding process. For current staff, schedule dedicated sessions and communicate the plan clearly in team meetings. You can book onsite group training to certify your entire team at once in a familiar environment. Designate a few key employees as safety leads who can help champion the program and answer questions. By integrating training into your regular operations, you build a workplace where everyone feels prepared and empowered to act in an emergency.
Becoming a Stop the Bleed Instructor
For larger organizations or those with higher-risk environments, creating an in-house Stop the Bleed instructor is one of the smartest moves you can make. This allows you to build a self-sustaining safety program, making it easy to train new hires and run regular refreshers without relying on outside schedules. An instructor is certified to teach the core principles of bleeding control—how to use tourniquets, pack wounds, and apply pressure effectively. The process is straightforward: a team member first completes a foundational Stop the Bleed course to master the skills, then enrolls in an official instructor program to learn how to teach the material effectively. This step transforms your team from being simply trained to becoming true safety advocates, capable of empowering everyone around them.
Your Bleeding Control Kit Maintenance Checklist
Getting bleeding control kits for your workplace is a fantastic first step, but the real work is in creating a system to keep them ready for action. A kit with missing or expired supplies is just a red box on the wall. A well-maintained program ensures that when an emergency happens, your team has exactly what they need, right when they need it. Think of it as a living part of your safety plan, not a one-and-done purchase. It’s about building a reliable safety net that you can count on. This ongoing commitment is what transforms a piece of equipment into a life-saving resource.
A solid maintenance program doesn’t have to be complicated. It’s built on simple, repeatable actions: regular checks, smart restocking, and strategic placement. By making these tasks a routine part of your operations, you remove the risk of finding an empty or expired kit during a crisis. This process also reinforces a culture of safety, showing your team that their well-being is a priority that goes beyond basic compliance. It demonstrates that you’re not just checking a box, but actively preparing your people to handle a real emergency with confidence. Here’s how to build a simple, effective maintenance program that keeps your people protected.
Set Up a Simple Inspection Schedule
Consistency is key to readiness. Your bleeding control kits should be checked at least once a month and always after one has been used. The goal of these checks is simple: make sure everything is in its place and ready to go. Assign this responsibility to a specific person or a safety committee and have them use a simple checklist to document the inspection. To make it a habit, set a recurring calendar reminder. These regular inspections take just a few minutes but are critical for ensuring a kit is fully functional when seconds count. It’s a small investment of time that pays off massively in an emergency.
Stay on Top of Expiration Dates and Restocking
Many items in a bleeding control kit, like sterile dressings and hemostatic gauze, have expiration dates. During your monthly inspections, check these dates carefully. A simple log or spreadsheet can help you track expiration dates for all your kits, so you can order replacements well in advance. When a kit is used, it needs to be restocked immediately. For organizations managing multiple kits or AEDs, a compliance management tool like AED Total Solution can automate tracking and send reminders for restocking, taking the guesswork out of the process and ensuring you’re always prepared.
Proper Storage for Long-Term Readiness
A bleeding control kit is useless if no one can find it. Store your kits in visible, unlocked, and clearly marked locations that are easy to get to in an emergency. Good spots include hallways, break rooms, reception areas, and near high-risk machinery or locations. It’s a great practice to place them alongside other emergency equipment, like an AED or a fire extinguisher, to create a centralized “safety station.” The goal is to make them an obvious and accessible part of your workplace environment so anyone can grab one without hesitation or needing to ask for directions.
How to Fit Kits into Your Emergency Action Plan
Your bleeding control kits shouldn’t exist in a vacuum. They need to be a fully integrated part of your company’s broader emergency action plan. Discuss the location and use of the kits during safety meetings and new employee orientations. Run drills that include scenarios requiring their use, so your team can practice grabbing the kit and responding. When your team understands how these kits fit into the bigger picture of emergency response—along with knowing who is trained to use them and how to call for help—you build a culture of safety and true preparedness.
Your 4-Step Action Plan for a Safer Workplace
Putting together a bleeding control program might feel like a huge task, but you can break it down into simple, manageable steps. It’s not about being perfect overnight; it’s about taking deliberate action to create a safer environment for everyone. Think of this as your roadmap. By following these four steps, you can build a practical and effective emergency plan that protects your team and meets compliance standards. Let’s walk through how to get it done, starting with understanding your specific needs.
Step 1: Conduct a Workplace Risk Assessment
Before you buy a single bandage, you need to know what you’re preparing for. A workplace risk assessment is your foundational step. It’s a careful look at your specific environment to determine what kind of first aid and emergency supplies you truly need. Walk through your facility and consider key factors like potential hazards, the number of employees on-site during different shifts, and the physical size of your workspace.
You should also review past accident or illness reports to identify any patterns. Think about whether you have employees who work off-site or in remote areas of your building. Finally, consider how far you are from the nearest hospital or emergency services—the longer the potential response time, the more prepared your team needs to be. This assessment gives you a clear, data-driven picture of your needs.
Step 2: Choose and Purchase the Right Kits
Once your assessment is complete, you can confidently select the right equipment. A good rule of thumb is to have at least one bleeding control kit for every 10 employees, but it’s always better to have more than you think you’ll need, especially for larger facilities or higher-risk industries. When you’re ready to purchase bleeding control kits, look for ones that contain essential, high-quality supplies like tourniquets, hemostatic gauze, and pressure dressings.
Placement is just as important as quantity. Your kits must be stored in locations that are easy to find and access in an emergency. Make sure they are clearly marked and that your employees know where to find them. The goal is to eliminate any guesswork when seconds count.
Step 3: Coordinate and Document Staff Training
Having the right tools is only half the battle; your team needs the confidence to use them correctly. While kits come with instructions, nothing replaces hands-on practice. Investing in professional training ensures your employees can act decisively and effectively under pressure. A Stop the Bleed course is an excellent way to empower your staff with the skills to manage a severe bleeding emergency until professional help arrives.
Make emergency preparedness a regular topic in staff meetings and keep detailed records of who has been trained and when their certifications expire. This not only helps with compliance but also builds a strong, safety-first culture. When your team is trained, they become your greatest safety asset.
Step 4: Build a Complete Emergency Preparedness Program
Your risk assessment, kits, and training are the core components of a larger emergency preparedness program. This program is your organization’s official plan for responding to a crisis. It should be a written document that integrates your bleeding control strategy with other safety protocols, like fire drills and evacuation routes. It’s about creating a comprehensive system where every piece works together seamlessly.
This plan isn’t just a binder that sits on a shelf; it’s a living part of your company culture. It reflects your commitment to protecting your people, which is both a compliance requirement and a moral responsibility. A well-rounded emergency preparedness program shows your team that their safety is your top priority and ensures everyone is ready to respond when it matters most.
Related Articles
- Bleeding Control Kits – responseready
- Best Bleeding Control Kit – Premium — AED Total Solution
- Get Bleeding Control Kit – Standard — CPR1
- Buy Premium Bleeding Control Kit – responseready
- Best Bleeding Control Kit – Standard — AED Total Solution
Frequently Asked Questions
Is a bleeding control kit really necessary for a low-risk workplace like an office? It’s a fair question, but the truth is that serious injuries aren’t limited to high-risk environments. Accidents can happen anywhere, from a deep cut caused by a broken window to a more serious incident. A bleeding control kit isn’t about preparing for what’s probable; it’s about being ready for what’s possible. Having one on hand ensures your team is equipped to handle a true emergency in the critical minutes before help arrives, no matter the setting.
What’s the difference between a bleeding control kit and a regular first aid kit again? Think of it this way: your standard first aid kit is for everyday problems like minor cuts, scrapes, and headaches. It’s designed to provide comfort and care for non-urgent issues. A bleeding control kit is built for a crisis. It contains specialized tools like tourniquets and hemostatic gauze designed specifically to stop a massive, life-threatening bleed. You absolutely need both, but they serve two very different and important purposes.
Can my company get in trouble if an employee tries to help but makes a mistake? This is a common concern, but the greater risk often lies in doing nothing. Most states have Good Samaritan laws that protect individuals who provide reasonable assistance to someone who is injured or ill. The best way to protect both your employees and your organization is to provide certified, hands-on training. This gives your team the skills and confidence to act correctly and decisively, which is what matters most in an emergency.
Do I need special training to use these kits, or are the instructions enough? While the instructions included are a great guide, they are not a substitute for proper training. In a high-stress situation, you won’t have time to read and process a manual. You’ll rely on what you know and have practiced. Hands-on training builds the muscle memory needed to apply a tourniquet or pack a wound correctly under pressure. Think of the instructions as a backup, but make formal training your primary plan.
How often do I need to check and replace the supplies in our kits? A good rule of thumb is to inspect your kits at least once a month and immediately after any use. During your check, make sure all supplies are present and note the expiration dates on sterile items like gauze and chest seals. A simple log can help you track these dates and plan for replacements ahead of time. Consistent checks ensure your kit is always fully stocked and ready to go when you need it most.
Disclaimer for information purposes only:
The information provided on this website is intended for general educational and informational purposes only. It is not medical advice and should not be used as a substitute for professional diagnosis, treatment, or care. Always consult a qualified healthcare or medical professional regarding any health-related questions or concerns.
While we strive to ensure the information shared is accurate and up to date, no guarantees are made regarding completeness, accuracy, or applicability to any individual situation. Use of this content is at the reader’s sole discretion and risk.
This website is part of the Response Ready family of emergency preparedness and training resources, including CPR & first aid training and compliance services, AED sales and program support, AED program management software, and medical oversight solutions provided through our affiliated platforms:
• AEDLeader.com
• ResponseReady.com
• AEDTotalSolution.com
• MDSIMedical.com
By accessing or using this website, you agree to release, indemnify, and hold harmless the website owners, authors, contributors, and affiliated entities from any claims, losses, damages, or liabilities arising from the use or reliance on the information presented.

Anastasios Giannikas
Anastasios Giannikas
Save Lives with the Right AED Today
Buy Trusted AEDs from AED Leader Today!
Get Certified in CPR and Make a Difference!