We install smoke detectors and keep fire extinguishers handy, but are you prepared for an emergency that can turn fatal in minutes? Uncontrolled bleeding is a leading cause of preventable death after an injury, often happening long before paramedics can arrive. This is where you can make a life-saving difference. Knowing the right bleeding control methods transforms you from a bystander into an immediate responder. This guide will walk you through the essential supplies for a bleeding control kit and, more importantly, the basic techniques you need to use those supplies with confidence until help arrives.
Key Takeaways
- Master the fundamentals of bleeding control: Your first priorities are to call 911 and apply firm, direct pressure to the wound. For severe bleeding on an arm or leg that doesn’t stop with pressure, a commercial tourniquet is the correct next step.
- Know the signs of shock: A person who has lost a lot of blood may go into shock. Watch for key symptoms like cool, clammy skin, confusion, or a weak and rapid pulse, and help the person lie down and stay warm until help arrives.
- Prepare with training and tools: Reading is a good start, but hands-on training builds the confidence to act correctly in a crisis. Assembling a dedicated bleeding control kit with sterile dressings and a tourniquet ensures you have the right supplies ready.
Why Bleeding Control Is a Critical Life Skill
When you think of life-saving skills, CPR often comes to mind. But what about severe bleeding? In emergencies from car accidents to workplace incidents, controlling bleeding is just as crucial. It’s the skill that bridges the gap between an injury and the arrival of medical help. Knowing what to do in those first moments can mean the difference between life and death. This isn’t about becoming an expert; it’s about empowering yourself with fundamental knowledge to protect your family, coworkers, and community. Being prepared is a shared responsibility.
The Numbers Behind the Urgency
The importance of bleeding control isn’t anecdotal; it’s backed by statistics that show why immediate action is vital. Understanding the numbers frames the urgency and proves why waiting for paramedics isn’t always enough. When an artery is severed, the situation becomes critical instantly. Data from trauma centers shows that bystanders who act confidently play an indispensable role in the chain of survival. These aren’t just figures; they represent real people where a trained individual could have changed the outcome.
A Matter of Minutes
After a severe injury, a person can bleed to death in as little as five minutes. That’s often faster than first responders can arrive, especially in a chaotic or remote location. This short timeframe makes bystander intervention critical. The actions taken in the first few minutes directly impact a victim’s chance of survival. Calling 911 and waiting is a passive response. Learning to apply direct pressure, pack a wound, or use a tourniquet transforms you into an immediate responder, preserving life until professional help takes over.
The #1 Cause of Preventable Trauma Death
According to the American College of Surgeons, uncontrolled bleeding is the number one cause of preventable death from trauma. Let that sink in: preventable. This means that with the right knowledge and tools, many of these deaths can be avoided. The initial injuries may not have been fatal, but the subsequent blood loss was. This fact was a catalyst for a national push to educate the public on bleeding control. Equipping people with this skill is a public health priority.
What Is the “Stop the Bleed” Initiative?
Recognizing the critical gap in public knowledge, a national awareness campaign called Stop the Bleed was launched to turn bystanders into lifesavers. The initiative was born from the collaborative efforts of government agencies and medical organizations following the Sandy Hook Elementary School tragedy. The goal is simple but powerful: to train and equip non-medical individuals to respond to severe bleeding emergencies. The program teaches simple, effective techniques that anyone can learn, empowering people to act decisively when faced with a life-threatening injury. It operates on the principle that the person next to a bleeding victim is the one most likely to save them.
A National Call to Action
The “Stop the Bleed” program is more than just a class; it’s a national call to action. It aims to make bleeding control training as common as CPR certification. The program teaches regular people how to recognize life-threatening bleeding and intervene by applying pressure, packing a wound, or using a tourniquet. Knowing how to stop bleeding can prevent death in emergencies, and this initiative provides the hands-on training needed to build that confidence. At CPR1.com, we offer courses that align with this national mission, providing the practical skills you need to become an immediate responder for your family, workplace, or community.
What Causes Severe Bleeding?
Severe bleeding can happen anywhere, at any time. While we often associate it with dramatic accidents, life-threatening blood loss can also result from common incidents at home or work. Understanding the different causes is the first step in knowing how to respond effectively. Most situations fall into one of three categories: major traumatic injuries, everyday accidents, or underlying medical conditions that increase bleeding risk. Each scenario requires a quick and confident response, which is why knowing the fundamentals of bleeding control is so important for everyone, from safety officers to parents.
Major Accidents and Traumatic Injuries
Major accidents are often what come to mind when we think of severe bleeding. These are high-impact events that cause significant trauma to the body. Think of car crashes, serious falls from a height, or accidents involving heavy machinery on a construction site. These incidents can cause massive external wounds, but they can also lead to dangerous internal bleeding when blunt force crushes or tears blood vessels inside the body. Injuries from violent acts, like deep knife wounds or gunshots, also fall into this category. In these cases, the damage is immediate and extensive, making a fast response absolutely critical to survival.
Everyday Injuries at Home or Work
You don’t need to be in a major catastrophe to face a bleeding emergency. Many serious injuries happen during routine activities. At home, a deep cut from a kitchen knife or a mishap with a power tool in the garage can slice through an artery. In the workplace, an accident in a warehouse or restaurant kitchen can happen in an instant. While these wounds might seem less dramatic than those from a major crash, they can be just as deadly if not controlled quickly. These everyday situations underscore why having a well-stocked first aid kit and the right training is essential for every home and business.
How Medical Conditions Increase Bleeding Risk
While less common than traumatic injuries, certain medical conditions can also lead to severe bleeding. Some people have inherited bleeding disorders, like hemophilia, that prevent their blood from clotting properly. Others take anticoagulant medications, often called blood thinners, to manage heart conditions, which puts them at a higher risk for uncontrolled bleeding even from a minor injury. In these cases, a small cut or a simple bump can become a medical emergency. If you are a caregiver or work in a healthcare setting, being aware of these conditions is a key part of providing a safe environment and responding appropriately.
What to Do First to Control Bleeding
When someone is bleeding, every second counts. Your ability to act quickly and calmly can make a life-or-death difference while you wait for professional help to arrive. It’s easy to feel overwhelmed in a situation like this, but remember that the goal isn’t to be a perfect medical professional. It’s to take a few simple, effective steps to manage the situation and give the injured person the best possible chance.
Before you do anything else, take a deep breath. The first steps are all about assessing the situation, ensuring your own safety, and getting help on the way. Think of it as setting the stage for a successful intervention. You’ll need to identify where the bleeding is coming from, call for backup, and then focus on the most important job: stopping the blood loss. We’ll walk through exactly what to do, starting with a simple framework to guide your actions.
Start with the ABCs of Bleeding Control
In an emergency, it’s helpful to have a simple mental checklist. For bleeding control, a great one to remember is the ABCs. This framework helps you prioritize your actions when things feel chaotic.
A is for Alert. Your first action should always be to call 911 or tell someone else to do it. Getting professional help on the way is the most critical step.
B is for Bleeding. Find the source of the bleeding. You may need to remove or cut away clothing to see the wound clearly. Look for the spot where blood is flowing or spurting from.
C is for Compress. Apply firm, steady pressure directly onto the wound. Use a clean cloth, bandage, or even your hands if you have nothing else. This direct pressure is the cornerstone of bleeding control techniques.
Other Simple Frameworks to Remember
The ABCs are a fantastic tool, but different frameworks click with different people. The key is to find a simple, memorable guide that you can recall under pressure, because what works for one person might not stick as well for another. Think of these next two frameworks as alternative mental checklists. They both cover the same core principles of bleeding control but package them in a slightly different way, focusing on slightly different aspects of the response. Take a look at both and see which one resonates most with you. Having a clear plan that you can access instantly is what matters most when you need to act fast.
The 4 D’s of Bleeding Control
The 4 D’s—Detect, Direct Pressure, Devices, and Don’t Dilute—offer a clear path for managing a bleeding emergency. First, Detect where the blood is coming from by exposing the injury. Next, apply firm Direct Pressure to the wound with a clean cloth or dressing. If direct pressure isn’t enough to stop severe bleeding on a limb, it’s time for Devices. This is when you would apply a commercial tourniquet above the wound. Finally, Don’t Dilute the wound by trying to wash it out; this can disrupt the body’s natural clotting process. Mastering the use of devices like tourniquets is best done with hands-on practice, which is a core part of any good Stop the Bleed course.
The 3 P’s of Bleeding Control
If you prefer something even more streamlined, remember the 3 P’s: Pressure, Pad, and Position. This framework focuses on the most immediate actions you can take. Start with Pressure, applying it directly to the wound. Use a Pad—a sterile dressing, a clean cloth, or any absorbent material you have—to help control the bleeding and protect the injury. Finally, if the wound is on an arm or leg and it doesn’t cause the person more pain, Position the limb so it’s elevated above their heart. This uses gravity to help reduce blood flow to the area. The 3 P’s are a simple yet powerful reminder of the foundational steps in basic first aid for bleeding.
Always Put Your Safety First
You can’t help anyone if you get hurt yourself. Before you rush in, take a moment to make sure the area is safe. Check for any hazards like traffic, fire, or downed power lines. Once you’ve confirmed the scene is safe, your next priority is to protect yourself from bloodborne pathogens. If you have access to a first aid kit, put on a pair of disposable gloves. If you don’t have gloves, try to find something to use as a barrier, like a plastic bag or layers of cloth. Your safety is just as important as the person you are helping.
When Should You Call 911?
Calling 911 should be your immediate priority in any serious bleeding emergency. Don’t wait to see if the bleeding stops on its own. Emergency services can take an average of seven to ten minutes to arrive, and those minutes are critical.
Call 911 immediately if:
- The bleeding is severe, spurting, or won’t stop.
- The wound appears deep or is very large.
- You suspect there is internal bleeding (signs include bruising, swelling, or pain in the abdomen or chest).
- The person is showing signs of shock, such as feeling dizzy, weak, or confused.
When you call, stay on the line and follow the dispatcher’s instructions until help arrives.
How to Apply Direct Pressure
When someone is bleeding, your first and most important job is to apply direct pressure. This simple action is often all it takes to control bleeding and give the body a chance to start forming a clot. It’s a foundational skill that works for everything from a kitchen mishap to a more serious injury. The goal is to apply firm, steady pressure directly onto the source of the bleeding to slow the blood flow. Think of it like putting your finger over the end of a running garden hose; you’re manually stopping the flow.
Step 1: Find Clean Materials and Get Ready
Before you do anything, find something clean to place over the wound. A sterile gauze pad from a first aid kit is ideal, but a clean t-shirt or towel works in a pinch. This material acts as a barrier to help prevent infection. Once you have your cloth, help the injured person lie down if possible, as this can prevent fainting. If the wound is on an arm or leg, try to elevate the limb above the level of their heart. This simple step uses gravity to help reduce blood flow to the injury.
Step 2: How to Apply Pressure Correctly
With your clean cloth ready, place it directly over the wound. Use the palm of your hand to apply firm and continuous pressure. For a large wound, you may need both hands. The key is to hold that pressure without letting up. It can be tempting to lift the bandage to check if the bleeding has stopped, but don’t. Lifting the cloth can dislodge any clots that have started to form, restarting the bleeding. If blood soaks through the first layer, don’t remove it. Just add another cloth on top and keep applying firm pressure.
Using Your Body Weight for Firm, Constant Pressure
Applying enough pressure to stop severe bleeding is harder than it sounds, and your hands can get tired quickly, especially when you have to hold it for several minutes until help arrives. To maintain the firm, constant pressure needed for effective bleeding control, use your body weight, not just your arm strength. Position yourself directly over the wound with your shoulders above your hands. Keep your arms straight by locking your elbows and lean your body forward. This technique transfers your body weight through your arms and onto the wound, allowing you to apply much more pressure with less effort. This method is crucial because it ensures the pressure remains steady, giving the blood a chance to clot without interruption.
What Not to Do When Applying Pressure
Knowing what not to do is just as important as what to do. A common mistake is applying pressure too lightly; it needs to be firm and consistent to be effective. Another critical error is trying to remove an object stuck in the wound. An embedded object may actually be acting as a plug and preventing more severe bleeding, so leave it for medical professionals. Finally, avoid applying direct pressure to an eye injury or a serious head wound with a possible skull fracture. Learning how to handle these specific situations is a key part of any hands-on First Aid course.

Don’t Try to Clean a Severe Wound
It might feel counterintuitive, but when you’re dealing with a serious injury, you need to fight the urge to clean the wound. Your only priority is to stop the bleeding. Trying to wash the area or pick out debris wastes critical seconds and can dislodge any clots that are starting to form, making the bleeding worse. While you can gently remove clothing or any loose dirt on the surface to get a clear view of the injury, you should never try to clean the wound itself or poke around inside it. Leave that to the medical professionals. They will handle cleaning and disinfecting the wound properly in a hospital setting. Right now, your job is hemorrhage control, not hygiene.
This rule is especially true for impaled objects. If something is stuck in the wound—like a piece of glass, a nail, or a knife—do not remove it. As gruesome as it looks, that object may be plugging the damaged blood vessel and preventing a fatal amount of blood loss. Pulling it out could turn a manageable injury into an uncontrollable one. Instead, do your best to apply pressure around the object and use bulky dressings to hold it in place. This is one of those critical judgment calls where hands-on First Aid training really makes a difference, teaching you how to stabilize the situation without causing more harm.
When and How to Use a Tourniquet
A tourniquet is a powerful tool, but it’s reserved for the most serious emergencies. Its job is to completely stop blood flow to a limb to prevent life-threatening blood loss. Because it’s such a significant intervention, you should only use one when direct pressure has failed to control severe, rapid bleeding from an arm or leg. Think of it as the next critical step when nothing else is working.
Using a tourniquet correctly requires confidence and a clear head. While the steps are straightforward, the pressure of the moment can make them feel complicated. This is why hands-on practice in a controlled setting is so valuable. Formal training, like a Stop the Bleed course, gives you the muscle memory and knowledge to act decisively when every second counts. In the sections below, we’ll walk through the signs that a tourniquet is needed, how to apply one, and the essential safety rules to follow until help arrives.
Is a Tourniquet Necessary? Look for These Signs
Knowing when to apply a tourniquet is just as important as knowing how. This tool is only for life-threatening bleeding from a limb that you can’t stop with direct pressure. If you’ve been applying firm, continuous pressure and the bleeding isn’t slowing down, it’s time to consider a tourniquet.
Look for these signs of a severe hemorrhage: blood that is spurting out of the wound, soaking through bandages one after another, or pooling quickly on the ground. According to safety experts, if direct pressure can’t control severe bleeding from an arm or leg, you may need to use a tourniquet. Remember, tourniquets are only for arms and legs. Never place one on the neck, head, or torso.
Your Step-by-Step Guide to Applying a Tourniquet
When you’ve made the decision to use a tourniquet, act quickly and with purpose. If you have a commercially made tourniquet from a bleeding control kit, use it. Improvised tourniquets using belts or cloth are far less effective and can cause more harm than good.
Place the tourniquet high up on the injured limb, about two to three inches above the wound. Never place it directly over the wound or on a joint like an elbow or knee. Pull the strap tightly and secure it. Next, twist the windlass (the rigid rod) until the bright red bleeding stops. The person will likely feel significant pain, but this step is essential to saving their life. Once the bleeding has stopped, lock the windlass in place so it can’t unwind.
Tourniquet Safety: Why Timing Is Everything
Once the tourniquet is on and the bleeding is controlled, there are a few rules you must follow. First, note the time. Use a marker to write the time you applied the tourniquet directly on the device or on the person’s forehead (for example, “T 10:15 AM”). This information is critical for the medical professionals who will take over.
Second, do not loosen or remove the tourniquet. Once it’s on, it stays on until a doctor or paramedic can safely remove it. Releasing the pressure can restart the bleeding and put the person back in immediate danger. Finally, make sure the tourniquet remains visible. Don’t cover it with a blanket or clothing. First responders need to see it right away to understand the situation and provide the right care for these severe wounds.
Important Tourniquet Warnings
Applying a tourniquet is a major decision, and it comes with a few non-negotiable rules. These aren’t just suggestions; they are critical warnings that ensure the tool is used safely and effectively. Understanding these points before you ever face an emergency will help you act with clarity and confidence. The two most important things to remember are to always use a proper, commercially made device and to be prepared for the intense pain it will cause. Getting these two things right is essential for a successful outcome.
Never Use a Homemade Tourniquet
In a crisis, it’s tempting to grab whatever is nearby, but you should never use a belt, rope, or strip of cloth as a makeshift tourniquet. It’s crucial to use a commercially made tourniquet from a bleeding control kit. Improvised tourniquets are far less effective and can cause more harm than good. They rarely generate enough force to stop arterial bleeding and can damage nerves and muscle tissue without actually controlling the hemorrhage. A proper tourniquet is engineered with a wide band and a windlass rod that provides the mechanical advantage needed to apply precise, life-saving pressure. Using anything else is a dangerous gamble that is unlikely to work.
Prepare the Person for the Pain
When you apply a tourniquet correctly, it will hurt. A lot. The person will likely feel significant pain when the tourniquet is applied, but this step is essential to saving their life. It’s important to be direct and honest with them. Tell them, “This is going to be very painful, but I have to do it to stop the bleeding.” Preparing them for the shock of the pain can help them endure it. As the rescuer, you need to be mentally prepared to cause this pain. Hesitating because you’re afraid of hurting them could be a fatal mistake. Remember that the pain is a sign the tourniquet is working, and you are doing exactly what is needed to give them a chance to survive.
Bleeding Control Methods for Different Wounds
Not all bleeding is the same, and your response shouldn’t be either. A minor scrape on the knee requires a different approach than a deep puncture wound. Understanding the type of injury you’re dealing with is the first step toward providing the right care. Knowing how to react can make a huge difference in the outcome, helping you stay calm and effective until professional help arrives. Let’s walk through the proper techniques for the most common types of wounds you might encounter.
What to Do for Deep Cuts and Punctures
Deep cuts and punctures can be alarming, but your focused action is key. The first and most important step is to apply firm, direct pressure to the wound using a clean cloth or sterile dressing. If the bleeding is severe and doesn’t slow with direct pressure, you may need to apply pressure to the main artery supplying blood to the limb. This involves pressing the artery against the bone to reduce blood flow. For these types of injuries, it’s crucial to call 911 immediately. Proper training in a First Aid/CPR/AED course can give you the hands-on practice needed to handle these high-stress situations with confidence.
How to Pack a Wound
For deep wounds, especially in areas where a tourniquet can’t be used like the groin or shoulder, simply pressing on the surface isn’t enough. This is where wound packing comes in. The goal is to apply pressure directly to the source of the bleeding inside the wound cavity. Start by taking sterile gauze or a clean cloth and systematically pushing it into the wound. Don’t just lay it on top; you need to pack the material tightly into the space until you can’t fit any more in. Once the wound is packed full, apply firm, direct pressure with both hands on top of the packing. Hold this pressure continuously until emergency responders take over. This is a critical skill covered in hands-on training that builds the confidence to act correctly.
How to Treat Scrapes and Minor Cuts
While less severe, scrapes and surface cuts still need proper attention to prevent infection and control bleeding. Start by applying gentle pressure with a clean cloth to stop the flow of blood. This simple action helps the body’s natural clotting process begin. Once the bleeding has stopped, you should clean the area carefully with mild soap and water, then pat it dry. Applying an antibiotic ointment and covering the wound with a sterile bandage will help protect it as it heals. Keeping a well-stocked workplace safety kit ensures you always have the necessary supplies on hand for these everyday injuries.
What to Do with Embedded Objects
If you encounter a wound with an object still embedded in it, like a piece of glass or a nail, your instinct might be to pull it out. Resist that urge. The most important rule is to leave the object in place. It may be acting as a plug, preventing catastrophic bleeding, and removing it could cause far more damage. Instead, your job is to control the bleeding around the object by applying pressure to the surrounding area. Try to stabilize the object with bulky dressings to prevent it from moving and call 911 immediately. This is a critical skill covered in hands-on Stop the Bleed courses.
What to Do If the Bleeding Won’t Stop
Sometimes, direct pressure isn’t enough to control a severe wound. This is a critical moment where your next actions can make all the difference. Knowing how to recognize when a bleed is out of control and what to do next is a vital skill that can save a life. If you’ve applied firm, steady pressure for several minutes and the situation isn’t improving, it’s time to move on to more advanced techniques while you wait for professional help to arrive. Stay as calm as you can and remember that your goal is to bridge the gap until paramedics are on the scene.
How to Tell If Bleeding Isn’t Under Control
It’s important to quickly recognize when your initial efforts aren’t working. The most obvious sign is blood that soaks through bandages or cloths one after another without slowing down. If the blood is spurting or flowing continuously from the wound despite direct pressure, the bleeding is not under control. In these life-threatening situations, you need to escalate your response immediately. This is the point where you should consider using a tourniquet if the wound is on a limb. Don’t wait until the person has lost a large amount of blood; acting decisively is key.
What to Do Next for Uncontrolled Bleeding
When direct pressure fails on an arm or leg wound, your next step is to apply a tourniquet. A commercial tourniquet is best, but you can improvise if needed. Place it two to three inches above the wound, avoiding joints, and tighten it until the bleeding stops. For wounds on the neck, shoulder, or groin where a tourniquet can’t be used, you can pack the wound with clean gauze or cloth and continue applying firm pressure. Learning these skills in a hands-on Stop the Bleed course gives you the confidence to act correctly under pressure.
How to Help While Waiting for Paramedics
While you manage the bleeding, make sure someone has called 911. Keep the injured person lying down, calm, and as still as possible to prevent further injury and slow blood flow. If you can, try to keep them warm with a blanket or jacket to help prevent shock. When paramedics arrive, be ready to tell them what happened, how long the person has been bleeding, and exactly what steps you’ve taken, including when you applied a tourniquet. Your clear communication helps them take over quickly and effectively. This is a core skill covered in any First Aid and CPR certification.
Keep the Person Still and Calm
Your calm demeanor can be incredibly reassuring to an injured person. Once you have the bleeding under control, focus on keeping them as comfortable and still as possible. Have them lie down, which can help slow blood flow and reduce the risk of fainting. Speak to them in a calm, steady voice, letting them know that help is on the way. Movement can disrupt clots and increase bleeding, so encourage them to remain still. It’s also important to keep them warm to prevent shock, a life-threatening condition that can result from significant blood loss. Use a blanket, a coat, or whatever is available to cover them while you wait for paramedics to arrive.
Wash Your Hands After Providing Care
After the emergency has been handled and the person is in the care of medical professionals, your final responsibility is to yourself. It is absolutely essential that you thoroughly wash your hands with soap and water. Do this even if you wore gloves and don’t see any blood on your skin. This step is critical for protecting yourself from potential bloodborne pathogens and preventing the spread of infection. Taking a moment for this simple act of self-care ensures that in the process of helping someone else, you also keep yourself safe. Understanding these safety protocols is a key component of any certified workplace safety training program.
How to Recognize and Manage Shock
When someone loses a lot of blood, their body can go into shock. This is a life-threatening condition where the circulatory system can’t get enough oxygen-rich blood to vital organs like the brain and heart. Even if you’ve managed to slow the bleeding, you must watch for signs of shock and take immediate steps to manage it while you wait for emergency responders. Recognizing shock is a critical skill covered in any comprehensive First Aid/CPR/AED course, as prompt action can make a significant difference in the outcome. Managing shock is just as important as controlling the bleeding itself, so it’s essential to know what to look for and what to do.
What Are the Warning Signs of Shock?
Shock can develop quickly after an injury, so pay close attention to the person’s condition. Someone going into shock may not realize what’s happening, especially if they are confused or disoriented from the injury. You need to be their advocate and watch for the warning signs. Look for a combination of symptoms, as one sign alone may not indicate shock.
Key signs include:
- Weak, rapid pulse and shallow, rapid breathing
- Cool, clammy, or pale skin
- Confusion, anxiety, or dizziness
- A drop in blood pressure
- Blue or grayish tint to the lips or fingernails
- Nausea or vomiting
- Loss of consciousness
If you see these signs, assume the person is in shock and act immediately.
Positioning and Reassurance: Keeping Them Calm
Your goal is to keep the person calm and stable until medical help arrives. Start by helping them lie down flat on their back. If the injury is on an arm or leg and doesn’t cause more pain, gently elevate the limb above the level of their heart. This can help slow bleeding and improve blood flow to their vital organs. It’s also crucial to keep them as still as possible to prevent making the injury worse. Speak to them in a calm, reassuring voice. Let them know that help is on the way and that you are there to support them.
How to Position Someone for Shock
Once you’ve identified the signs of shock, your main goal is to keep the person stable and calm. The first step is to help them lie down flat on their back. This position is crucial because it helps maintain blood flow to their vital organs, like the brain and heart. If they don’t have any obvious injuries to their legs, hips, or spine, you can gently raise their feet about 12 inches to further encourage blood to return to their core. It’s also essential to keep them as still as possible, as any movement could worsen their injuries. These simple but effective steps are a key part of managing shock and can make a significant impact while you wait for professional help to arrive.
Simple Steps to Keep Them Warm and Conscious
A person in shock often has trouble regulating their body temperature. You can help by covering them with a blanket, coat, or anything else available to keep them warm and prevent shivering, which uses up precious energy. Loosen any tight clothing, like a collar or a belt, to make them more comfortable. Do not give the person anything to eat or drink, even if they ask for water. This could cause them to choke or vomit, creating further complications, especially if they need surgery later. Continue to monitor their breathing and consciousness while you wait for paramedics.
How to Build Your Own Bleeding Control Kit
Having the right tools on hand can make all the difference in a bleeding emergency. While a standard first aid kit is great for minor cuts, a dedicated bleeding control kit contains specific items for stopping severe blood loss quickly. You can buy a pre-assembled kit or build your own to keep in your car, home, or workplace. Putting a kit together is a proactive step that prepares you to act confidently when every second counts. Let’s walk through the essential items you’ll want to include.
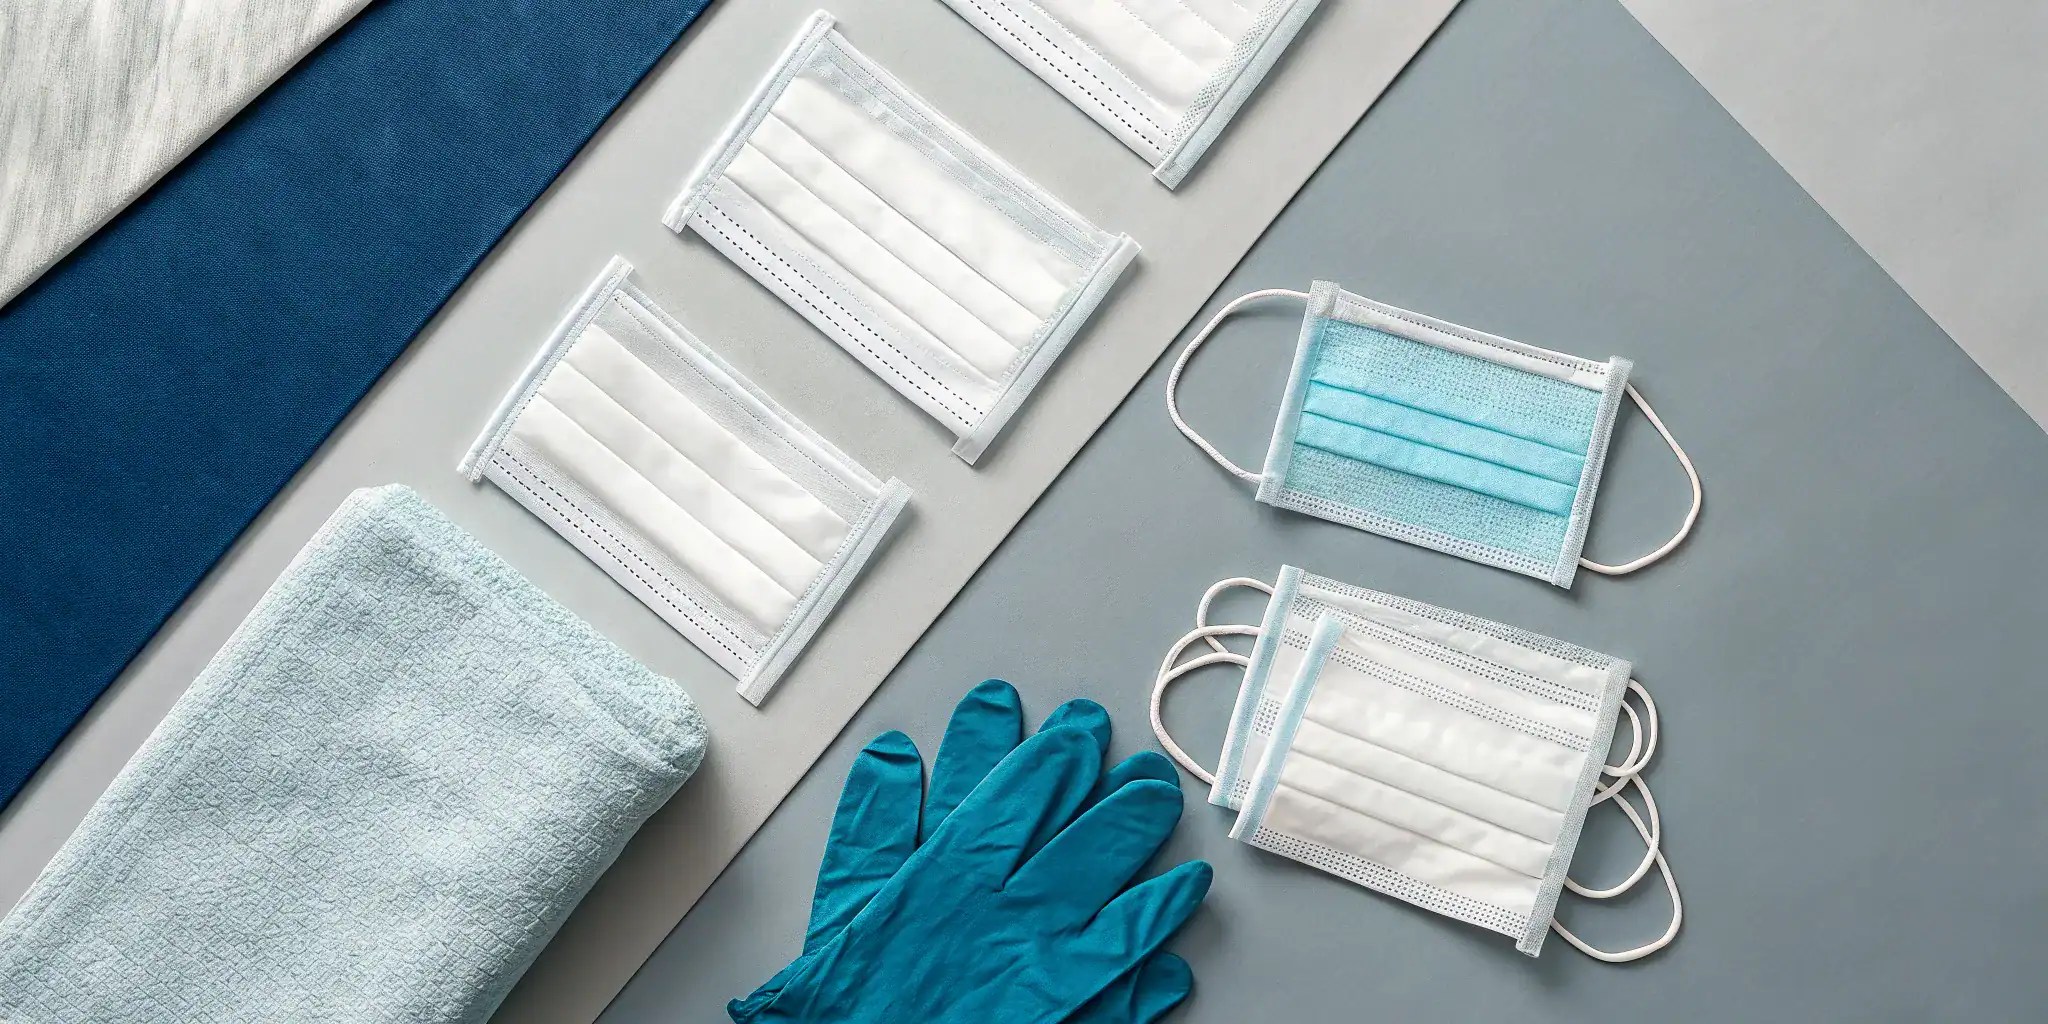
Must-Have Dressings and Bandages
Think of dressings and bandages as your first line of defense. Their main job is to cover a wound and help you apply the direct, steady pressure needed to stop the flow of blood. Your kit should include sterile gauze pads of various sizes and roller bandages to hold them in place. When you respond, cover the wound with a clean dressing and press down firmly. If blood soaks through the first layer, don’t remove it. Just add another first aid dressing on top and keep applying pressure. Removing the bottom layer would disrupt any clots that are starting to form.
Hemostatic Dressings for Faster Clotting
For severe bleeding that doesn’t stop with pressure alone, a hemostatic dressing can be a true lifesaver. Unlike standard gauze, these advanced dressings are infused with special agents that actively help your blood clot. Think of them as a way to supercharge the body’s natural healing process right at the source of the injury. They work by rapidly absorbing water from the blood, which concentrates the natural clotting factors and helps seal the wound much faster. The American Red Cross has reviewed these agents and found that hemostatic dressings are effective in controlling severe bleeding when compared to regular gauze. While they sound high-tech, many are designed for use by non-medical responders, making them an excellent addition to any serious bleeding control kit.
Why You Need Tourniquets and Pressure Dressings
For severe bleeding on an arm or leg that direct pressure can’t control, a tourniquet is a critical tool. A commercial tourniquet is designed to be applied above the wound to stop blood flow completely. It’s important to know that using one correctly requires training, as improper application can cause further harm. That’s why hands-on practice in a course like Stop the Bleed is so valuable. Another useful item is a pressure dressing, which is an all-in-one bandage that uses a built-in pressure bar to apply focused pressure, making it easier to maintain than manual pressure alone.
Specialized Equipment for Severe Injuries
While tourniquets and pressure dressings are the workhorses of bleeding control, some severe injuries require even more specific tools. For deep wounds in areas where a tourniquet can’t be used, like the torso, you need different equipment to manage the injury effectively. These specialized items are designed for unique, life-threatening situations and are often included in more advanced trauma kits. Knowing what they are and how they work is a key part of being prepared for the worst-case scenario, moving beyond basic first aid into a higher level of readiness.
Chest Seals for Puncture Wounds to the Torso
A puncture wound to the chest is uniquely dangerous because it doesn’t just bleed—it can let air into the chest cavity, which can collapse a lung. This life-threatening condition is known as a tension pneumothorax. A chest seal is a specialized dressing designed to prevent this by creating an airtight barrier over the wound. As medical experts explain, chest seals are critical for treating wounds from stabbings or gunshots. They are engineered for fast, simple application and stick securely to the skin, even in chaotic conditions. Including a chest seal in your kit significantly enhances your ability to respond to penetrating chest trauma, and learning the proper technique is a key component of advanced training like a Stop the Bleed course.
Putting It All Together: Your Go-To Kit
Once you have your supplies, put them together in a durable, clearly marked bag. A complete kit should contain medical gloves, trauma shears for cutting away clothing, assorted sterile dressings, roller bandages, and at least one commercial tourniquet. Keep your kit somewhere easy to grab, like under a car seat or in a central location at your office. Remember to check your kit a couple of times a year to make sure the supplies haven’t expired or been used. Having a well-stocked bleeding control kit is the first step; knowing how to use everything inside is what truly prepares you to save a life.
Essential Tools: Trauma Shears and a Permanent Marker
Beyond the bandages and tourniquets, two simple tools are incredibly important in a bleeding emergency: trauma shears and a permanent marker. Trauma shears are specifically designed to cut through tough materials like denim, leather, and seatbelts quickly, allowing you to expose a wound without causing further injury. You can’t treat what you can’t see, and these make that first step fast and safe. The permanent marker has one critical job: to write down the time a tourniquet was applied. This piece of information is vital for medical professionals when they take over. Once a tourniquet is on, you should write the time directly on the tourniquet itself or on the person’s forehead. These small details make a huge difference in a high-stress situation.
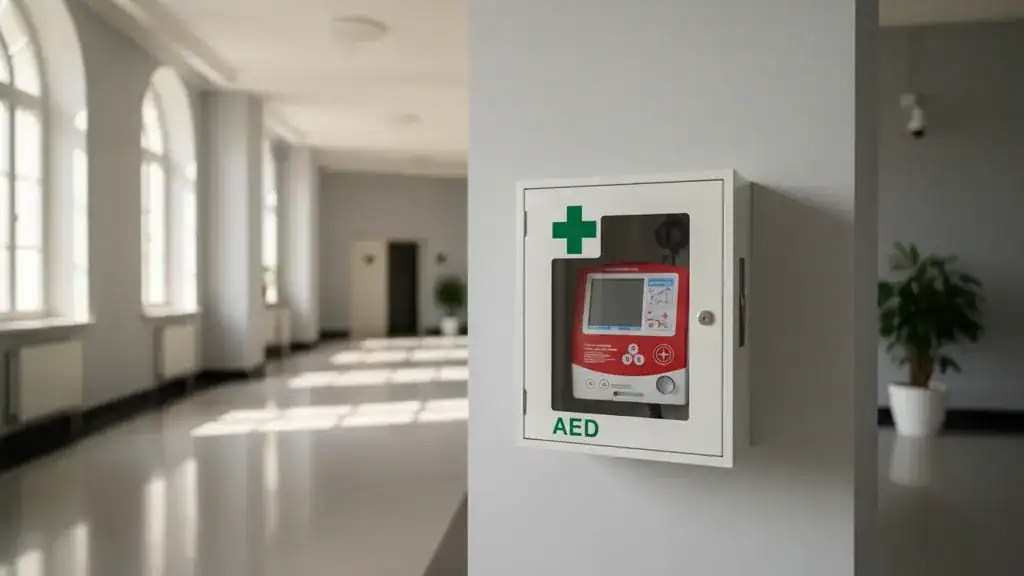
Where to Find Public Bleeding Control Kits
Just like AEDs, public bleeding control kits are becoming more common in high-traffic areas like airports, schools, stadiums, and large office buildings. These wall-mounted kits are designed for bystander use before professional help arrives. While it’s great to know they exist, you shouldn’t rely solely on finding one in an emergency. The best way to be prepared is to have your own kit. You can build your own to keep in your car, home, or workplace, ensuring you have the necessary supplies no matter where you are. Having a well-stocked kit is the first step; knowing how to use everything inside is what truly prepares you to save a life.
Checking Public AED Cabinets
A great pro-tip for locating a public bleeding control kit is to look for an AED cabinet. Many organizations now store their bleeding control kits right alongside their defibrillators, as both are used in life-threatening emergencies. The next time you’re at the gym, your office, or a public venue, take a moment to spot the wall-mounted AED cabinet. You might see a second, smaller kit labeled “Bleeding Control” or “Stop the Bleed” right next to it or even inside the same cabinet. Making a mental note of these locations is a simple, proactive step that makes you more aware of your surroundings and better prepared to act if an emergency ever happens.
Why Professional Training Makes All the Difference
Reading about bleeding control techniques is an excellent first step, but it’s the hands-on training that truly prepares you to act decisively in a crisis. When adrenaline is high and every second counts, you won’t have time to second-guess your actions. Professional training helps build the muscle memory and mental clarity needed to perform these life-saving skills correctly and without hesitation.
An experienced instructor can guide you through realistic scenarios, correct your form, and answer questions you might not have even thought to ask. This structured learning environment moves you from simply knowing what to do to having the confidence to actually do it. It’s the difference between watching a video about swimming and actually feeling comfortable in the water. Professional courses are designed to empower you, ensuring you are not just a bystander but a capable first responder for your family, colleagues, or community.
Build Real Confidence with Hands-On Practice
It’s one thing to read instructions on how to apply a tourniquet; it’s another to physically tighten one on a practice limb until the simulated bleeding stops. This is where hands-on practice becomes invaluable. As experts note, receiving practical training in bleeding control techniques can greatly help anyone be better prepared to respond during a life-threatening emergency. In a professionally led First Aid course, you get to feel the right amount of pressure to apply and learn how to adapt to different situations. An instructor provides immediate feedback, ensuring you build correct habits from the start, so your response becomes second nature when it matters most.
The Value of Certification and Staying Current
Beyond building personal confidence, completing a formal course provides you with a certification that validates your skills. Programs like Stop the Bleed teach everyday people how to manage severe bleeding through structured training and specialized kits. For many professionals and businesses, this type of certification is also a key part of meeting workplace safety requirements and ensuring OSHA compliance. Learning these steps in a certified course makes you a more valuable and reliable person in your community, fully prepared to help in a crisis. It’s a clear signal to your employer, family, and peers that you have the training to be counted on.
Related Articles
Frequently Asked Questions
What if I don’t have a first aid kit or gloves? Your safety is always the first priority, but a lack of supplies shouldn’t stop you from helping. If you don’t have gloves, try to create a barrier between you and the blood using layers of clean cloth or even a plastic bag over your hand. In a pinch, any clean, absorbent material like a t-shirt or a towel can be used to apply pressure directly to the wound. The most important thing is to act quickly to stop the bleeding.
I’ve heard tourniquets can cause someone to lose a limb. Is it safe for me to use one? This is a common concern, but it’s important to put it in perspective. A tourniquet is a last resort used only for life-threatening bleeding from an arm or leg that direct pressure cannot control. In these situations, the choice is between saving a life and saving a limb. When applied correctly and when medical help is on the way, a tourniquet is a life-saving tool. The risk of limb damage is far less than the certainty of death from uncontrolled blood loss.
How can I tell the difference between someone who is just scared and someone who is going into shock? It can be tricky because fear and shock share some signs, like rapid breathing. The key difference is in the physical symptoms. A person in shock will often have cool, clammy, and pale skin, along with a weak but rapid pulse. They may also seem confused or dizzy. While a scared person might be anxious, they typically won’t show those distinct physical changes. If you see those signs of shock, you should treat it as a medical emergency.
What’s the most common mistake people make when trying to control bleeding? One of the most frequent mistakes is not applying enough pressure or not holding it consistently. It’s natural to want to lift the bandage to check on the wound, but doing so can dislodge any clot that has started to form, which restarts the bleeding. Apply firm, steady pressure and hold it. If blood soaks through your first cloth, simply add another one on top and continue pressing down firmly.
Can I get in trouble if I try to help and make a mistake? Most states have Good Samaritan laws designed to protect people who provide reasonable assistance to those who are injured or ill. As long as you act in good faith and to the best of your ability, these laws generally shield you from liability. The goal is to encourage people to help in an emergency without fear. Taking a certified first aid course is the best way to ensure you have the knowledge to act confidently and correctly.