We often think of emergencies as things that happen to other people, in other places. But the reality is that most cardiac arrests occur at home. The person you may one day need to save is likely to be a parent, a partner, or a child. In that moment, waiting for an ambulance to arrive can feel like an eternity. Your ability to act immediately is their best hope. This guide is about preparing you for that moment. We will walk you through the seven fundamental steps of CPR, giving you the knowledge to protect the people you care about most. It all starts with knowing what to do after ensuring the scene is safe.
CPR saves lives. When someone’s heart stops, performing CPR immediately can double or triple their chances of survival. Here’s a quick summary of the 7 key steps you need to know to perform CPR effectively:
- Check Safety and Response: Ensure the area is safe. Check if the person is responsive and breathing normally.
- Call 911: Contact emergency services and provide clear details about the situation.
- Check the Airway: Open the airway using the head-tilt/chin-lift method and look for normal breathing.
- Give Breaths: Provide rescue breaths if the person isn’t breathing. Ensure proper seal and chest movement.
- Do Chest Compressions: Perform compressions at 100–120 beats per minute, pressing down 2–2.4 inches for adults.
- Repeat CPR Cycles: Continue 30 compressions followed by 2 breaths until help arrives or the person recovers.
- Use an AED: If available, follow the device’s instructions to deliver a shock and resume CPR.
Fast action is critical. Brain damage can begin within 3 minutes of no blood flow. Learn these steps, get certified, and stay prepared to save a life.
Why Bystander CPR is Critical
Knowing the steps to perform CPR is one thing, but understanding *why* your immediate action matters can be the motivation you need to step in during a crisis. When a person experiences sudden cardiac arrest, their heart stops beating effectively, and blood flow to the brain and other vital organs ceases. The clock starts ticking immediately. For every minute that passes without CPR, the chance of survival drops significantly. You, as a bystander, are the crucial bridge between the moment of collapse and the arrival of professional medical help. Your actions can literally determine the difference between life and death, making bystander intervention one of the most powerful tools in emergency medicine.
The Stark Reality of Cardiac Arrest Statistics
The numbers don’t lie, and they paint a very clear picture of urgency. Most cardiac arrests—nearly 3 out of 4—happen at home, meaning the person you might need to save is likely a family member or loved one. In these moments, waiting for an ambulance isn’t enough. According to research, “immediate CPR can double or triple survival chances after cardiac arrest.” When CPR is started within the first two minutes, the person has an 81% higher chance of surviving and a 95% lower risk of brain damage. This statistic highlights your critical role. By starting chest compressions right away, you keep oxygenated blood flowing to the brain, preventing irreversible damage and giving that person their best possible shot at a full recovery.
Key Emergency Frameworks to Know
In the middle of an emergency, it’s easy to feel overwhelmed and for your mind to go blank. That’s why having a simple, memorable framework to fall back on is so important. Instead of trying to recall a long list of individual steps, these mental models give you a clear, structured path to follow. They help you organize your thoughts, prioritize your actions, and move forward with confidence when every second counts. Knowing these frameworks can help you stay calm and focused, ensuring you provide the most effective help possible. Think of them as your mental cheat sheet for managing a crisis before professional responders arrive on the scene.
The Chain of Survival
One of the most effective frameworks used by professionals is the “Chain of Survival.” As its name suggests, it’s a series of actions that, when linked together, give a person the greatest chance of surviving a cardiac arrest. Each link is as critical as the next. The chain includes: early recognition of the emergency and calling 911, early CPR with an emphasis on chest compressions, rapid defibrillation with an AED, effective advanced life support from paramedics, and integrated post-cardiac arrest care at a hospital. As a bystander, you are responsible for the first few, and arguably most critical, links in this chain. Your ability to act as a vital link strengthens the entire system of care.
Check, Call, Care: A Simple Action Plan
If the Chain of Survival feels like a lot to remember, there’s an even simpler framework taught by the American Red Cross: Check, Call, Care. It’s a straightforward action plan for any emergency. First, **Check** the scene for safety, then check the person for responsiveness and breathing. Is the area safe for you to enter? Is the person conscious? Next, **Call** 911 or tell someone else to do it. This step is critical for getting professional help on the way as quickly as possible. Finally, **Care**. Begin CPR if the person is unresponsive and not breathing normally, or provide other first aid as needed. These three emergency action steps provide a clear and simple sequence to follow, helping you stay focused and effective.
Overcoming the Fear to Act
It’s completely normal to feel a surge of fear or hesitation when faced with a real emergency. Thoughts like, “What if I do it wrong?” or “What if I hurt them?” are common. This fear of making a mistake can be paralyzing, causing some people to do nothing at all. But it’s important to understand that these fears, while valid, can be managed. The key is to replace that uncertainty with knowledge and confidence. Understanding the legal protections in place for rescuers and internalizing the fact that any attempt to help is better than none can empower you to push past the fear and take life-saving action when it matters most.
Understanding Good Samaritan Laws
One of the biggest worries for bystanders is the fear of legal trouble. The good news is that every state has laws in place to protect you. These are called “Good Samaritan laws,” and they are designed to shield people who provide reasonable assistance to those who are injured, ill, or in peril. As long as you act in good faith and within the scope of your training, these laws protect people who help in emergencies from being sued. The purpose of these laws is simple: to encourage everyday people to help one another without hesitation. Knowing that the law is on your side can give you the peace of mind to step forward and provide critical aid when someone’s life is on the line.
Why Doing Something is Better Than Doing Nothing
Many people hesitate to perform CPR because they’re afraid of causing injury, like breaking a rib, or simply doing it incorrectly. But here is the most important thing to remember: a person in cardiac arrest is clinically dead. Without intervention, their situation will not improve. Your actions can only help. An attempt at CPR, even if it’s not perfect, circulates oxygenated blood and gives that person a chance to survive—a chance they would not have otherwise. The risk of inaction is certain death, while the risk of action is a chance at life. Getting certified through a hands-on course from a provider like CPR1.com is the best way to build the muscle memory and confidence you need to act decisively and effectively.
Step 1: Assess the Scene and Check for a Response
How to Ensure the Scene is Safe
Before stepping in to help, take a moment to evaluate the surroundings for any risks. Be on the lookout for dangers such as:
- Moving traffic near a car accident
- Exposed electrical wires or live equipment
- Unstable buildings or machinery
- Aggressive individuals or escalating situations
- Standing water that could be electrically charged
“Emergency responders will usually tell you that the best course of action if you witness or come across a car accident is to pull over at a safe distance, contact emergency services and stay in your car until they arrive.” – DefibsPlus
Make sure all power sources are turned off and confirm that any machinery in the area is deactivated. Only approach once you’re confident the scene is safe. After ensuring safety, check if the person in need is responsive.
How to Check if Someone is Responsive
Approach the person from the front, gently tap their shoulder, and ask, “Are you okay?” Take no more than 10 seconds to check for normal breathing.
- If there’s no response and breathing is abnormal or absent, start CPR right away.
- If the person is unresponsive but breathing normally, place them in the recovery position while waiting for emergency help.
Quick action is crucial when there’s no response and breathing isn’t normal – begin CPR immediately.
Checking an Infant for Responsiveness
Checking on an infant requires a gentler approach than you would use for an adult. Instead of shaking their shoulder, firmly tap the bottom of their foot and call their name to see if they react. Watch for any movement, crying, or other signs of responsiveness. If the baby doesn’t respond and isn’t breathing normally, it’s time to act fast and begin CPR. Situations like these are exactly why specialized training is so important. Understanding the differences in care for infants and children is covered in our Adult & Pediatric First Aid/CPR/AED courses, giving you the confidence to help no matter the age.
Getting Consent to Provide Care
Before you provide any care to someone who is responsive, you need to get their permission. Introduce yourself, state that you are trained in first aid, and ask if you can help. If the person is a minor, you should ask a parent or guardian for consent if they are present. Most people will agree to help, but you must respect their wishes if they refuse. Forcing care on someone who has refused it can have legal consequences. This is a crucial step that protects both you and the person in need, ensuring that help is both wanted and legally sound before you proceed with any first aid measures.
What if the person is unresponsive and can’t give you permission? In these cases, the law provides for “implied consent.” This means you can assume that if the person *could* respond, they would want you to help them. This legal protection, often covered under Good Samaritan laws, is designed to encourage bystanders to act without fear. Getting certified ensures you understand these critical details, so you can provide care confidently and correctly when every second counts. Proper training removes the guesswork and empowers you to make the right decisions in a high-stress emergency.
Step 2: Call 911 for Help
What to Tell the 911 Dispatcher
Once you’ve ensured the scene is safe and confirmed the person is unresponsive, your next step is to call 911 immediately. Speak clearly and stay calm while providing the dispatcher with the necessary information to send help as quickly as possible. Here’s what to tell them:
- Location: Provide the exact address, nearby landmarks, or specific building details.
- Type of emergency: Mention the need for CPR and the person’s unresponsiveness.
- Condition: Share details about breathing, pulse, or visible injuries.
- Callback number: Give a phone number where you can be reached.
- Access instructions: Include details like gate codes or directions to reach the location.
“To expedite help, it’s best to be prepared with the following information and use a clear, calm voice. Take a deep breath while calling to focus and calm yourself.” – Sean Ewen, Founder and Executive Director of Allied Medical Training
Stay on the line with the dispatcher. They can guide you through T-CPR (Telecommunicator CPR) while emergency responders are on their way.
Put the 911 Operator on Speakerphone
Once you’re connected with the 911 dispatcher, put your phone on speaker and set it down nearby. This simple action is incredibly important because it frees your hands to begin chest compressions immediately. The dispatcher is trained to provide step-by-step instructions, a process known as Telecommunicator CPR (T-CPR). They can count compressions with you, remind you of the correct pace, and guide you on how to use an AED if one is available. Having that calm, professional voice guiding you can make a huge difference in a stressful moment. As the American Red Cross notes, staying on the line allows the dispatcher to provide this crucial support while help is on the way. This allows you to focus all your attention on the person who needs you, without fumbling with your phone.
Why You Need to Act Fast
In a CPR emergency, every second counts. Research highlights how response time directly affects survival rates:
| Response Time | Impact on Survival |
|---|---|
| Within 2 minutes | Up to 81% higher chance of survival with hospital discharge and 95% lower risk of brain damage |
| Within 10 minutes | 19% higher survival rate and 22% better brain protection compared to no CPR |
“Time is of the essence when a cardiac arrest occurs, and late interventions can be as ineffective as no intervention. Community education and empowerment are critical for us to save lives.” – Dr. Anezi Uzendu, Interventional Cardiologist at UT Southwestern Medical Center
If you’re alone with the victim, call 911 first – except in cases of drug overdose or drowning. In those situations, perform 2 minutes of CPR before making the call. With roughly 350,000 out-of-hospital cardiac arrests happening each year in the U.S., quick action can truly make the difference between life and death. Once you’ve called for help, check the victim’s airway and get ready to start CPR.
Step 3: Open and Clear the Airway
How to Perform the Head-Tilt, Chin-Lift
Opening the airway properly is key to performing effective CPR. The head-tilt/chin-lift method is the go-to technique for this. It helps keep the tongue from blocking the airway. Here’s how to do it:
- Place one hand on the person’s forehead and the other under the bony part of their chin – avoid pressing on soft tissue.
- Gently tilt their head back while lifting the chin forward. This helps clear the airway.
If the chest doesn’t rise after this, retilt the head and make sure there’s a good seal before giving another breath.
How to Check for Normal Breathing
Once the airway is open, check if the person is breathing. Take no more than 10 seconds to assess. Look for chest movement, listen for breathing sounds, and feel for air against your cheek. Watch out for signs of breathing trouble, such as:
- Faster breathing than normal
- Bluish lips or fingernails
- Grunting when exhaling
- Flaring nostrils
- Chest pulling inward with each breath
- Sweaty, cool, or clammy skin
- Wheezing or whistling noises
If there’s no normal breathing, start rescue breaths. If you feel resistance, recheck the head-tilt/chin-lift. If the chest still doesn’t rise, check for and remove any visible blockage in the airway.
Step 4: Give Two Rescue Breaths
A Step-by-Step Guide to Rescue Breaths
Rescue breaths provide the oxygen necessary to support life (your exhaled breath contains about 17% oxygen). For adults and older children:
- Tilt the head back and lift the chin to open the airway.
- Pinch the nose shut.
- Place your mouth over the victim’s mouth, creating a tight seal.
- Breathe steadily into their mouth for one second and watch for the chest to rise.
- Deliver a second breath.
- If the chest doesn’t rise, adjust the head position, ensure the seal is tight, and check for anything blocking the airway. Avoid sweeping the mouth blindly[26, 28].
For infants:
- Keep the head in a neutral position.
- Cover both the nose and mouth with your mouth.
- Breathe steadily for one second while checking for chest movement.
- Follow with a second breath.
Using a Barrier for Safer CPR
Using a protective barrier during rescue breathing helps lower the risk of disease transmission. Here are some common options:
| Device Type | Features | Average Cost |
|---|---|---|
| CPR Keychain Shield | Portable; includes gloves | $5.25 |
| Mini Face Shield | Compact and easy to carry | $3.40 |
| Adult/Child Mask | Offers professional-grade protection | $6.50–$11.50 |
When using a barrier device, follow the instructions provided by the manufacturer. Ensure the head-tilt/chin-lift is maintained, and stick to the standard 30:2 compression-to-breath ratio.
sbb-itb-20dcc80
Performing CPR on Adults vs. Infants
Step 5: Start Chest Compressions
After giving rescue breaths, performing chest compressions effectively is key to keeping blood circulating.
Getting Your Hand Placement Right
- For adults: Kneel next to the person and place the heel of your dominant hand in the center of their chest. Place your other hand on top, interlock your fingers (keeping them off the chest), straighten your elbows, and position your shoulders directly above your hands.
- For children: Use one hand in the center of the chest.
- For infants: Use two fingers placed in the center of the chest.
Proper Depth and Rate for Compressions
Delivering proper CPR can make all the difference.
- Ensure the person is on a firm, flat surface.
- Aim for 100–120 compressions per minute.
- For adults, press down about 2 inches (but no more than 2.4 inches).
- Let the chest fully rise between compressions, and avoid unnecessary pauses.
Need help keeping the rhythm? These songs match the ideal compression rate:
| Song Title | Artist | BPM | Notes |
|---|---|---|---|
| Stayin’ Alive | Bee Gees | 103 | A classic for CPR training |
| Dancing Queen | ABBA | 100 | Simple and memorable |
| Just Dance | Lady Gaga | 119 | A modern option |
| Imperial March | John Williams | 103 | An instrumental choice |
Adapting Compressions for Different Ages
Chest compressions vary depending on the person’s age:
| Age Group | Hand Position | Compression Depth | Special Considerations |
|---|---|---|---|
| Adults | Two hands, interlocked | 2–2.4 inches | Use your body weight |
| Children | One hand | 1/3 chest depth | Apply less force |
| Infants | Two fingers | 1/3 chest depth | Use gentle pressure |
Many AEDs now include built-in metronomes to help you maintain the right compression speed.
“Immediate CPR can double or triple chances of survival after cardiac arrest.” – American Heart Association
Continue performing CPR cycles until professional help arrives.
Step 6: Continue the CPR Cycle
Here’s how to maintain effective CPR during an emergency.
Understanding the 30:2 Ratio
For adults, perform 30 chest compressions followed by 2 rescue breaths. This method balances blood flow with oxygen delivery. Make sure to minimize pauses, let the chest fully recoil after each compression, and keep a steady rhythm while counting. Research from the National Institutes of Health suggests aiming for around 107 compressions per minute with a depth of about 1.85 inches (4.7 cm) for best results.
How to Keep a Steady Rhythm
Taking a 10-second break every 100 compressions can help maintain proper depth and reduce fatigue.
| Duration | Action | Purpose |
|---|---|---|
| 2 minutes | Perform compressions | Ensure blood circulation |
| 10 seconds | Take a short rest | Avoid exhaustion |
| 100–120 beats/min | Maintain compression rate | Optimize blood flow |
Tips for consistent, high-quality CPR:
- Use your body weight instead of just arm strength.
- Keep your arms straight with shoulders positioned over your hands.
- Switch rescuers every 2 minutes if possible.
- Use a metronome app set between 100 and 120 beats per minute to stay on pace.
Continue performing CPR until one of these happens: the person shows clear signs of life, professional help takes over, or you are too tired to continue effectively. If the victim recovers but becomes unresponsive again, restart CPR immediately. Stick to these cycles until an AED is used or emergency responders arrive.
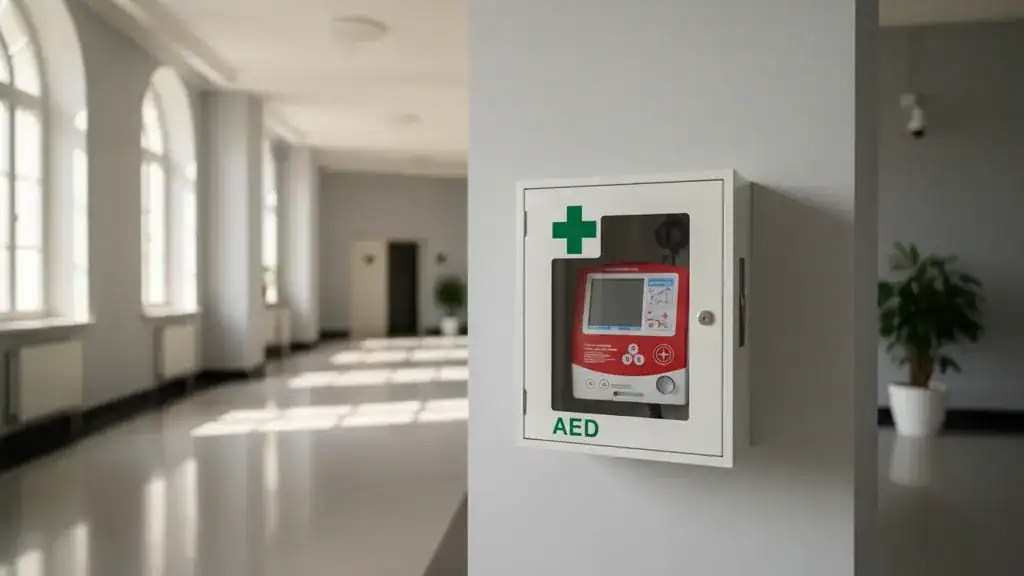
Step 7: How to Use an AED
An AED can be a lifesaver in emergencies. Use it right away if someone:
- Has collapsed suddenly
- Is unresponsive
- Isn’t breathing normally
When Should You Use an AED?
If you witness a sudden cardiac arrest, act fast. Start CPR immediately while someone gets the AED. Once the AED is available, follow its instructions to deliver a shock as needed.
How to Follow the AED’s Voice Prompts
AEDs come with voice prompts to guide you step by step. Here’s what to do:
| Step | Action | Key Safety Points |
|---|---|---|
| Preparation | Turn on the AED and remove clothing | Make sure the chest is completely dry. |
| Pad Placement | Place the pads on the bare chest | Position one pad on the upper right, the other on the lower left side. |
| Analysis | Let the AED analyze the heart rhythm | Ensure no one touches the patient during this process. |
| Shock Delivery | Press the shock button if advised | Announce “CLEAR!” to confirm no one is in contact with the patient before pressing the button. |
| Continue Care | Resume CPR immediately | Start with chest compressions. |
Key safety tips:
- Check for a green indicator light on the AED. A red light means maintenance is needed.
- For children under 8 years old, use pediatric pads if available.
- Never touch the patient during the analysis or when delivering a shock.
“CPR is the single-most important intervention for a patient in cardiac arrest and should be provided until a defibrillator is applied to minimize interruptions in compressions.” – American Heart Association
If the AED doesn’t work, keep performing CPR until professional help arrives. Regular monthly checks of the AED ensure it stays ready for emergencies.
What to Do if the Person is Breathing but Unresponsive
So, you’ve assessed the scene, tapped the person’s shoulder, and shouted to get their attention. They’re not responding, but when you lean in, you can see their chest rising and falling. They are breathing. This is a critical moment. While it’s a relief they’re breathing, an unresponsive person is still in a serious medical emergency. Their body can’t protect itself, and the biggest immediate risk is their airway becoming blocked. If they were to vomit, for example, they could easily choke because their natural reflexes aren’t working. This is where knowing what to do next can make all the difference while you wait for paramedics to arrive.
The correct action is to place them in the recovery position. This simple maneuver is designed to keep their airway clear and open. By positioning them on their side, you use gravity to your advantage, allowing any fluid to drain safely from their mouth and preventing their tongue from falling back and blocking their throat. It’s a vital first aid skill that stabilizes the person and protects them from further harm until professional help takes over. Learning this technique is a core part of any comprehensive first aid course and gives you the confidence to act correctly in a stressful situation.
How to Use the Recovery Position
Placing someone in the recovery position is straightforward if you follow these steps. Kneel beside the person on a flat surface and get ready to gently roll them toward you.
- Position the Arms: Take the arm closest to you and extend it out at a right angle. Bring their other arm across their chest and hold the back of their hand against their cheek nearest to you.
- Bend the Knee: Bend the knee that is farthest from you, keeping their foot flat on the floor. This will act as a lever.
- Roll the Person: Gently pull on their bent knee to roll them toward you onto their side. Their body should now be stable, supported by their bent leg.
- Open the Airway: Once they are on their side, gently tilt their head back to ensure the airway remains open.
Once they are safely in position, it’s crucial to stay with them and continue monitoring their breathing until emergency services arrive. Keep checking to make sure their chest is still rising and falling regularly. If their breathing stops at any point, you’ll need to roll them back onto their back and begin CPR immediately. The recovery position is a holding pattern, designed to protect the person while you wait for professional medical help to take over. Your calm presence and careful observation are just as important as the initial action.
What to Do After Learning the Basics
Now that you’ve learned life-saving CPR techniques, it’s time to focus on certification and keeping your skills sharp through regular practice.
Why and Where to Get Certified
Organizations like the American Heart Association (AHA) and American Red Cross provide CPR certification programs that prepare you for emergencies. With only about 3% of Americans certified in CPR each year, proper training is crucial. Here are a few options for certification:
| Organization | Course Type | Cost | Features |
|---|---|---|---|
| National CPR Foundation | Standard CPR/AED | $12.95 | Online training; 4.87/5 rating from 229,845 reviews |
| American Red Cross | Blended Learning | Varies | Mix of online and hands-on training |
| American Heart Association | Healthcare Provider BLS | Varies | Leader in resuscitation training |
Certification is a critical first step in building your emergency response skills.
Bridging the National CPR Training Gap
It’s a surprising fact: only about 3% of Americans get certified in CPR each year. When you consider that roughly 350,000 cardiac arrests happen outside of a hospital annually, that gap becomes a serious concern. The good news is that we can close it. The American Heart Association has shown that immediate CPR can double or triple a person’s chances of survival, which highlights just how critical bystander action is. Community education is the key to empowering more people to act confidently in an emergency. By pursuing professional training, you’re not just learning a skill for yourself; you’re becoming a vital link in the chain of survival for your family, colleagues, and neighbors, helping to create a safer community for everyone.
How to Stay Ready to Respond
Staying prepared for emergencies takes ongoing effort. Here are some key points to keep in mind:
- Brain damage can start within three minutes without blood flow, but immediate CPR can double or even triple survival rates.
- An estimated 200,000 lives could be saved each year with effective CPR intervention.
To maintain your readiness, review study materials regularly and practice often. This keeps your skills sharp and builds the confidence you need to act quickly during emergencies. For healthcare professionals, Basic Life Support (BLS) courses provide advanced training tailored to workplace needs. These programs go beyond standard CPR certification, equipping you to handle critical situations where every second matters.
Related posts
- 5 Common First Aid Mistakes and How to Avoid Them
- 10 Must-Have Items in Your Workplace First Aid Kit
- Top 6 AED Devices for Small Business Settings
- 8 Ways to Improve Workplace Emergency Preparedness
Frequently Asked Questions
What if I’m afraid of hurting the person or breaking their ribs? This is one of the most common fears, and it’s completely understandable. But it’s important to remember that a person in cardiac arrest is clinically dead. Without your help, their chances of survival are almost zero. While it’s possible for ribs to break during compressions, that is a treatable injury. Your actions are focused on the much bigger goal of circulating oxygenated blood to their brain and vital organs, giving them a chance at life. Any attempt at CPR is far better than doing nothing at all.
Do I really have to give rescue breaths if I’m not comfortable with it? No, you don’t. If you are untrained or feel hesitant about giving rescue breaths, you can perform hands-only CPR. This involves providing continuous, fast, and firm chest compressions without stopping for breaths. The American Heart Association supports hands-only CPR because the most critical action is to keep blood flowing. Pushing hard and fast in the center of the chest is still incredibly effective and can save a life.
How long am I supposed to continue doing CPR? You should continue the cycle of compressions and breaths until one of four things happens: the person shows obvious signs of life, like breathing on their own; another trained responder or emergency medical services professional arrives and takes over; an AED is ready to analyze the person’s heart rhythm; or you become too exhausted to continue effectively. It can be physically demanding, which is why it’s helpful to switch with another person every two minutes if possible.
What’s the single most important thing to do if my mind goes blank in an emergency? If you feel overwhelmed and can’t remember all the steps, focus on just one action: call 911. As soon as you recognize there’s a serious problem, make that call or tell someone specific to do it for you. Once you have the dispatcher on the line, put your phone on speaker. They are trained to walk you through exactly what to do, step-by-step, until help arrives. They can count compressions with you and be a calm, guiding voice in a chaotic moment.
Is CPR for children and infants the same as for adults? While the core principles are similar, there are important differences. For a small child, you’ll likely use the heel of just one hand for compressions instead of two. For an infant, you’ll use two fingers in the center of the chest, just below the nipple line. The compression depth is also shallower for both children and infants. Because the techniques are so specific, we highly recommend taking a course that covers pediatric CPR to build the confidence and skills needed to help a child in an emergency.
Key Takeaways
- You are the critical link to survival: Most cardiac arrests happen at home, and your immediate response is the most significant factor in a positive outcome. Starting chest compressions right away keeps blood flowing and can dramatically increase the person’s chance of survival.
- Master the core actions: Check, Call, Care: In an emergency, simplify your response. First, ensure the scene is safe and check the person. Next, call 911 immediately. Finally, begin the cycle of 30 chest compressions and 2 rescue breaths until help takes over.
- Turn hesitation into confident action with training: It’s normal to fear doing something wrong, but any attempt at CPR is better than none. Getting certified builds the muscle memory and knowledge—including understanding Good Samaritan laws—to act decisively when it matters most.
Disclaimer for information purposes only:
The information provided on this website is intended for general educational and informational purposes only. It is not medical advice and should not be used as a substitute for professional diagnosis, treatment, or care. Always consult a qualified healthcare or medical professional regarding any health-related questions or concerns.
While we strive to ensure the information shared is accurate and up to date, no guarantees are made regarding completeness, accuracy, or applicability to any individual situation. Use of this content is at the reader’s sole discretion and risk.
This website is part of the Response Ready family of emergency preparedness and training resources, including CPR & first aid training and compliance services, AED sales and program support, AED program management software, and medical oversight solutions provided through our affiliated platforms:
• AEDLeader.com
• ResponseReady.com
• AEDTotalSolution.com
• MDSIMedical.com
By accessing or using this website, you agree to release, indemnify, and hold harmless the website owners, authors, contributors, and affiliated entities from any claims, losses, damages, or liabilities arising from the use or reliance on the information presented.

Ayaan Shohan
Ayaan Shohan
Save Lives with the Right AED Today
Buy Trusted AEDs from AED Leader Today!
Get Certified in CPR and Make a Difference!