
Most of us think CPR is a one-size-fits-all skill. But when someone is drowning, the rules change. This isn’t a sudden heart attack; it’s a fight for air. The victim’s body is desperate for oxygen, and that simple fact changes your entire response. Knowing the correct protocol for CPR for drowning victims is critical. This guide gives you the specific, life-saving steps, starting with the most important one: rescue breaths. You’ll learn how to act with confidence and give someone the best possible chance at survival.
The Sobering Reality of Drowning Statistics
Before we get into the “how-to,” it’s important to understand the “why.” Drowning is a far more common and immediate threat than many of us realize. It happens quickly, often silently, and affects families and communities everywhere. The statistics aren’t just numbers; they represent real lives that could have been saved with faster, more confident intervention. Understanding the scope of the problem is the first step toward becoming part of the solution. When you know the risks, you’re better motivated to learn the skills needed to respond effectively, turning a moment of panic into an opportunity to save a life. This knowledge is what fuels the mission of every first responder and every person who decides to get certified.
Global and U.S. Drowning Rates
The scale of drowning worldwide is staggering. According to the American Heart Association, “Drowning is the third biggest cause of death from accidental injury worldwide, causing about 236,000 deaths each year.” This makes it a global health issue that transcends borders, climates, and cultures. Whether you’re at a community pool, a lake, or an ocean beach, the danger is present. These numbers highlight why water safety and emergency preparedness are universal skills. Having the ability to respond to a drowning incident isn’t just a good idea for lifeguards or medical professionals; it’s a critical skill for anyone, because an emergency can happen anywhere, at any time. Proper training equips you to act decisively in those crucial first minutes.
Who Is Most at Risk?
While drowning can happen to anyone, certain groups are especially vulnerable. The American Heart Association reports a heartbreaking fact: “In the U.S., drowning is the main cause of death for children aged 1 to 4 years old.” This statistic is a sobering reminder for parents, caregivers, and anyone who supervises young children near water. Furthermore, data shows significant disparities, with drowning rates being “highest among Black, American Indian, and Alaska Native people under 18 in the U.S.” These statistics underscore the need for accessible safety education and resources in every community. Protecting our most vulnerable requires a proactive approach, including vigilant supervision, physical barriers like pool fences, and widespread CPR and First Aid certification for everyone from parents to school staff.
How to Recognize the Signs of Drowning
One of the biggest myths about drowning comes from what we see in movies: a person splashing wildly and yelling for help. In reality, the opposite is often true. A person who is drowning is fighting for air, and their body instinctively prioritizes breathing over calling out. This means they often can’t make any sound at all. Recognizing the true, subtle signs of drowning is a critical skill for anyone supervising swimmers, whether you’re a parent at the beach or a teacher on a field trip. Knowing what to look for allows you to identify an emergency much sooner, which dramatically increases the chances of a positive outcome. It shifts your focus from listening for distress to actively watching for it.
Why Drowning Is Often Silent
As WebMD explains, “Drowning is often silent and quick. People who are drowning usually can’t get enough air.” This is because of a physiological response called the instinctive drowning response. The body’s primary goal is to get oxygen, so the respiratory system overrides the ability to speak. A person’s mouth sinks below the water and reappears just long enough to exhale and inhale, but not to shout. This silent struggle can be easily missed by an untrained observer who is expecting to hear a cry for help. Understanding this is key to water safety; it means you have to be an active, vigilant supervisor, constantly scanning the water for the visual cues of distress, not just waiting to hear them.
Key Visual Cues of a Person in Distress
Since a drowning person can’t yell, you need to know what to look for. According to WebMD, a key sign is that “They are silent. They bob up and down, with their mouth dipping below the water and popping up just to breathe.” Their body is often vertical in the water, and they can’t make any forward progress. You also won’t see the frantic waving you might expect. Instead, “Their arms might be stiff and out to the side, pressing down on the water to stay afloat, not waving for help.” Other signs include a glassy or empty look in their eyes, hair over their forehead or eyes, or trying to roll over onto their back. Recognizing these cues is the first step in any rescue, and it’s a core component of any good life-saving course.
What Is Near-Drowning?
Near drowning occurs when a person is submerged in water. They survive but have severe trouble breathing. This critical stage demands immediate intervention to prevent life-threatening complications. Without prompt action, the condition can worsen. It can cause severe breathing problems or even death. Urgent situations are key to a better chance of recovery.
How Does Water Submersion Affect the Body?
Water submersion can seriously affect the body, particularly the lungs and brain. Water entering the lungs often causes pulmonary edema and breathing problems. In “dry drowning,” water may not reach the lungs. Oxygen deprivation during submersion may impair the brain. Yet, studies show that extended submersion may not always result in permanent damage with rapid resuscitation.
Immediate action, like CPR, is vital. It restores oxygen flow, prevents cardiac arrest, and manages complications. This shows a critical need to understand the body’s response to drowning. It is key for effective intervention.
Saltwater vs. Freshwater Drowning
You might think drowning is the same no matter where it happens, but the type of water actually changes how the body responds. It’s a surprising fact, but about 90% of drowning incidents occur in freshwater environments like pools, lakes, and rivers. When someone inhales freshwater, its low salt concentration allows it to pass quickly from the lungs into the bloodstream. This process dilutes the blood, can cause red blood cells to rupture, and throws the body’s electrolyte balance into chaos, which can lead to cardiac arrest. While the internal mechanics are complex, the immediate danger and the need for a swift, confident response are just as critical in any body of water.
Saltwater drowning works differently. Because the ocean’s water is much saltier than our blood, it has the opposite effect. When inhaled, saltwater pulls fluid from the bloodstream into the lungs, causing a rapid buildup of fluid called pulmonary edema. This makes it incredibly difficult for the victim to get oxygen. Despite these differences, both saltwater and freshwater have one dangerous thing in common: they wash out a vital substance in the lungs called surfactant, which is what keeps our tiny air sacs from collapsing. The end result is the same in either scenario—a severe lack of oxygen that requires immediate intervention.
From a first aid perspective, these internal differences don’t change your immediate actions. Your priority is always to get the person out of the water safely, call for emergency help, and begin CPR if they are unresponsive and not breathing. The physiological details are critical for the medical professionals who take over, but for a first responder, the life-saving steps are universal. This is why being trained is so important. Having the skills from a course like our Adult & Pediatric First Aid/CPR/AED class gives you the confidence to act decisively, providing that vital bridge to professional medical care, no matter the circumstances.
Why CPR Is Critical for Drowning Victims
CPR is vital for saving near-drowning victims. It restores oxygen to the brain and organs. This prevents irreversible damage and improves survival chances. Submersion in water can fill the lungs with fluid. This can cause asphyxiation and cardiac arrest. CPR helps sustain oxygen flow and circulation until help arrives. This reduces the risk of severe brain damage from lack of oxygen. This life-saving technique is crucial in such emergencies.
Why Drowning Requires a Different CPR Approach
CPR for drowning victims is different. Start with two rescue breaths, then do chest compressions. This is vital because drowning causes oxygen deprivation from inhaled water. So, rescue breaths are a critical first step.
If the victim is still in the water, use mouth-to-nose breaths. The American Heart Association recommends this. A decade-long Australian study found that 86% of drowning victims vomit during CPR. So, they must clear their airways by turning them to the side. Laryngospasm often prevents water from entering the lungs. So, there is less of a need for extensive airway clearing.
Drowning vs. Cardiac Arrest: Key CPR Differences
CPR for near-drowning incidents differs from standard CPR. It must address the specific challenges of water immersion.
- Water in the Lungs: Water in the lungs complicates chest compressions and rescue breaths. This is especially true with freshwater. It dilutes electrolytes and can cause ventricular fibrillation. It limits lung expansion, reduces oxygen intake, and makes it hard to maintain blood oxygen levels.
- Hypothermia: Hypothermia, common in near-drowning victims, slows the heart and circulation. It makes it hard to assess the pulse and do chest compressions. It lowers the body’s oxygen demand and metabolism. But, it also affects resuscitation and defibrillation success. Rewarming must be gradual. It prevents sudden drops in blood pressure and other complications.
Supplemental oxygen is often vital during CPR. It improves oxygen levels and protects the brain from damage. Basic Life Support knowledge is vital for handling near-drowning emergencies.
The Drowning Chain of Survival
Similar to cardiac arrest, a drowning emergency has its own sequence of actions designed to maximize the chance of survival. The American Heart Association outlines this as the “Drowning Chain of Survival,” a five-step process that begins well before an emergency occurs. The first links are proactive: preventing drowning through supervision and barriers, and learning to recognize the often-silent signs of distress. The next steps are reactive: providing a flotation device, safely removing the person from the water without endangering yourself, and immediately calling for professional medical help. Each link is vital because the core issue in drowning is oxygen deprivation, and following this chain ensures a swift, coordinated response when every second is critical.
When the person is on dry land, the final link in the chain—providing immediate care—becomes your focus. If they are unresponsive and not breathing, this is the moment to begin CPR. Unlike a typical cardiac arrest, you must start with two rescue breaths before moving to chest compressions. This initial step is non-negotiable for a drowning victim, as it directly addresses the immediate lack of oxygen that caused them to stop breathing. Performing these actions correctly can restore oxygen flow to the brain and vital organs, preventing permanent damage. While knowing the steps is important, having the muscle memory and confidence to act without hesitation is what truly saves lives, and that comes from hands-on CPR certification.
How to Perform CPR for Drowning Victims: A Step-by-Step Guide
This is a brief overview of how to perform CPR on drowning victims:
- Get help: Call 911 immediately or alert a lifeguard.
- Move the person: Remove them from the water.
- Check consciousness: If unresponsive, place them on their back.
- Open the airway and deliver 2 rescue breaths: Tilt their head back, pinch their nose, and give two breaths while watching the chest rise.
- Begin chest compressions: If the individual is not breathing, start chest compressions. Do them at a rate of 100-120 per minute. Press at least 2 inches deep for adults. Alternate every 30 compressions with 2 rescue breaths.
- Continue CPR: Continue CPR until the person starts breathing or professional medical help takes over.
Step 1: Call for Help Immediately
Call 911 now, or ask someone nearby to do so. Every moment counts in a near-drowning emergency. Alert a lifeguard if one is present, as they have training for such situations. If you’re alone, use your phone’s speaker mode. It will free your hands to perform CPR while waiting for help.
Step 2: Safely Get the Person Out of the Water
Make sure you’re safe before trying a rescue. It avoids risking drowning. If a lifebuoy or stick is within reach, use it to rescue them.
When removing the person from the water, use a gentle touch. Avoid unnecessary movement, especially if you suspect a neck or spinal injury. This could worsen their condition.
Step 3: Check for Breathing and Response
After getting them to dry land, check their consciousness. Tap their shoulder and call out to them. Look for any signs of movement or response. At the same time, check for breathing. Look for chest movement and listen for breathing sounds. Feel for air near their mouth or nose.
CPR is necessary for a near-drowning victim if they need urgent resuscitation.
- Unconscious
- Not breathing or only gasping.
- Lack of a detectable pulse
- Exhibit cyanosis (bluish or pale skin).
These symptoms signal severe respiratory or cardiac distress. Immediate CPR is crucial for restoring breathing and circulation.
Step 4: Clear and Open the Airway
Gently tilt their head back. Place one hand on their forehead and the other under their chin. Lift their chin upward. This prevents the tongue from obstructing the airway. Make sure the airway is clear and check for any signs of breathing.
Step 5: Give Two Rescue Breaths First
Ensure the victim’s airway is fully open and transparent to help breathing:
- Pinch and Seal: Pinch the person’s nose, seal your mouth over theirs, and breathe steadily for about one second. Check if their chest rises, indicating the breath was effective. If the chest doesn’t rise, adjust the head by tilting it further back and try again.
- Two Breaths: If the chest rises after the first breath, proceed with a second. Each breath must be slow, steady, and last about one second.
- If the Chest Doesn’t Rise: If tilting the head again doesn’t cause the chest to rise, the airway may be blocked. Continue chest compressions and attempt breaths after each set of compressions.
Not possible to remove the adverb. Their condition is due to respiratory failure. So, delivering oxygen is essential.
Step 6: Begin Chest Compressions
- Lay the victim on their back on a firm surface and kneel beside them at chest level to begin helping.
- Place the heel of one hand on the center of the chest, between the nipples. Then, place your other hand on top, interlocking your fingers.
- Use your upper body weight to apply firm, rapid chest compressions. Press at least 2 inches deep for adults. Compress at a rate of 100 to 120 per minute. Let the chest fully rise between compressions. Keep a steady rhythm.
- Perform 30 quick chest compressions, counting aloud to maintain accuracy and rhythm.
Step 7: Continue the 30:2 Cycle
Continue alternating chest compressions and rescue breaths. Do this until the person breathes or emergency services arrive.
- Keep performing CPR without interruption until help arrives or the person wakes up. Every moment is critical, despite the effort involved.
- If the person starts breathing, they should still go to the hospital. Drowning can harm the lungs and organs. Complications, like secondary drowning, may develop hours later.
Following these steps increases the likelihood of survival in a near-drowning emergency.
How to Monitor Their Condition During CPR
Continue monitoring to determine whether the person begins to breathe independently. If they do, position them on their side in the recovery position and keep observing. Even if they appear to recover, medical attention is still necessary.
If the victim starts breathing but is still unconscious, place them in the recovery position, on their side. This keeps the airway clear and prevents choking if they vomit. Track their breathing and pulse closely, and be ready to restart CPR if breathing stops.
If the victim wakes up, cover them with a blanket. It will keep them warm, but not too hot. Maintaining body warmth helps prevent hypothermia. Ensure they remain calm and still, as sudden movements can worsen their condition. Immediate hospital transfer is essential for proper cardiovascular care and further medical evaluation.
Situations like these highlight the importance of proper emergency training. A Basic Life Support course shows you how to check consciousness. You’ll learn to put a victim in the recovery position and track vital signs until help arrives. It also reinforces the correct methods for performing CPR and using an AED safely. This way, you’ll be ready to act in life-threatening situations.
CPR for Children and Infants: What’s Different?
- For children, use one hand for chest compressions. Press to a depth of about 2 inches.
- For infants under one year, use two fingers to compress the chest to a depth of about 1.5 inches. Deliver gentle puffs of air. Cover both the baby’s mouth and nose with your own. Do not give full breaths.
- For children and infants, provide 30 chest compressions followed by 2 gentle breaths. If two rescuers are available, adjust the ratio to 15 compressions for every 2 breaths.
When doing CPR on near-drowning victims, watch for spinal injuries. This is important if the incident involved shallow water or a strong impact. Stabilize the head and neck during CPR to prevent further harm.
Be aware that the victim may vomit due to the amount of water consumed. If this happens, quickly turn their head to the side to clear the airway before resuming CPR. Prolonged submersion can cause complications like pulmonary edema. So, track their condition closely and adjust your approach as needed.
Special Considerations for Drowning Rescues
While the core steps of CPR provide a solid foundation, drowning emergencies introduce unique challenges that require special attention. The presence of water, the risk of hypothermia, and the specific cause of cardiac arrest—lack of oxygen—mean you may need to adjust your approach. Knowing how to handle these variables, from using an AED on a wet person to coordinating with another rescuer, is key to providing the most effective aid. These considerations don’t replace the fundamentals of CPR, but they build upon them to prepare you for the realities of a water rescue.
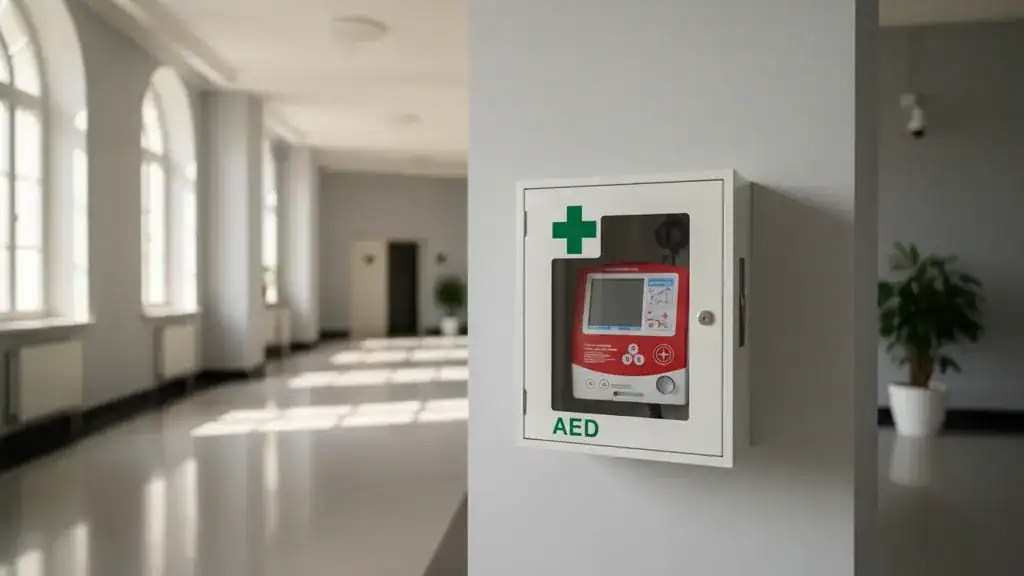
Using an AED on a Drowning Victim
You can and should use an Automated External Defibrillator (AED) on a drowning victim, but there are a few critical safety steps to follow. First, the person must be removed from the water and moved to a dry area. Before applying the AED pads, you must wipe their chest dry so the pads can adhere properly and to ensure the electrical shock is delivered effectively. The American Heart Association notes that CPR should be started *before* using the AED, as the immediate priority for a drowning victim is restoring oxygen to the brain and heart through rescue breaths and compressions. Once you’ve started CPR, have someone else prepare the AED and apply it as soon as possible.
Performing Compressions-Only CPR
For drowning victims, CPR with rescue breaths is always the best approach because their primary problem is a lack of oxygen. However, if you are untrained, unwilling, or unable to give rescue breaths, don’t let that stop you from acting. The American Heart Association confirms that it’s still incredibly helpful to provide chest compressions only until more help arrives. Continuous, high-quality compressions can help circulate the remaining oxygen in the blood to vital organs. Doing something is always better than doing nothing, but a certification course will give you the confidence to provide the most complete care in an emergency.
Considerations for Multiple Rescuers
If another person is available to help, you can perform CPR more effectively and for a longer period. With two rescuers, one person can focus on chest compressions while the other manages the airway and provides rescue breaths. For children and infants, you should switch to a ratio of 15 compressions followed by two breaths. This provides more frequent oxygenation, which is critical for younger victims. To prevent exhaustion and maintain the quality of compressions, rescuers should switch roles approximately every two minutes. This teamwork ensures the victim receives continuous, high-quality care until professional responders take over.
Staying Up-to-Date with CPR Guidelines
The American Heart Association says to give immediate oxygen and air in near-drowning cases. Also, restore circulation. It highlights the vital roles of bystander CPR and quick emergency service activation. Medical staff must take all resuscitated victims to a hospital, no matter their condition.
The WHO endorses the Utstein definition of drowning. It emphasizes that drowning is respiratory failure from submersion in liquid. This ensures consistent data reporting. The European Resuscitation Council advises giving five initial rescue breaths. This clears water and boosts oxygen levels. It improves brain function before starting chest compressions.
Common Mistakes to Avoid When Performing CPR
In a high-stress emergency, it’s easy to forget the details. But when it comes to CPR, proper technique is everything. Knowing the most common errors can help you stay focused and deliver the most effective care possible. For drowning victims, where every second of oxygen deprivation matters, avoiding these pitfalls is especially critical. The goal isn’t perfection, but performing each step correctly gives the person the best possible chance of survival. Let’s walk through a few key areas where people often go wrong and how you can get them right when it counts.
Ensuring Effective Chest Compressions
One of the most frequent mistakes in CPR is not performing chest compressions correctly. It’s vital to push both hard and fast. For an adult, you need to press down at least two inches, using your upper body weight to generate enough force. The right pace is between 100 and 120 compressions per minute—think of the beat to the song “Stayin’ Alive.” Just as important is allowing the chest to fully rise, or recoil, between each compression. This lets the heart refill with blood. Without effective compressions, you aren’t circulating oxygenated blood to the brain and other vital organs, which is the entire point of CPR.
Another common error is stopping too soon. CPR is physically demanding, and it’s natural to feel tired, but consistency is key. You must continue the cycle of 30 compressions and two breaths until professional help arrives and takes over, an AED is ready to use, or the person shows obvious signs of life. Getting hands-on practice in a certified CPR course helps build the muscle memory needed to maintain the correct depth, rate, and rhythm, even when you’re exhausted and under pressure.
Maintaining an Open Airway
For a drowning victim, rescue breaths are the first and most critical step, which means their airway must be open. A common mistake is failing to properly execute the head-tilt, chin-lift maneuver. You need to gently tilt the head back far enough to pull the tongue away from the back of the throat, clearing the path for air. If you give a rescue breath and the chest doesn’t rise, don’t panic. Your first move should be to readjust the head—tilt it back a bit further—and try the breath again. This simple correction often solves the problem.
Forgetting to give rescue breaths altogether is a dangerous mistake, especially in drowning cases. While compression-only CPR is recommended for sudden cardiac arrest, drowning is a respiratory issue first. The person’s primary problem is a lack of oxygen, not a heart malfunction. Your breaths are what re-oxygenate their blood. Ensuring the airway is clear and delivering those initial two breaths before starting compressions directly addresses the most immediate threat to their life. This is a key difference that can dramatically change the outcome for a drowning victim.
Why Regular CPR Training Is So Important
Regular training keeps people ready for emergencies like near-drowning. In such cases, quick, effective action is vital. Knowing specific techniques, like the initial rescue breaths in water-related CPR, dramatically helps. It boosts the chances of a good outcome.
Always get near-drowning CPR training from certified, accredited organizations. This ensures it is reliable and effective.
How Do You Know if CPR Is Working?
Effective CPR shows in these signs. The person may gasp or breathe. You should see the chest rise with rescue breaths. You should detect a pulse. Their skin color should improve as oxygen circulates. They may show awareness by opening their eyes or responding. These changes or show the person’s condition is improving.
FAQs
What’s the First Step in a Drowning Emergency?
If you encounter a drowning victim, ensure your safety before assisting. Call emergency services immediately and begin CPR if they are not breathing. Effective management of the airway is crucial to prevent further complications.
Why Is CPR for Drowning Different?
CPR for drowning victims often starts with rescue breaths. Oxygen deprivation is the main issue. Unlike sudden cardiac arrest, drowning causes respiratory failure, so restoring oxygen is critical.
What Can Block a Drowning Victim’s Airway?
Water, vomit, or swelling may compromise a drowning victim’s airway. Clearing the airway is essential before administering rescue breaths to ensure adequate oxygenation.
How Does CPR Help in a Drowning Emergency?
CPR restores oxygen to vital organs. It improves recovery chances for drowning victims. Immediate action can prevent brain damage and increase survival rates.
What Does Recovery Look Like After Drowning?
The speed at which rescuers restore oxygen determines the recovery of drowning victims. Even after resuscitation, victims may have complications. They may get pulmonary edema or secondary drowning. So they need a medical evaluation.
How Can I Perform CPR Correctly for Drowning?
Focus on initial rescue breaths to provide oxygen, followed by chest compressions. Keep the airway clear. Continue until help arrives or the victim wakes.
Is a Full Recovery Possible After Drowning?
With prompt and effective CPR, many drowning victims can achieve a full recovery. But, long-term effects depend on how severe the oxygen deprivation was and how quickly they were resuscitated.
Be Prepared to Save a Life
In drowning emergencies, quick action and proper CPR are vital for survival. Knowing the unique CPR requirements for drowning can improve outcomes. These include prioritizing rescue breaths and managing the airway. Ensure the victim gets immediate medical attention after resuscitation to address complications. With the right knowledge and training, you can save lives and recover drowning victims.
In Washington D.C., residents have the chance to enroll in certified CPR and water safety courses. These classes focus on techniques to respond to drowning situations. Local programs focus on rescue breathing, airway management, and post-resuscitation care. These skills are crucial in water emergencies. Training in Washington, D.C. builds your confidence. This is true for lifeguards, parents, and bystanders alike. This training can even save lives.
Key Takeaways
- Prioritize Rescue Breaths: Drowning is a respiratory emergency, meaning the victim’s primary need is oxygen. Always start by giving two rescue breaths before beginning chest compressions to reintroduce air into their lungs.
- Recognize the Silent Signs of Distress: Forget the loud splashing you see in movies. A drowning person is often silent, vertical in the water, and unable to call for help. Look for a glassy-eyed stare and arms pressing down for support, not waving.
- Commit to the 30:2 Cycle: After the initial breaths, perform a continuous cycle of 30 hard and fast chest compressions followed by 2 rescue breaths. Don’t stop this rhythm until professional help arrives or the person shows clear signs of life.
Related Articles
Disclaimer for information purposes only:
The information provided on this website is intended for general educational and informational purposes only. It is not medical advice and should not be used as a substitute for professional diagnosis, treatment, or care. Always consult a qualified healthcare or medical professional regarding any health-related questions or concerns.
While we strive to ensure the information shared is accurate and up to date, no guarantees are made regarding completeness, accuracy, or applicability to any individual situation. Use of this content is at the reader’s sole discretion and risk.
This website is part of the Response Ready family of emergency preparedness and training resources, including CPR & first aid training and compliance services, AED sales and program support, AED program management software, and medical oversight solutions provided through our affiliated platforms:
• AEDLeader.com
• ResponseReady.com
• AEDTotalSolution.com
• MDSIMedical.com
By accessing or using this website, you agree to release, indemnify, and hold harmless the website owners, authors, contributors, and affiliated entities from any claims, losses, damages, or liabilities arising from the use or reliance on the information presented.

Anastasios Giannikas
Anastasios Giannikas
Save Lives with the Right AED Today
Buy Trusted AEDs from AED Leader Today!
Get Certified in CPR and Make a Difference!