
CPR training has come a long way from the simple plastic dolls of the past. Today’s manikins are sophisticated tools designed to build real skills and confidence. The most significant advancement is real-time feedback technology, which tells you instantly if your compressions are deep enough and fast enough. This feature is a game-changer, transforming practice from guesswork into a targeted, skill-building exercise. From audible clickers to advanced digital monitors that sync with an app, the options are powerful. We’ll explore the different types of feedback, anatomical realism, and other key features to help you understand what makes the best CPR manikins so effective.
Knowing CPR is one thing. But, using it in an emergency is another. So, both knowledge and skills are vital. For the best CPR training, use a mix of online learning and hands-on practice. This lets learners grasp the theory and then apply it in a realistic, controlled setting. A CPR dummy or manikin is essential for this practical component. It lets students practice and refine their skills on a lifelike model. This bridges the gap between knowing and doing. CPR manikins are vital for training. They provide a hands-on experience that is key to mastering life-saving skills. Choose a dummy that fits your training program’s needs and goals. Different manikins have various features and levels of realism. They suit diverse learning environments. Choosing the right CPR manikin is vital for effective training. A well-structured model boosts academic achievement. Knowing what to look for will help you choose the best CPR dummy. There are many types and key features that enhance training. This will ensure your practice sessions are realistic and useful.
CPR Dummy vs. Manikin: What’s the Real Difference?
Before exploring the types of CPR dummies and manikins, we must define these terms. Both terms describe training tools, but with distinct meanings. They simulate performing CPR on a real person. They provide hands-on practice that helps learners develop crucial life-saving skills. The difference between “manikin” and “dummy” rests in how they’re used. The term “manikin” is more common in medical settings. It refers to a human body model for teaching, such as CPR or anatomy. In contrast, “dummy” is a broader term. It can refer to any model of the human body. This is true regardless of whether it’s for medical or non-medical teaching.
Do You Really Need a Manikin for CPR Training?
A CPR dummy or manikin simulates the body’s response during CPR. It gives feedback to help users gauge their technique. Some models have features like audible cues. Correct compressions produce audible sounds. This ensures accurate practice. These manikins are vital for hands-on CPR training. They let learners practice their skills in a realistic way. Many state boards and agencies need a hands-on demo for CPR certification, even to renew it. You can include this practical component in your training. It will ensure a higher skill level, even if it is not required by your state or governing body. If your CPR training is hands-on, a CPR dummy is essential. You must practice and prove skills with it.
A Guide to the Different Types of CPR Manikins
CPR manikins have been vital to training since the 1960s. They began with the first CPR doll, “Resusci-Annie,” created by toymaker Asmund Laerdal. Over the years, these manikins have changed a lot. They own an unpretentious look and engage seamlessly. Modern designs focus on realism, low maintenance, and better feedback. This makes training more effective and accessible. CPR manikins now come in various sizes and types, from infant to adult. They cater to a wide range of training needs. To ease some rescuers’ reluctance to do CPR on strangers, we made modern manikins more inclusive. They also have one-way barriers that protect the rescuer from the victim. These advancements help make CPR training more comfortable and approachable for everyone. Even before COVID-19, a key challenge with CPR manikins was cleaning them between uses. In 2014, we developed a patented SUMO manikin kit. It addressed the high cost and logistics of transporting CPR dummies. The single-use manikit kit is a compact, cheap alternative to traditional manikins. It still provides the needed movement and feedback for effective CPR training and demos. Its simple design provides a practical solution. It does not lower the training quality.
Adult, Child, and Infant Manikins
When you imagine a CPR emergency, who do you see? It could be an adult coworker, a child at a park, or even an infant. The life-saving techniques for each are quite different, from hand placement to the force of compressions. That’s why CPR manikins are designed for specific age groups: adult, child, and infant. Using age-appropriate models is essential because it allows you to practice the exact methods needed for each body size. This hands-on experience builds muscle memory and confidence, ensuring you’re prepared to act correctly no matter who is in need. Our comprehensive training covers all age groups, so you can be sure you’re learning the right skills for any situation.
Dual-Age Training Models
For instructors and organizations, providing training for different age groups often means managing multiple sets of equipment. Dual-age training models offer a practical solution. These versatile manikins can be adjusted to simulate both an adult and a child, allowing you to practice two distinct skill sets with a single piece of equipment. This is incredibly useful for group training sessions where efficiency is key, and it’s a smart choice for businesses, schools, or community groups with limited storage or budgets. These models don’t sacrifice realism; they provide the same crucial feedback needed to master techniques for both adults and children, making them a flexible and effective tool for any CPR program.
How to Choose the Best CPR Manikin for Your Needs
When choosing a CPR manikin, consider several factors. They ensure it meets your training needs. To find the right fit, start by evaluating your needs and preferences:
- When deciding how many manikins to use for training, consider your group’s size. Each participant needs a personal manikin for direct hands-on training. In larger classes, a 1:3 manikin-to-student ratio is ideal. It ensures effective learning while maintaining training quality.
- Decide on in-person or remote training receipt. Full-body manikins need shipping and storage, which can be cumbersome and costly. For remote training, smaller manikins or a SUMO manikin kit are better. They are more practical and cost-effective. They offer convenience without sacrificing training quality.
- An employer may not need a hands-on skills test. Your state or agency may not enforce it. Yet, even without a need, hands-on training can improve your CPR program. It deepens the learning experience. You might think a CPR dummy isn’t needed without a hands-on need. We recommend incorporating it for applied, hands-on skill development. This approach builds confidence. It also prepares people to respond in emergencies. So, the training is more impactful and valuable.
- It’s crucial to set a budget for CPR manikins. Their prices vary by type, size, and features. If you have a tight budget, a cheaper model may help. It can meet your training needs without overspending. Cost-effective options are key. They let you provide valuable, hands-on learning without compromising your essential training equipment.
- Consider if CPR training will be a one-time event or a future need. The SUMO kit provides a cost-effective option for single instances. If you’ll need the training equipment many times, buy a reusable model. It will be more practical and cost-effective in the long run. It will last for future sessions.
A CPR manikin’s main goal is to improve training. It must prepare you and your team to respond to emergencies. Choose a model that makes your CPR training efficient. It will ensure that participants learn the skills to save lives when it matters most.
Key Features to Look for in a CPR Manikin
Choosing the right CPR manikin is about more than just finding a human-shaped model. The best training tools are designed with specific features that build muscle memory and confidence. When you’re practicing, you need to know if your compressions are deep enough and fast enough. You also need to simulate the real steps of an emergency, from opening an airway to using an AED. Modern manikins incorporate technology and realistic anatomical details to make your training as effective as possible. By focusing on a few key areas—feedback, realism, and material quality—you can select a manikin that prepares you to act decisively when it counts.
Real-Time Feedback Technology
The single most important feature of a modern CPR manikin is its ability to provide real-time feedback. Without it, you’re just guessing if your technique is correct. Feedback mechanisms are designed to guide you toward the proper rate and depth for chest compressions, which are critical for circulating blood effectively. This instant correction helps you build accurate muscle memory, so your hands know exactly what to do in a high-stress situation. Studies have shown that trainees who use feedback devices perform significantly better. This technology transforms practice from a simple motion into a targeted, skill-building exercise that meets official life-saving guidelines.
Audible Clickers for Compression Depth
One of the simplest yet most effective feedback tools is an audible clicker. Built into the manikin’s chest, this mechanism makes a distinct “click” sound when you push down to the correct compression depth. This provides immediate, unambiguous confirmation that your technique is effective. For beginners, the clicker is an invaluable guide that helps them quickly learn the feel of a proper compression. It removes the guesswork and allows you to focus on maintaining a consistent rhythm and depth, ensuring every compression is a life-saving one. It’s a straightforward feature that delivers powerful results in training.
Visual Feedback Lights for Rate and Depth
Visual feedback lights take performance monitoring a step further. These systems typically use a series of LEDs on the manikin or a connected device to show whether your compression rate and depth are within the recommended ranges. For example, different colored lights might indicate if you are pushing too fast, too slow, too shallow, or just right. This visual data gives you a more complete picture of your performance than an audible clicker alone. It allows you to make immediate adjustments and helps instructors quickly assess the technique of multiple students at once, making it a great feature for group training.
Digital Monitors and App Integration
For the most detailed performance analysis, look for manikins with digital monitors or app integration. These high-tech models connect to a smartphone, tablet, or external display to provide comprehensive data on your CPR performance. The apps can track metrics like compression depth, rate, recoil, and hands-off time, offering a complete report card of your skills. This level of detail is perfect for advanced learners or instructors who want to pinpoint specific areas for improvement. It also allows for progress tracking over time, helping you refine your technique with precision and ensure you’re performing at the highest standard.
Anatomical Realism
While feedback is key for technique, anatomical realism is what makes the training feel genuine. A manikin that mimics the look and feel of a human torso helps bridge the gap between practice and a real-world emergency. Realistic features like a movable head and a chest that rises with rescue breaths make the entire simulation more immersive. This helps you get comfortable with the physical steps of performing CPR on a person, not just a plastic box. The more lifelike the manikin, the better prepared you’ll feel to respond to a real cardiac arrest event with confidence and skill.
Head-Tilt and Airway Management
A critical step in CPR is opening the victim’s airway before giving rescue breaths. A manikin with a realistic head-tilt/chin-lift feature allows you to practice this essential maneuver correctly. On these models, the airway remains “closed” until you tilt the head back and lift the chin properly. Only then will the chest rise when you deliver a rescue breath. This feature provides clear, immediate feedback on your airway management technique. It ensures you master one of the most important steps for delivering effective oxygenation during CPR, making your life-saving efforts far more successful.
Palpable Pulse Points
More advanced manikins often include palpable pulse points, typically at the carotid artery in the neck. This feature allows trainees to practice a crucial assessment step: checking for a pulse. An instructor can manually activate the pulse with a small bulb, creating a realistic simulation for scenarios where you need to determine if a victim has a heartbeat. Practicing this step helps integrate the full sequence of a rescue, from initial assessment to starting compressions. It adds another layer of realism that is especially valuable for healthcare providers and first responders who need to perform detailed patient evaluations.
Abdominal Thrust Capability
Many CPR courses also include training for choking emergencies. Some manikins are designed to accommodate this by allowing you to practice abdominal thrusts (the Heimlich maneuver). These models often include a feature where a foam object is expelled from the airway when the thrusts are performed correctly. This provides clear, satisfying confirmation that your technique was successful. Having a manikin that supports both CPR and choking relief practice makes your training more comprehensive and prepares you for a wider range of common medical emergencies, making you a more versatile and capable first responder.
Materials and AED Compatibility
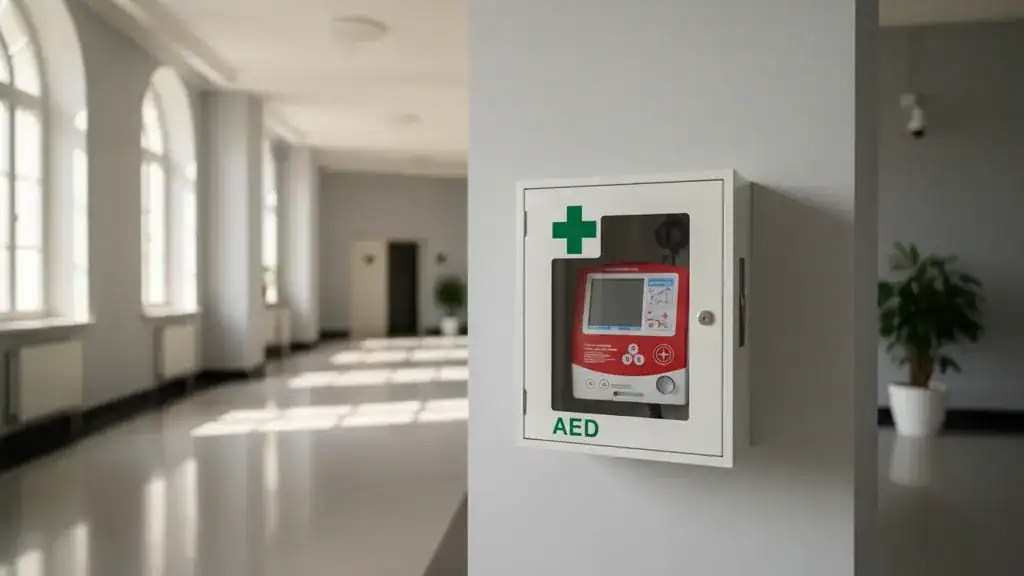
Beyond feedback and realism, the physical construction of a manikin is an important consideration. You want a training tool that is safe for all users, built to last through countless training sessions, and compatible with other essential rescue equipment. The materials should be durable and easy to clean, especially when used by multiple students. Furthermore, since an Automated External Defibrillator (AED) is a critical part of the chain of survival, your manikin must be designed to work seamlessly with AED trainers. This ensures you can practice the entire life-saving sequence just as you would in a real emergency.
Latex-Free and Durable Materials
To ensure safety for all participants, it’s best to choose manikins made from latex-free materials. This prevents allergic reactions and makes the equipment suitable for use in any environment, including schools and corporate settings. Durability is also key. CPR manikins undergo significant wear and tear from repeated compressions, so they should be constructed from high-quality, resilient materials that can withstand heavy use. A well-made manikin is a long-term investment that will serve your training needs for years to come, providing a reliable platform for continuous skill development and practice.
Compatibility with AED Trainer Pads
In a real cardiac arrest, CPR is almost always performed in conjunction with an AED. Therefore, your training should reflect this. Look for a manikin with a torso that is compatible with AED trainer pads. The surface should allow the pads to adhere properly without damaging the manikin’s skin. This feature enables you to practice the full emergency response sequence: performing CPR, stopping to apply the AED pads, and following the device’s prompts. Integrated CPR and AED training is the gold standard, and a compatible manikin is essential for making that practice realistic and effective.
Popular CPR Manikin Brands and Models
When you start shopping for CPR manikins, you’ll notice a few brand names that appear again and again. Companies like Laerdal, Simulaids, and WorldPoint have established themselves as leaders in the industry by producing high-quality, reliable training tools that meet the standards of major certifying bodies. These brands are trusted by instructors and organizations worldwide because their products are durable, realistic, and often incorporate the latest feedback technology. Choosing a manikin from a reputable manufacturer ensures you’re investing in a product that will provide effective training and stand the test of time, helping you and your students master life-saving skills with confidence.
Leading Brands in the Industry
In the world of CPR training, a few brands stand out for their innovation and quality. Laerdal, the creator of the original Resusci Anne manikin, continues to be a leader with its range of feedback-enabled models. Simulaids and Life/form are also well-respected for their durable and realistic manikins that cater to a variety of training needs, from basic CPR to advanced life support. These brands are known for working closely with organizations like the American Heart Association to ensure their products align with the latest CPR guidelines. Investing in a manikin from one of these trusted names means you’re getting a tool designed for excellence.
Common Models and Their Uses
CPR manikins come in various forms to suit different training scenarios. The most common is the adult torso manikin, which is perfect for practicing chest compressions and rescue breaths. For pediatric training, you’ll need child and infant manikins, which are smaller and have different physiological features. Full-body manikins offer the most realistic experience, allowing for practice in moving and positioning a victim. Some models are designed specifically for choking practice, while others are part of modular kits that can be adapted for different scenarios. The right model depends entirely on the scope of your training program and the skills you need to teach.
Single Manikins vs. Multi-Packs for Instructors
If you’re an individual looking to practice at home, a single manikin is all you need. However, for instructors and organizations, purchasing manikins in multi-packs is often the most practical and cost-effective solution. A multi-pack, typically containing four or more manikins, ensures you have enough equipment for group classes, allowing for a low student-to-manikin ratio. This maximizes hands-on practice time for every participant. These packs often come with a convenient carrying case, making them easy to transport and store. For anyone running regular training sessions, investing in a multi-pack is a smart choice that streamlines logistics and enhances the learning experience.
Practical Factors to Consider Before Buying
Beyond the technical features and brand names, there are several practical factors to weigh before you purchase a CPR manikin. Your budget, how you plan to transport and store the equipment, and its long-term durability all play a role in finding the right fit. It’s also important to consider the learners themselves and choose equipment that reflects diversity and promotes an inclusive training environment. Thinking through these real-world logistics will help you select a manikin that not only meets your training needs but also works for your specific situation, ensuring a smooth and successful learning experience for everyone involved.
Budget and Price Range
CPR manikins are available at a wide range of price points, from basic models under $100 to advanced feedback manikins that cost over $1,000. Your budget will be a major factor in your decision, but it’s important to balance cost with the features you need for effective training. A simple, no-frills manikin might be enough for personal practice, but for certified courses, a model with feedback is often required. Consider the long-term value of your investment. A slightly more expensive manikin with durable construction and essential feedback features may be more cost-effective over time than a cheaper model that needs frequent replacement.
Portability and Weight
For instructors who conduct onsite training at different locations, portability is a crucial factor. Lugging heavy, bulky equipment can be a major hassle. Many modern manikins are designed to be lightweight and come with carrying cases to make transportation easier. Torso-only manikins are naturally more portable than full-body models. When choosing a manikin, check its weight and dimensions to ensure it fits your logistical needs. A lightweight, easy-to-carry manikin will make setting up for classes quicker and less strenuous, allowing you to focus your energy on teaching.
Warranty and Durability
A CPR manikin is an investment, so you want to be sure it will last. Check the manufacturer’s warranty before you buy—most reputable brands offer a warranty of one to three years. This is a good indicator of the product’s quality and the company’s confidence in its durability. A manikin used in frequent training classes will endure a lot of stress, so it needs to be built from robust materials that can handle repeated compressions and regular cleaning. A solid warranty provides peace of mind and protects your investment, ensuring your training equipment remains in good working order for years to come.
Diversity and Inclusivity Features
Creating an inclusive and welcoming learning environment is essential for effective training. Emergency situations can happen to anyone, regardless of their background, so training materials should reflect the diversity of the real world. Modern manikin manufacturers are increasingly recognizing this by offering models with a range of features that promote inclusivity. This helps all learners feel more connected to the training and better prepares them to respond to emergencies in their own communities. It’s a thoughtful detail that can make a significant difference in the training experience.
Skin Tones and Gender Representation
To make training scenarios more realistic and relatable, consider choosing manikins that represent a variety of skin tones and genders. Practicing on a manikin that looks different from the stereotypical model can help break down unconscious biases and make trainees more comfortable responding to a diverse population. Some manufacturers now offer manikins in different skin tones and even female manikins with realistic chest anatomy. These inclusive options help create a more comprehensive and respectful training environment, ensuring that every participant feels seen and prepared to help anyone in need.
Ensuring Compliance with Training Standards
When your goal is official certification, not just any manikin will do. Major training organizations like the American Heart Association (AHA) and the American Red Cross have specific guidelines for the equipment used in their certified courses. These standards are in place to ensure that every student receives high-quality, effective training that prepares them to perform CPR correctly. Choosing a manikin that meets these requirements is non-negotiable for certified instructors and training centers. It guarantees that your program is compliant and that your students are learning skills that align with the latest life-saving protocols.
Meeting AHA and Red Cross Guidelines
The American Heart Association and the Red Cross require that manikins used in their courses provide, at a minimum, feedback on compression rate and depth. This is because their guidelines are based on extensive research showing that these two metrics are the most critical for effective CPR. When shopping for a manikin, look for models that are explicitly advertised as “AHA compliant” or “Red Cross compliant.” This ensures the manikin’s feedback system meets the 2020 guidelines for CPR and ECC. Using compliant equipment is essential for validating the skills of your students and issuing legitimate certification cards.
The Role of Feedback in Certified Training
The requirement for feedback devices in certified training isn’t arbitrary. It’s based on clear evidence that feedback improves rescuer performance. Research has consistently shown that trainees who use manikins with real-time feedback perform chest compressions more accurately and consistently than those who don’t. This hands-on guidance is critical for building the muscle memory needed to perform high-quality CPR under pressure. By using a compliant feedback manikin, you are not just checking a box for certification—you are providing a superior learning experience that directly translates to better outcomes in a real cardiac arrest emergency.
Is Your Training Program Properly Equipped?
A CPR manikin is vital for effective training. But the right choice depends on your organization’s needs, staff, and future plans. The right equipment ensures your team gets the best CPR training. They will own emergency response skills and react with assurance.
Complete training in CPR, AED & First Aid ensures your team is ready for many emergencies. Knowing what to do during heart problems or injuries is crucial. The right skills and tools can truly change outcomes. Using quality training with the right manikins and gear helps keep skills sharp. It also boosts confidence for real-life situations.
Faq
What Exactly Is a CPR Dummy?
CPR manikins are medical training tools. They are for teaching advanced medical procedures and rescue exercises, like CPR. Adult, child, and infant manikins are available.
Should You Perform CPR Through Clothing?
When performing CPR, you do not need to remove any of the person’s clothing. You can perform CPR over whatever clothing the person is wearing. When using a defibrillator, the clothes must come off. This includes any type of bra or binding that the person may be wearing.
How Difficult Is It to Learn CPR?
This technique is easy to master by people of all levels. The key part of CPR is chest compressions. They keep blood flowing to vital organs until a regular heartbeat returns. Giving breaths of oxygen brings more oxygen to the person in cardiac arrest.
Where Can You Buy a CPR Manikin?
You can find a variety of mannequins for sale, new and used. Check online retailers, specialty stores, and local sellers. Many websites sell a variety of mannequins, from full-body to headless. They cater to different needs and budgets.
Understanding Different CPR Manikin Body Types
Mannequin bodies come in various styles. They comprise detailed representations of the entire body, torso, and limb segments. They come in male and female forms. Some have features like poseable arms or detachable parts for custom displays.
Key Takeaways
- Prioritize Real-Time Feedback: A manikin’s most valuable feature is its ability to tell you if your compressions are correct. Look for models with audible clickers or digital monitors to ensure you’re building accurate, life-saving muscle memory from the start.
- Select the Right Tool for the Job: There’s no one-size-fits-all manikin. Consider your specific needs—like training for different age groups, class size, and portability—to choose a model that fits your budget and training goals perfectly.
- Focus on Realism and Durability: To make practice feel like the real thing, choose manikins with lifelike features like a proper airway and AED pad compatibility. A durable, well-made model is a smart investment that ensures your training equipment will last.
Related Articles
Disclaimer for information purposes only:
The information provided on this website is intended for general educational and informational purposes only. It is not medical advice and should not be used as a substitute for professional diagnosis, treatment, or care. Always consult a qualified healthcare or medical professional regarding any health-related questions or concerns.
While we strive to ensure the information shared is accurate and up to date, no guarantees are made regarding completeness, accuracy, or applicability to any individual situation. Use of this content is at the reader’s sole discretion and risk.
This website is part of the Response Ready family of emergency preparedness and training resources, including CPR & first aid training and compliance services, AED sales and program support, AED program management software, and medical oversight solutions provided through our affiliated platforms:
• AEDLeader.com
• ResponseReady.com
• AEDTotalSolution.com
• MDSIMedical.com
By accessing or using this website, you agree to release, indemnify, and hold harmless the website owners, authors, contributors, and affiliated entities from any claims, losses, damages, or liabilities arising from the use or reliance on the information presented.

Anastasios Giannikas
Anastasios Giannikas
Save Lives with the Right AED Today
Buy Trusted AEDs from AED Leader Today!
Get Certified in CPR and Make a Difference!