
- A — Airway: Tilt the head back and lift the chin to open the airway.
- B — Breathing: Look, listen, and feel for normal breathing; deliver rescue breaths if absent.
- C — Circulation: Begin chest compressions at 100–120 per minute to keep blood flowing to the brain and heart.
Key Takeaways
- Adapt the CPR Sequence to the Victim: While C-A-B (Compressions first) is the standard for most adults in cardiac arrest, the original A-B-C sequence is still best for children, infants, and drowning victims, as their emergencies often start with a breathing problem.
- Activate Emergency Services Before You Act: Your most critical first step is to call 911 or direct a specific person to do it. Starting the professional response is just as important as providing hands-on care, ensuring advanced help is on the way while you bridge the gap.
- Look for Critical Signs Beyond the Acronyms: Effective response goes beyond a simple sequence. Learn to distinguish agonal gasps from real breathing, and know when to use the recovery position for an unconscious person who is still breathing on their own.
What Do A, B, and C Stand for in CPR?
The ABC of CPR and Basic Life Support is a vital guide. It aims to enable quick and effective help in emergencies. These steps, called ABC, outline the key order for life-saving care. They stand for Airway, Breathing, and Circulation. Applying ABC principles helps maintain oxygen flow and circulation. This action increases survival chances when someone needs immediate CPR.- Airway: Open the victim’s airway using a head-tilt chin-lift or jaw thrust maneuver.
- Breathing: Provide rescue breathing.
- Circulation: Perform chest compression to restore the blood circulation.
A Brief History of the ABCs
The ABC method is a cornerstone of emergency response, but it wasn’t always the standard. The approach was first introduced in 1957 by Peter Safar, who outlined the life-saving sequence in his foundational book, “ABC of Resuscitation.” For decades, this “Airway, Breathing, Circulation” model was the gold standard for CPR, teaching responders to prioritize opening the airway. As research advanced, the American Heart Association updated its guidelines in 2010 for most adult cardiac arrest situations. The recommended order shifted to C-A-B: Compressions, Airway, Breathing. This change highlights the critical need to start chest compressions immediately to keep blood flowing to the brain and heart. While the sequence has evolved, understanding the original ABCs gives you important context for why each step is vital for a successful outcome.The First Step Before ABC: Call 911
Before you even think about checking for an airway or starting compressions, your absolute first move should be to call for emergency help. It’s a step that’s easy to overlook in a moment of panic, but it’s the most important one. The American Heart Association is clear on this: you should always call 911 immediately. If you’re by yourself, make the call before you start CPR. If there are other people around, point to someone specific and tell them to call 911 while you begin. This single action sets the entire emergency response system in motion, ensuring that paramedics are on their way while you provide critical, life-saving care. Time is everything in a cardiac emergency. The ABCs of CPR are designed to be a bridge, a way to maintain a person’s vital functions until professional help can take over. Think of it this way: your actions keep the brain and other organs supplied with oxygen, but the advanced care that paramedics bring is what often leads to a successful outcome. By prioritizing the call to 911, you start the clock on their arrival time. In our CPR1.com training sessions, we constantly reinforce that being a rescuer means both providing hands-on care and activating the emergency response system to ensure the best possible chance of survival.A is for Airway: How to Check and Clear It
Airway management is the first and most critical step in the ABCs of CPR. It ensures that oxygen reaches the lungs and carbon dioxide is expelled. Keeping the airway clear is essential for effective breathing and resuscitation. Proper technique is vital. It prevents obstructions and ensures oxygen flow. It is the basis for life-saving interventions.- Assessing the Airway: The initial priority in an emergency is to determine if the victim is responsive. This can be done by tapping them and calling out in a loud voice. If there’s no reaction, act quickly. Manage the airway and start lifesaving measures.
- Opening the Airway: To clear the airway, tilt the victim’s head back in a gentle manner while lifting the chin. This simple movement prevents the tongue and soft tissues from blocking airflow. It allows for proper breathing.
- Checking for Breathing: Check for breathing. Move close to the victim’s mouth and nose. Observe chest movement, listen for breath sounds, and feel for airflow. If there are no signs of normal breathing or only gasping, begin rescue breathing right away.
The Jaw-Thrust Maneuver for Suspected Neck Injuries
When you suspect someone might have a neck or spinal injury, perhaps after a fall or a car accident, the standard head-tilt, chin-lift isn’t the best option. Moving the head could worsen the injury. This is where the jaw-thrust maneuver comes in. It’s a technique designed specifically to open the airway while keeping the head, neck, and spine perfectly still. To perform it, you place your fingers behind the angles of the person’s lower jaw and move it forward, lifting the tongue away from the back of the throat. Because it requires more skill, this method is typically taught in more advanced courses like Basic Life Support (BLS) for healthcare providers. For most people providing first aid, the head-tilt, chin-lift is the standard. However, knowing when and how to use the jaw-thrust is a critical skill that highlights the importance of hands-on, professional training.B is for Breathing: How to Check for Breaths
The next step in the ABC approach is evaluating breathing. Once the airway is open, provide artificial ventilation. It helps supply oxygen to the lungs. Effective breathing support is vital. It stabilizes the victim and boosts their survival chances.- Rescue Breathing: If the victim is unresponsive and not breathing normally, deliver two rescue breaths. Pinch their nose and seal their mouth. This keeps air in and delivers oxygen.
- Proper Technique: Each rescue breath should take one second. Watch for chest movement. If the chest does not rise, adjust the head position and attempt another breath.
Recognizing Agonal Breathing vs. Normal Breathing
It’s easy to get confused in a high-stress situation, but one of the most critical things to learn is the difference between normal breathing and agonal breathing. Agonal breathing isn’t true breathing at all. It’s a brainstem reflex that happens when someone is suffering from a severe medical emergency like cardiac arrest. Instead of a steady rhythm, you might hear strange, noisy gasps, gurgles, or snorts. These breaths are irregular and shallow, and they are a sign that someone needs help immediately. Normal breathing is quiet and regular, while agonal breathing is sporadic and sounds like the person is struggling. Unfortunately, bystanders often misinterpret these gasps as a sign that the person is recovering or just having trouble breathing. This confusion can cause a dangerous delay in starting CPR. The rule is simple: if someone is unresponsive and you only see or hear gasping, you should act as if they are not breathing at all. This is a clear signal to call 911 and begin chest compressions right away. This is exactly why hands-on training is so important. It prepares you to make these critical judgments with confidence when every second counts.Get certified in CPR

Adult & Pediatric First Aid/CPR/AED — Blended Learning
Self-paced Red Cross course you complete online, then meet for a quick in-person skills check. Earns a 2-year certification.

CPR, AED & First Aid Certification
Instructor-led training where your team practices the exact response steps in this article on real manikins and AED trainers.
C is for Circulation: Starting Chest Compressions
C stands for Circulation, the most vital part of the ABCs. Once the airway is clear and rescue breaths are given, the next step is to restore blood flow. Effective chest compressions help maintain circulation, increasing the chances of survival.- Chest Compressions: If the victim is unresponsive and not breathing properly, begin chest compressions immediately. Put the heel of one hand on the lower half of the sternum. Place the other hand on top. Interlock your fingers to apply firm pressure.
- Proper Technique: Do chest compressions quickly and firmly. Push at a rate of 100-120 per minute. Let the chest fully recoil between each push. Use your upper body weight to apply enough pressure. Compress at least two inches deep for adults.
- Compression-to-Breath Ratio: For single-rescuer CPR, do 30 chest compressions, then 2 rescue breaths. Cut pauses to maintain circulation.
Why the Shift to C-A-B for Adults?
You might have learned CPR with the A-B-C sequence, so the switch to C-A-B can seem confusing. In 2010, major health organizations, including the American Heart Association, updated the guidelines for adult cardiac arrest. The new order, Compressions, Airway, Breathing (C-A-B), was introduced to get blood flowing as quickly as possible. For most adults who collapse, their blood is still oxygenated for several minutes, but the heart has stopped pumping it. Starting chest compressions immediately, with fewer pauses, is the most critical action for survival. This change also makes it simpler for bystanders to remember and act, removing hesitation when every second counts.The Case for A-B-C: Drowning and Pediatric Emergencies
While C-A-B is the standard for adults, it’s not a one-size-fits-all rule. For infants and children, cardiac arrest is often the result of a breathing problem, not a heart problem. Because of this, the original A-B-C sequence is still the recommended approach. The priority is to resolve the respiratory issue first by opening the airway and providing rescue breaths before starting compressions. The same logic applies to victims of drowning, regardless of their age. Getting certified in Adult & Pediatric First Aid/CPR/AED is the best way to learn these critical distinctions and respond correctly in any situation.The Role of Hands-Only CPR
What if you’re not trained or feel hesitant to perform rescue breaths? That’s where Hands-Only CPR comes in. This technique involves providing continuous, fast, and firm chest compressions without stopping for breaths. It’s a simple yet powerful way for any bystander to help. According to the Red Cross, performing Hands-Only CPR is significantly better than doing nothing at all and can keep vital organs supplied with blood until professional help arrives. The key takeaway is to act. Pushing hard and fast in the center of the chest can double or even triple a person’s chance of survival.ABC vs CAB: Side-by-Side Comparison
Choosing between ABC and CAB depends on who needs help and why they collapsed. This table breaks down the key differences so you can act quickly in any situation.| Feature | ABC (Airway, Breathing, Circulation) | CAB (Compressions, Airway, Breathing) |
|---|---|---|
| Sequence | Open airway first, then give breaths, then compressions | Start compressions first, then open airway, then give breaths |
| Best for | Infants, children, drowning, choking, and respiratory arrest | Adults and teens in sudden cardiac arrest |
| Why this order? | These emergencies usually start with a breathing problem, so restoring air flow is the priority | In cardiac arrest, blood is still oxygenated for several minutes; pumping it to the brain and heart is the priority |
| Guideline source | AHA (for pediatric/drowning); original Safar protocol (1957) | AHA 2010 guideline update (for most adult arrests) |
| Compression-to-breath ratio | 30:2 (adults), 15:2 (2-rescuer infant/child) | 30:2 (single rescuer), 15:2 (2-rescuer infant/child) |
| Hands-only option? | Not recommended (breaths are the priority) | Yes, for untrained bystanders witnessing adult collapse |
When Did ABC Change to CAB?
The American Heart Association officially changed the recommended CPR sequence from ABC to CAB in October 2010 with the publication of updated resuscitation guidelines. The decision followed years of research showing that delays in starting chest compressions reduced survival rates in adult cardiac arrest. Under the old ABC model, rescuers often spent 30 seconds or more trying to open the airway and deliver breaths before starting compressions. That delay meant less oxygenated blood reaching the brain during the most critical window. The 2010 update told rescuers to push first and push fast, with compressions starting within 10 seconds of recognizing cardiac arrest. The 2015, 2020, and 2025 AHA guideline updates have all reinforced this C-A-B approach for adult victims.How ABC Applies in Different Emergency Scenarios
The ABC framework adapts based on the specific emergency you encounter. Here is how the same three-step logic plays out across common situations:- Unwitnessed adult collapse: Use CAB. Start 30 compressions, then open the airway and deliver 2 breaths. Continue the 30:2 cycle until an AED arrives or paramedics take over.
- Drowning (any age): Use ABC. The victim’s primary problem is oxygen deprivation, so open the airway and give 5 initial rescue breaths before starting compressions.
- Infant who stops breathing: Use ABC. Infants rarely have cardiac events. Tilt the head to a neutral position, cover the mouth and nose, and give 2 gentle puffs before starting 2-finger compressions.
- Workplace injury with severe bleeding: Use CABC. Address catastrophic hemorrhage first (direct pressure or tourniquet), then follow ABC/CAB for the remaining assessment.
- Drug overdose or poisoning: Use ABC. Respiratory failure is the usual cause of arrest, so early breaths and airway management take priority over compressions.

REAL-TIME CPR FEEDBACK
ZOLL AED Plus (Fully Automatic)
Real CPR Help coaches you on compression depth and rate in the moment — the AED Plus literally guides the C in ABC.
Beyond the Basics: Expanded Emergency Protocols
While the ABCs are the foundation of CPR for cardiac arrest, other emergencies require a more detailed assessment. First responders and healthcare professionals often use an expanded framework to evaluate a sick or injured person who is still breathing and has a pulse. This systematic approach ensures that the most critical problems are identified and managed in the right order. Understanding these protocols can give you a deeper appreciation for emergency assessment and help you recognize the structured steps a professional takes when they arrive on the scene. These methods provide a clear, organized way to handle complex situations where the immediate problem isn’t always obvious.The ABCDE Approach for Patient Assessment
The ABCDE approach is a widely used method for assessing and treating critically ill patients. It stands for Airway, Breathing, Circulation, Disability, and Exposure. This step-by-step process allows a rescuer to quickly identify and treat life-threatening conditions in order of priority. You start with the airway and only move to breathing once the airway is clear and secure. This continues down the line, ensuring you don’t get distracted by a less critical injury while a more severe one goes unmanaged. It’s a foundational tool taught in advanced first aid and medical training, providing a reliable script to follow in a high-stress environment.D is for Disability: Checking Consciousness
After confirming the airway, breathing, and circulation are stable, the next step is assessing “Disability.” This doesn’t refer to a permanent condition but rather the person’s neurological status at that moment. The goal is to check their level of consciousness. A simple way to do this is with the AVPU scale: Is the person Alert? Do they respond to your Voice? Do they only respond to Pain? Or are they completely Unresponsive? This quick check helps determine the severity of their condition and can point to issues like a head injury, stroke, or low blood sugar.E is for Exposure: Looking for Other Injuries
The final step, “Exposure,” involves carefully examining the person for any other injuries or clues to their condition. This means respectfully and methodically exposing parts of the body to look for things like severe bleeding, fractures, rashes, or medical alert bracelets. It’s important to do this while protecting the person’s privacy and preventing heat loss by covering them with a blanket afterward. This head-to-toe check ensures that nothing critical is overlooked after the immediate life threats of ABC have been addressed, providing a complete picture of the patient’s state.When to Use ABCDE vs. Starting CPR Immediately
It’s crucial to know when to use which protocol. The ABCDE approach is designed for assessing a patient who is sick or injured but is still breathing and has a pulse. It’s a tool for evaluation. However, if you find someone who is unresponsive and not breathing normally, you should not perform the full ABCDE assessment. In a case of suspected cardiac arrest, time is critical. You must skip the detailed assessment and immediately call for help and start CPR with chest compressions. The priority shifts from evaluation to action to get blood circulating to the brain and vital organs.Other Protocols: DR ABC and CABC
The basic ABC framework has been adapted for different scenarios. One common variation is DR ABC, which stands for Danger, Response, Airway, Breathing, Circulation. This protocol reminds you to first check for any dangers to yourself or the victim before approaching, and then check for a response to see if the person is conscious. Another protocol, CABC, is often used in military or trauma situations. Here, the first ‘C’ stands for Catastrophic hemorrhage. In these cases, stopping massive, life-threatening bleeding becomes the top priority, even before securing an airway, because a person can bleed to death in minutes.Using the Recovery Position
If a person is unconscious but is breathing normally and has a pulse, you shouldn’t leave them lying on their back. This is where the recovery position comes in. By gently rolling them onto their side and tilting their head back, you use gravity to keep their airway clear. This position prevents their tongue from falling back and blocking their throat and allows any fluid or vomit to drain safely from their mouth instead of going into their lungs. It’s a simple yet life-saving technique that protects the airway while you wait for medical help to arrive and is a key skill covered in any comprehensive First Aid/CPR/AED course.Are the ABCs of CPR Different for Kids?
If you have children at home or work with them, learning CPR is essential. Their smaller size requires some techniques to differ in emergencies. They need special attention. Airway. Start by checking for any airway obstruction. If something is blocking the throat, use back blows or chest thrusts to clear it. For nasal congestion, a bulb syringe can help remove mucus. Breathing. For breathing, tilt the child’s head back as you would for an adult and deliver a breath lasting one second. Cover both the mouth and nose while maintaining a rate of 12 to 20 breaths per minute. For a baby, keep the head in a neutral position. Make sure the chest goes up and down with each breath. Let air out before taking the next breath. After two breaths, do chest compressions. Stop when the infant wakes up or help arrives. For infants, give two breaths followed by 15 compressions. Make sure each breath makes the chest rise and fall. Circulation. For a child, follow the same steps, but adjust hand placement. Use both hands, palms down, fingers interlaced. If the child is small, use one hand. For a baby, use two fingers or thumbs above the sternum, pressing only about 1.5 inches deep. If needed, switch to one hand for better control and effectiveness.How CPR’s ABCs Apply in a Choking Emergency
A choking emergency is a real-time test of the “A” in the ABCs: the airway is actively blocked, and clearing it is the immediate priority. When someone is conscious and choking, your first step is to encourage them to cough. If they can’t cough, speak, or breathe, you need to intervene immediately. For adults and children, this involves giving five firm back blows between the shoulder blades, followed by five abdominal thrusts, also known as the Heimlich maneuver. This entire process is focused on one thing: clearing the obstruction from the airway so the person can breathe again. The goal is to dislodge the object before the situation escalates and they lose consciousness. If the person becomes unconscious, the situation changes, and you transition to full CPR, but with a slight modification. After carefully lowering them to the ground and calling for help, you begin chest compressions. These compressions not only serve to circulate blood but can also help force the object out of the airway. After 30 compressions, you’ll perform the next steps of the ABCs. Open the airway and look inside the mouth for the object. If you see it, sweep it out with your finger. Then, attempt to give two rescue breaths. If the chest doesn’t rise, the airway is still blocked. You’ll continue the cycle of compressions, airway checks, and rescue breaths until help arrives or the object is cleared. This is a critical skill that is best learned in a hands-on training course.Essential Tools and Skills to Support CPR
If you’ve trained in CPR and First Aid, and know how to use an AED, what else can you do to get ready? Oxygen can help if the victim still struggles to breathe after rescue breaths. If available, supplemental oxygen can support recovery and improve oxygen levels. Learn key life-saving techniques. They include helping heart attack victims and using the Heimlich maneuver. Choking interventions vary for adults, children, and infants. So, knowing the right method helps to clear the airway without causing injury. Check AEDs and oxygen tanks to confirm they are in working order. Many AEDs conduct self-checks, so confirm that the status light is on. Attending local training sessions can also help you learn proper AED use.To handle emergencies like cardiac arrest or choking, get proper hands-on training. A CPR & AED course shows you how to do chest compressions correctly, give rescue breaths, and use an AED safely. It also includes equipment checks and real-life situations. This way, you’ll be ready to act with urgency and precision when time is critical.
Beyond the Pulse: Other Signs of Circulation
While checking for a pulse is a standard part of assessing circulation, it can be tough to find in a high-stress situation. But it’s not the only way to tell if blood is flowing. Other physical signs can give you important clues about a person’s condition. Paying attention to their skin color, temperature, and how responsive they are helps you get a fuller picture. One of the most straightforward methods is the capillary refill test, which gives you a quick, visual check of how well blood is reaching their hands and feet.The Capillary Refill Test
The capillary refill test is a simple way to check circulation. To do it, press firmly on the person’s fingernail until the nailbed turns white. Then, let go and count how long it takes for the normal pink color to come back. According to the initial assessment guidelines used by medical professionals, a healthy system will refill the capillaries in less than two seconds. If it takes longer, that could be a sign of poor circulation or that the person is going into shock. This quick check gives you immediate feedback and helps you decide what to do next while you wait for help to arrive.Treating for Shock
Shock is a life-threatening condition where the circulatory system isn’t getting enough blood to the body’s vital organs. If you see signs of shock, like pale, cool, or clammy skin, weakness, or a rapid pulse, your immediate actions are critical. Have the person lie down flat on their back. If you don’t suspect any leg, head, or spine injuries, carefully raise their legs about 12 inches. This position helps redirect blood flow back toward the heart and brain. Keep the person warm and comfortable with a blanket or jacket, and loosen any tight clothing so nothing restricts their circulation. These are the kinds of essential skills we cover in our First Aid courses, where you learn how to confidently manage emergencies that go beyond basic CPR.What is the CAB Sequence in CPR?
The AHA’s “CAB” approach in CPR prioritizes chest compressions over the old “ABC” method. This change aims to improve response times in emergencies. This sequence shows that restoring circulation is urgent, especially during sudden cardiac arrest. It’s key to getting oxygen to vital organs fast.- C – Chest Compressions: In the CAB sequence, if the victim is unresponsive and not breathing, start chest compressions right away. First, establish a proper compression rhythm. Then, assess the airway and provide rescue breaths.
- A – Airway: Once chest compressions start, quickly assess and open the airway. Tilt the head back and lift the chin. This should be done in a manner that minimizes delays in compressions.
- B – Breathing: In the CAB sequence, rescue breaths follow chest compressions. After every 30 compressions, give two breaths. This keeps the 30:2 ratio used in single-rescuer CPR.
When should CAB be used instead of ABC?
The CAB sequence is recommended for adult cardiac arrest outside hospitals. This is especially true when untrained bystanders are the first to respond. It stresses early, effective chest compressions. They keep oxygenated blood flowing to the brain and vital organs. For infants, children, and drowning or overdose victims, the ABC sequence is crucial. It prioritizes rescue breaths earlier in the process. The decision to use CAB or ABC depends on the victim’s age and condition. Effective emergency response needs proper CPR training. It must follow guidelines from groups like the American Heart Association.Infant vs. Adult CPR: Key Differences in the ABCs
Infant CPR differs from adult CPR in key ways. It requires modified techniques for safe, effective resuscitation.- For infants, use two fingers for chest compressions. Adults need the heel of the hand to apply adequate pressure.
- For infants, compressions should be about 1.5 inches deep. Adults need a depth of about 2 inches for effective circulation.
- Infants need the same compression rate as adults. It is 100 to 120 compressions per minute to maintain proper circulation.
- For infants, cover both the nose and mouth with yours. Then, give gentle puffs of air. For adults, use mouth-to-mouth or mouth-to-mask ventilation.
- For infants, the head should be neutral. Adults need a slight backward tilt to keep the airway open.
Using an AED: How Does the ABC Assessment Fit In?
The ABC assessment checks if an AED is needed in an emergency. If a person is unresponsive, not breathing, and has no pulse, it signals cardiac arrest. It requires immediate defibrillation. This structured approach ensures critical actions are taken without delay.What’s the Role of CPR’s ABCs in a Choking Emergency?
Knowing the ABCs of CPR is key during a choking emergency. It helps clear the airway, restore breathing, and maintain circulation.- Airway: Ensure the airway is clear. If breathing is blocked, use back blows and chest thrusts to clear it.
- Breathing: Once the airway is cleared, check for normal breathing. If the person isn’t breathing or only gasping, start CPR right away.
- Circulation: Continue chest compressions if CPR is needed. Use the right technique for the person’s age. Keep going until medical help arrives.
What Is the Difference Between ABC and CAB in CPR?
ABC (Airway, Breathing, Circulation) tells you to clear the airway and deliver rescue breaths before starting chest compressions. CAB (Compressions, Airway, Breathing) reverses that order, putting chest compressions first. The AHA switched to CAB for most adult cardiac arrest cases in 2010 because research showed that starting compressions within the first 10 seconds of collapse gives the best chance of survival. The blood already holds enough oxygen for several minutes; what it needs is a pump. ABC is still the preferred sequence when the emergency starts as a breathing problem, such as in drowning, choking recovery, or pediatric arrest. The right choice depends on the victim and the situation, not a single rule for every scenario.Final Thoughts on Effective CPR
In emergencies, knowing the ABC of CPR is key to saving lives. It stands for Airway, Breathing, and Circulation. Proper airway management, rescue breaths, and chest compressions are key. Both the ABC sequence and CAB approach can boost survival rates. Using an AED is important. You must know the right breath-circulation step. Also, applying the correct compression pressure is key for successful resuscitation. Stay informed. Practice CPR. Keep emergency equipment working. You’ll be ready to respond in life-threatening situations.In North Carolina, you can find many ways to get certified in CPR and AED training. These programs focus on the ABCs of resuscitation. State programs offer hands-on training for first responders, teachers, and caregivers. This training follows the latest guidelines. Training in North Carolina helps you react quickly and with confidence to emergencies.
The Importance of Certified Training
While understanding the ABCs is a fantastic start, it’s the hands-on practice that builds real-world confidence. Effective emergency response depends on proper training that follows established guidelines from organizations like the American Heart Association. A certified course teaches you how to perform chest compressions and rescue breaths correctly, which is crucial for saving someone’s life when every second counts. This formal training builds the muscle memory you need to act decisively under pressure. Since certification is typically valid for two years, it’s important to take a refresher course if yours has expired to ensure your skills are sharp and up-to-date.
Not sure which AED or training fits you?
A CPR1 product expert walks you through it — no obligation.
Talk to a CPR/AED Expert →FAQs
What is the ABC (Airway Breathing Circulation) Method?
The ABC method in CPR is a three-step emergency framework: Airway (tilt the head back and lift the chin to open the airway), Breathing (deliver rescue breaths if the victim is not breathing normally), and Circulation (perform chest compressions at 100-120 per minute). This sequence ensures oxygen enters the lungs and oxygenated blood reaches the brain and heart.Why is circulation prioritized in the CAB method?
The CAB approach emphasizes circulation first. Immediate chest compressions help keep blood flowing to the brain and heart. Health groups recommend this change to help sudden cardiac arrest victims.How Breathing and Circulation Work Together in CPR
Once the airway is open, the next step is to breathe. Deliver rescue breaths to provide oxygen. Continue chest compressions to maintain circulation. This combination increases survival chances by ensuring that oxygen-rich blood reaches the organs.What is the difference between ABC and ABCDE in emergency care?
CPR uses the ABC (Airway, Breathing, Circulation) sequence. Advanced care uses ABCDE to check a patient’s condition. ABCDE stands for Airway, Breathing, Circulation, Disability, and Exposure. This method goes beyond CPR.How Much Pressure Should You Use for Chest Compressions?
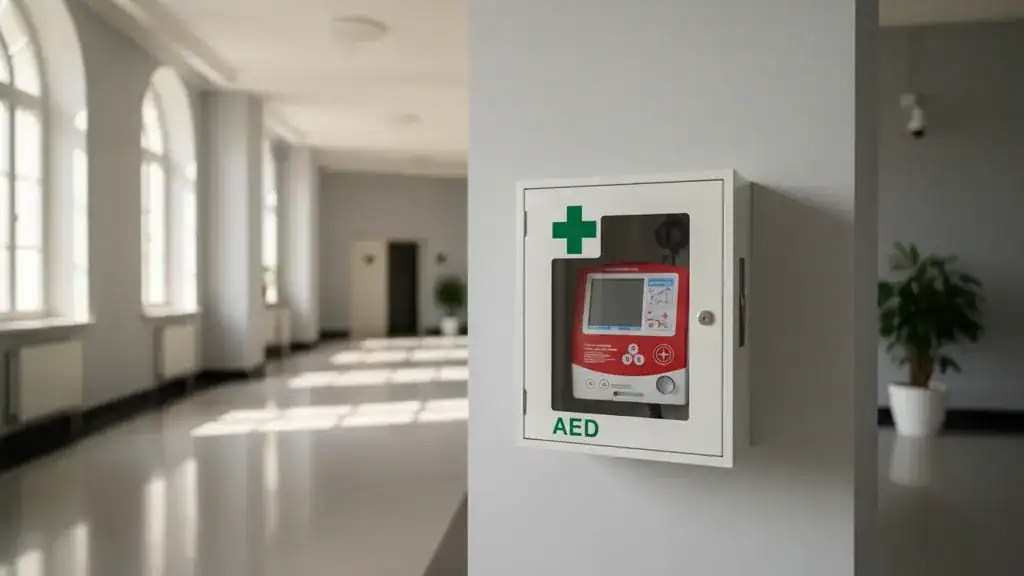
In the ABC flow and its pressure technique, compress 2 inches deep for adults and 1.5 inches for infants. They should be at a rate of 100 to 120 compressions per minute to support circulation.When should an AED be used in the ABC sequence?
If a victim is unresponsive and has no pulse or breath, use an AED right away. The ABCs of CPR help rescuers spot cardiac arrest. They stress the need for quick defibrillation to restore a normal heartbeat.When Should I Use ABC vs CAB?
In most adult and teen emergencies, use CAB (Compressions, Airway, Breathing). Starting with chest compressions gets blood moving right away and is the standard approach taught for lay rescuers. ABC may be used in situations where breathing is the primary problem, such as drowning, choking after the airway is cleared, or certain cases involving children and infants, because early breaths can matter more in those scenarios. If you are trained and your certification materials specify when to prioritize breaths, follow that guidance. If you are not sure, start with CAB and follow the AED prompts if one is available.
Is Hands-Only CPR Enough If I’m Not Trained?
Yes, hands-only CPR is a good option if you are not trained or you are not comfortable giving rescue breaths. For a collapsed adult who is unresponsive and not breathing normally, doing hard, fast chest compressions in the center of the chest and using an AED as soon as possible can make a real difference. If you are trained and willing, CPR with breaths may be more helpful in cases where lack of oxygen caused the collapse, such as drowning, drug overdose, or many child emergencies. When in doubt, start compressions and follow instructions from 911 or the AED.
Related Articles
- BLS Study Guide Online | Learn Basic Life Support Quickly – CPR1
- Know When to Perform CPR: 7 Key Situations to Save Lives – CPR1
- What is BLS? Learn why Basic Life Support saves lives
Ready to Learn CPR and Save Lives?
Get certified in CPR, First Aid, and AED use with our accredited courses. Online and in-person options available for individuals, families, and businesses.
Browse CPR Training Courses →