
Thinking about a child having a medical emergency is every caregiver’s worst fear. But what you do in those first few moments can change everything. For infants and children, knowing the correct resuscitation techniques is vital, and that’s where Pediatric CPR comes in. The American Heart Association confirms that a trained person can greatly improve a child’s chance of survival. As a parent or caregiver, you need to be prepared. This guide provides the key insights into pediatric CPR, giving you the tools to act effectively and confidently when it matters most.
What Exactly is Pediatric CPR?
It involves rescue breathing to restore oxygen and chest compressions to maintain circulation. Immediate action is essential. A lack of oxygen can cause severe brain damage or death within minutes. Continue CPR without interruption until the child breathes or professionals take over.
Out-of-hospital cardiac arrest survival rates for children differ by age. Adolescents have the highest chance, at 17%. Then, children are at 13%, and infants at 4.9%. These numbers stress the need for quick, effective pediatric CPR. It can greatly improve a child’s chance of survival in an emergency.
Defining “Child” vs. “Infant” for CPR
When performing CPR, age isn’t just a number—it dictates the specific technique you must use. The terms “infant” and “child” have precise definitions that guide your response in an emergency. An infant is anyone under one year of age. For babies this young, cardiac arrest is often caused by a lack of oxygen from events like choking or drowning. A child is defined as anyone from age one up to the onset of puberty. The differences in their body size and structure require a different approach to be both safe and effective. For an infant, you’ll use two fingers in the center of the chest, compressing about 1.5 inches deep. For a child, you’ll switch to one or two hands, pressing down about 2 inches. Understanding these CPR guidelines is essential for providing life-saving aid without causing harm, which is a core focus in any certified training course.
Why Every Second Counts: The Urgency of Pediatric CPR
When a child stops breathing, the clock starts ticking immediately. It’s a terrifying thought, but understanding the timeline is crucial for grasping the importance of CPR. The human brain is incredibly sensitive to a lack of oxygen. According to MedlinePlus, brain damage can begin in as little as four minutes after blood flow stops. Within four to six minutes, the situation can become fatal. This narrow window means that the actions taken by a bystander—a parent, a teacher, a coach—are often the most critical factor in a child’s survival. Waiting for emergency services to arrive, while essential, isn’t enough. Immediate intervention is what bridges the gap between the incident and professional medical help, preserving brain function and giving the child the best possible chance.
Unlike adults, who often suffer cardiac arrest from heart-related issues, children’s emergencies frequently stem from respiratory problems or accidents. A child’s breathing or heartbeat can stop for many reasons, including choking, drowning, suffocation, severe injuries, or even electrical shock. These are everyday risks that can turn a normal day into a crisis in an instant. Because these situations can happen anywhere—at home, at the pool, on the playground—the first person on the scene is rarely a medical professional. This is why knowing how to respond is so important for anyone who cares for children. Being prepared to perform CPR can literally save a child’s life by addressing the immediate lack of oxygen and circulation until help arrives.
The best way to handle a pediatric emergency is to be prepared long before one ever happens. While a 911 dispatcher can guide you through the steps, the most effective CPR comes from someone who has completed an accredited training course. Confidence and muscle memory are built through hands-on practice, which is something you can’t get from a phone call. This is why organizations like the Mayo Clinic and MedlinePlus stress that all parents and caregivers should learn child CPR. Having this skill means you won’t hesitate when every second is critical. You’ll know how to assess the situation, perform compressions and rescue breaths correctly, and act as a vital first responder, giving a child the best possible chance at a positive outcome.
How is CPR for a Child Different from an Adult?
Children’s anatomy and physiology affect resuscitation. They need specific techniques for effective CPR. Their smaller jaws can complicate airway management. This requires immediate action. While like adult CPR, pediatric CPR prioritizes starting compressions before calling 911. According to the American Heart Association, beginning CPR immediately increases survival chances. Contact emergency services after two minutes of compressions. We urge parents and caregivers to take an infant CPR course. It will prepare them for emergencies.
Common Causes of Cardiac Arrest in Children
Unlike in adults, where cardiac arrest is often a primary heart problem, in children, it’s typically a secondary event. This means it usually happens because of an injury or another illness that leads to a lack of oxygen. The most frequent causes are breathing emergencies, such as choking, drowning, or a severe asthma attack. When a child’s oxygen supply is cut off, their heart eventually stops beating. Other significant factors include congenital heart disorders, which are structural issues present from birth, and trauma from accidents. Understanding these root causes is key because it highlights the importance of broad first aid skills. Responding effectively often means addressing the initial problem—like clearing an airway—to prevent cardiac arrest from happening in the first place.
Performing Pediatric CPR: Your Step-by-Step Guide
Before performing CPR on a child, ensure the area is safe and assess the situation. If a parent or guardian is present, get consent before proceeding. Experts tell you to use personal protective equipment (PPE) for added safety. If the child is unresponsive, resuscitation is vital. It boosts their odds of survival.
Step 1: Is the Child Responsive?
Check the child’s responsiveness by tapping the sole of their foot and calling their name. If there is no movement or reaction, immediate action may be necessary.
Step 2: Immediately Call 911 for Help
If the child is unresponsive, call 911 immediately or ask someone nearby to do so. If you’re alone, use the speakerphone. This way, you can stay on the line while starting CPR. Keep providing care until help arrives.
When to Call 911 if You’re Alone
When you’re the only one there to help, the guidance for calling 911 shifts based on one key detail: did you see the child collapse? If you witnessed the event, your first move should be to call 911 immediately. A sudden, witnessed collapse in a child often points to a cardiac problem, where getting professional help and an AED on the scene is the top priority. A fantastic tip is to put your phone on speaker mode right away. This lets you communicate with the dispatcher, who can guide you through the next steps while you begin chest compressions, ensuring you’re providing care without losing a single moment.
On the other hand, if you find a child who is already unresponsive and you didn’t see what happened, the approach is different. Unwitnessed collapses in children are frequently caused by a breathing emergency, like choking or a respiratory illness. In these situations, the child’s most critical need is immediate oxygen. The recommended protocol is to start CPR right away and continue for two minutes *before* pausing to call 911. After those two minutes of compressions and rescue breaths, if help hasn’t arrived, make the call and then resume CPR. Knowing this distinction is a crucial part of any certified pediatric CPR course, as it equips you to make the right call under intense pressure.
Step 3: Position the Child for CPR
Kneel beside older children. Ensure a stable position for infants. Adjust your position based on the child’s age. Check their faces and breathing for five to ten seconds. This will show if urgent help is needed.
Step 4: Start with 30 Chest Compressions
If the child isn’t breathing, place your hands in the center of the chest. Align them with an imaginary line between the nipples. For small children, use the heel of one hand. Apply firm, rapid compressions about two inches deep at 100 to 120 per minute. This will help restore circulation.
For an infant, place both thumbs at the center of the chest while supporting the back with your fingers. Apply firm compressions, 1.5 inches deep, at 100-120 per minute. Allow the chest to fully recoil after each compression to maintain circulation.
Compression Rate and Depth
Getting the rate and depth of your compressions right is key to making CPR effective. Your goal is to manually pump the heart, keeping oxygen-rich blood flowing to the brain and other vital organs. You’ll want to push hard and fast, aiming for a rate of 100 to 120 compressions per minute—think of the beat to the song “Stayin’ Alive.” For a child, push down about 2 inches deep. For an infant, the depth is a bit shallower at about 1.5 inches. It’s crucial to allow the chest to fully recoil, or rise back to its normal position, between each push. This lets the heart refill with blood before the next compression.
What About “Hands-Only” CPR?
If you haven’t been trained in CPR or are hesitant to perform rescue breaths, you can still make a huge difference with Hands-Only CPR. This technique is exactly what it sounds like: you only use chest compressions. The American Heart Association confirms that this method is recommended for untrained bystanders who witness a cardiac arrest. Just push hard and fast in the center of the chest until help arrives. While Hands-Only CPR is a life-saving intervention, it’s important to know that for children and infants, cardiac arrest is often caused by breathing problems. Because of this, traditional CPR with rescue breaths is still the gold standard. Taking a certification course will give you the confidence to perform both techniques correctly.
Step 5: Provide Two Gentle Rescue Breaths
After 30 compressions, tilt the baby’s head back with caution to open the airway. Breathe into their mouth for one second. Deliver one breath every 3 to 5 seconds. Use a soft and controlled approach. Watch for chest movement to ensure airflow. Since an infant has small lungs, they only need light puffs of air. If the chest doesn’t rise, adjust the head and check the seal before trying again.
Rescue Breaths for Infants
After delivering 30 chest compressions, your next step is to provide rescue breaths to deliver vital oxygen. An infant’s airway is small and delicate, so this requires a gentle touch. Carefully tilt the baby’s head back into a neutral position to open the airway, but be mindful not to hyperextend their neck. Unlike with an adult, you’ll need to cover both the infant’s mouth and nose with your mouth to create a proper seal. This ensures the air you provide goes directly into their lungs.
Give a soft puff of air—just enough to make the chest gently rise. Each breath should last about one second. According to the American Heart Association, this careful technique is crucial for infants. If the chest doesn’t rise on the first attempt, simply readjust the head tilt and ensure you have a good seal before giving the second breath. This step is critical, and mastering it in a hands-on infant CPR course can give you the confidence to act correctly when it matters most.
Step 6: Continue the CPR Cycle
Continue CPR. Do 30 chest compressions, then give 2 breaths. Repeat until the child responds, an AED is available, or help arrives.
Adjusting for Two Rescuers: The 15:2 Ratio
When a second person is available to help, your CPR technique should adapt to make your efforts more effective. With two rescuers, the compression-to-breath ratio for a child or infant changes from 30:2 to 15:2. This means one person will deliver 15 chest compressions while the other provides two rescue breaths. This updated ratio, recommended by organizations like the Mayo Clinic, helps provide more frequent oxygenation, which is vital for children whose cardiac arrests often stem from respiratory issues. To prevent fatigue and maintain high-quality compressions, you should switch roles every two minutes. This teamwork ensures the child receives the best possible care until help arrives and is a critical skill covered in hands-on safety training.
Important Safety Considerations
When a child is unresponsive, your instinct is to act fast. That’s the right instinct, but it’s equally important to act safely to avoid causing more harm. Certain situations require special care, especially when dealing with potential spinal injuries or assessing whether CPR is even necessary. Understanding these key safety points ensures your actions are not only swift but also correct, giving the child the best possible chance of a positive outcome until professional help arrives.
Suspected Neck or Back Injuries
If you suspect a child has a neck or back injury, perhaps from a fall or a serious accident, you must be extremely careful when opening their airway. Instead of the standard head-tilt, chin-lift maneuver, the safest approach is to use the jaw-thrust technique. To do this, you gently pull their jaw forward without moving their head or neck. This action lifts the tongue away from the back of the throat, clearing the airway while keeping the spine stable. Mastering this technique is a key part of certified safety training, as it requires practice to perform correctly and confidently in a high-stress situation.
When Not to Perform Compressions
It’s a common fear: what if I start CPR when it isn’t needed? The good news is that a simple check can prevent this. Before beginning compressions, you must confirm the child is unresponsive and not breathing normally. If the child is moving, coughing, or breathing, do not start chest compressions. Performing them on a child whose heart is beating can be dangerous and could even cause it to stop. Your initial assessment is the most critical step. If you see any signs of life, your role is to monitor them and wait for emergency services to arrive, not to begin CPR.
Using the Recovery Position
If the child begins breathing on their own after you’ve performed CPR, your job isn’t over yet. The next step is to place them in the recovery position. To do this, gently roll the child onto their side while supporting their head and neck. This simple action helps keep their airway open and prevents them from choking if they vomit. Once they are safely on their side, continue to check their breathing regularly until help arrives. The situation can change quickly, so staying with the child and monitoring them closely is essential for their safety.
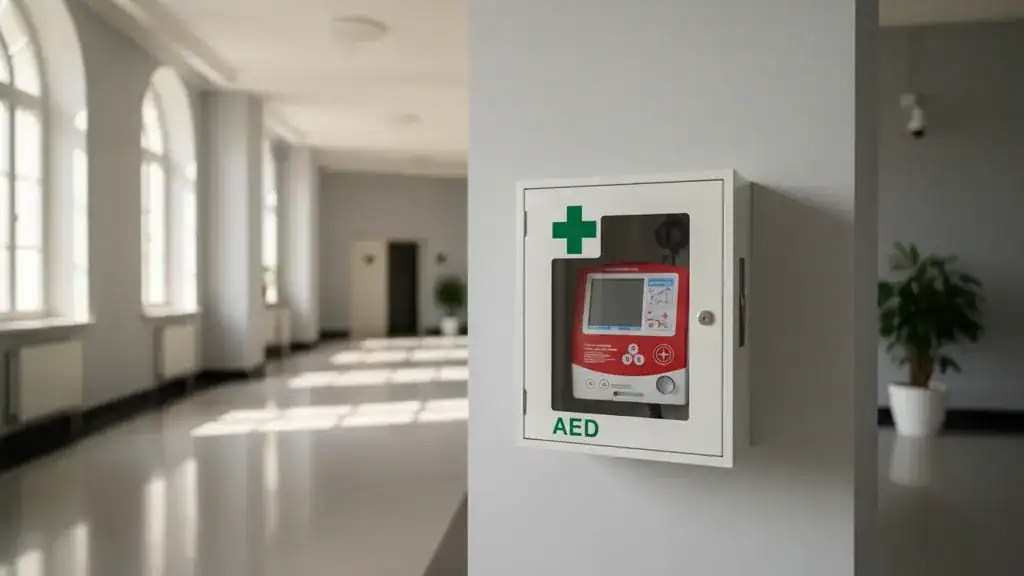
Using an AED on a Child: Is It Safe?
If an AED is available, apply pediatric pads and use it after five CPR cycles. For the best chance of survival, use the AED as soon as possible on infants and children. Use pediatric pads for kids under eight or under 55 pounds.
For infants under one year old, a manual defibrillator is the best option. If someone is unavailable, a caregiver can use an AED in a pediatric setting. If that isn’t an option, a caregiver should give an adult shock.
Understanding how to adapt emergency care for different age groups is a key part of a CPR, AED & First Aid course. These trainings cover how to use pediatric AED pads. They also teach how to handle infant cardiac emergencies and when to start CPR. Caregivers and responders can act quickly and accurately with the right training. This helps increase the chances of survival for children and infants in emergencies.
Preventing Common Childhood Emergencies
While knowing how to respond in a crisis is essential, the best-case scenario is preventing an emergency from ever happening. Many situations that require CPR for children are entirely preventable with awareness and simple safety measures. By focusing on proactive safety in the car, at home, and around water, you can create a secure environment where children can thrive. Taking the time to implement these precautions is one of the most powerful ways you can protect a child’s well-being and avoid a life-threatening event.
Car Safety
Every car ride presents potential risks, but following established safety rules can dramatically reduce them. According to the American Heart Association, children under 13 should always ride properly buckled in the back seat. It’s also critical to use the right car seat for a child’s age, weight, and height, ensuring it’s installed correctly. One of the most important rules is to never leave a child alone in a car, not even for a minute. A vehicle’s interior temperature can rise to dangerous levels in a short amount of time, leading to heatstroke. These simple, consistent habits are fundamental to preventing tragic accidents on the road.
Home Safety
Your home should be a safe haven, but it can harbor hidden dangers for a curious child. Creating a safe home environment starts with identifying and securing potential hazards. Store all toxic chemicals, cleaning solutions, and medications in locked or childproof cabinets, well out of reach. Be mindful of choking risks by keeping small objects like coins, buttons, and small toy parts away from young children. You should also secure heavy furniture and televisions to the wall to prevent tip-overs. A comprehensive First Aid course can also prepare you to handle common household incidents like choking or poisoning, giving you the skills to act swiftly while you wait for help to arrive.
Water Safety
Drowning can happen quickly and silently, making water safety a top priority. The most critical rule is to always provide active, undistracted supervision whenever children are in or near water—this includes pools, lakes, oceans, and even bathtubs. Designating a “water watcher” during gatherings ensures someone is always focused on the kids. Beyond supervision, you can add layers of protection by installing four-sided fencing with a self-latching gate around home pools. As health experts recommend, teaching children how to swim is another vital skill, but it doesn’t replace the need for constant supervision. These preventative steps are key to ensuring a safe and fun experience around water.
Where to Get Your Pediatric CPR Certification
Infant CPR training in the U.S. has advanced significantly since the 1980s. The American Heart Association introduced Pediatric Advanced Life Support (PALS) in 1988 to train pediatric healthcare providers in resuscitation. In 1984, the AAP and ACEP started the APLS course. It focused on more pediatric emergencies. In the last 20 years, certification has become vital for pediatric hospital workers.
FAQs
Infant CPR: Understanding the Guidelines
The AHA’s infant CPR guidelines emphasize effective compressions and rescue breaths. For infants under one year, use two fingers to press 1.5 inches deep at a rate of 100-120 compressions per minute. If two rescuers are present, use the two-thumb encircling technique for better efficiency.
Infant vs. Child CPR: What’s the Difference?
Child CPR follows similar principles to infant CPR but has important differences. For children over one year old, use the heel of one hand to compress the chest about two inches deep. Rescue breaths are crucial. If the child is unresponsive, start CPR before calling 911.
The American Heart Association’s Role in CPR Training
The AHA’s infant CPR guidelines provide life-saving steps for all. They are for both healthcare professionals and the public. Programs like PALS and BLS ensure effective CPR for kids in emergencies.
When Does an Infant Need CPR?
If an infant is unresponsive and not breathing normally, start CPR right away. Basic life support, with chest compressions and rescue breaths, helps. It maintains circulation until medical professionals take over.
AED Use for Infants and Children: What to Know
You can use an Automated External Defibrillator (AED) on infants and children. Use a manual defibrillator for infants. If it’s unavailable, use an AED with pediatric pads. If you cannot use pediatric pads, you may use an adult shock as a last resort. Always follow AHA CPR guidelines for infants.
Why Formal Training Matters
While reading articles is a great first step, nothing replaces the confidence that comes from hands-on practice. According to MedlinePlus, “CPR is best done by someone who has taken an accredited CPR course.” Formal training does more than just show you the steps; it builds muscle memory so you can act effectively under pressure. Instructors guide you through the specific nuances of pediatric care, like adjusting hand placement for an infant versus a child or knowing when and how to use pediatric AED pads. At CPR1.com, our certified instructors use their real-world experience to ensure you leave the class feeling prepared for an actual emergency, not just a test.
Can I Learn CPR at Home?
Absolutely. For busy parents and caregivers, finding time for an in-person class can be a challenge. Thankfully, there are excellent at-home options available. The American Heart Association offers an Infant CPR Anytime Training Kit that includes a practice manikin and video instructions to teach you the core skills of infant CPR and choking relief. These kits are a fantastic way to learn the basics on your own schedule. While they don’t replace a full certification, they provide a vital foundation. For those seeking certification with flexibility, our web-based online training offers a convenient way to get certified from home.
Your Next Steps to Becoming CPR Certified
Knowing pediatric CPR is vital for anyone caring for infants and children. Parents, caregivers, and healthcare workers must respond without delay in emergencies. Proper chest compressions and rescue breaths help maintain circulation until medical help arrives. The AHA’s Infant CPR courses teach vital skills. They boost confidence and save lives. CPR training and practice ensure you can respond well in a crisis.
In Texas, you can find pediatric CPR training at hospitals, community centers, or with certified instructors. Whether you’re a parent in Houston, a teacher in Dallas, or a healthcare worker in Austin, a local course can help you deal with child emergencies better. Texas programs follow AHA guidelines. They provide hands-on experience to build confidence and save young lives.
Key Takeaways
- Prioritize rescue breaths for children: Unlike adults, a child’s cardiac arrest is often caused by a breathing problem. Combining chest compressions with rescue breaths is the most effective way to restore oxygen and protect their brain.
- Adapt your technique to the child’s size: Use two fingers for an infant’s chest (1.5 inches deep) and the heel of one or two hands for a child (2 inches deep). Getting the hand placement and depth right is crucial for providing safe and effective CPR.
- Combine proactive safety with hands-on training: The best emergency is one that never happens, so focus on preventing common accidents. Formal training builds the muscle memory and confidence needed to act correctly under pressure, turning knowledge into a life-saving skill.
Related Articles
- How to Perform Pediatric CPR: Essential Life-Saving Steps — AED Total Solution
- Pediatric CPR: Your Guide to Online Certification
- Pediatric CPR Guide: How to Save a Child’s Life in Emergencies — CPR1
- CPR Training for Kids | Teach Life-Saving Skills at Home or School
- Pediatric First Aid and CPR Online: A Complete Guide
Disclaimer for information purposes only:
The information provided on this website is intended for general educational and informational purposes only. It is not medical advice and should not be used as a substitute for professional diagnosis, treatment, or care. Always consult a qualified healthcare or medical professional regarding any health-related questions or concerns.
While we strive to ensure the information shared is accurate and up to date, no guarantees are made regarding completeness, accuracy, or applicability to any individual situation. Use of this content is at the reader’s sole discretion and risk.
This website is part of the Response Ready family of emergency preparedness and training resources, including CPR & first aid training and compliance services, AED sales and program support, AED program management software, and medical oversight solutions provided through our affiliated platforms:
• AEDLeader.com
• ResponseReady.com
• AEDTotalSolution.com
• MDSIMedical.com
By accessing or using this website, you agree to release, indemnify, and hold harmless the website owners, authors, contributors, and affiliated entities from any claims, losses, damages, or liabilities arising from the use or reliance on the information presented.

Anastasios Giannikas
Anastasios Giannikas
Save Lives with the Right AED Today
Buy Trusted AEDs from AED Leader Today!
Get Certified in CPR and Make a Difference!